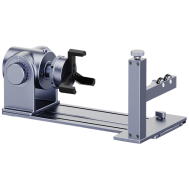
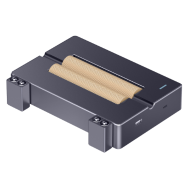
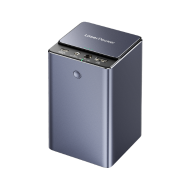
Dog tags are more than just accessories—they can carry important information, personal messages, or unique style statements. Whether you're customizing pet tags, military-style IDs, or stylish gifts, engraving is the key to making each tag meaningful and long-lasting.
In this guide, we'll walk you through 6 practical methods for engraving dog tags — ranging from professional laser machines to DIY tools—so you can find the one that fits your skills, budget, and design needs.

In this article:
- Method 1: Engrave Dog Tag with a Laser Engraving Machine
- Method 2: Engrave Dog Tag with Rotary Tool
- Method 3: Engrave Dog Tag with Chisel and Hammer
- Method 4: Engrave Dog Tag via Stamping
- Method 5: Engrave Dog Tag with a Small CNC Machine
- Method 6: Engrave Dog Tag with Cricut Maker
Method 1: Engrave Dog Tag with a Laser Engraving Machine
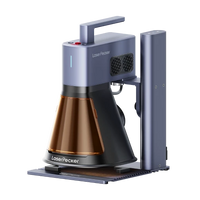
Laser engraving is one of the most precise and professional ways to customize a dog tag. Whether you're adding a name, contact info, or a custom design, a laser engraver delivers clean, permanent results on metal, plastic, or acrylic surfaces.
What You'll Need for laser engraving dog tag:
- Fiber laser engraving machine
- Dog tags (stainless steel, aluminum, etc.)
- Design software (e.g., LightBurn, LaserPecker Software & App)
Step 1: Create or select a design
Use design software to create the text, pattern, or logo. Size it to match your tag.
Step 2: Clean the tag surface
Wipe off any dust, oil, or fingerprints to ensure a clean engraving.
Step 3: Fix the tag securely
Place the tag on the laser bed and ensure it doesn't move during engraving.
Step 4: Adjust laser settings
Set the power, speed, and focus height based on your material. (e.g., for stainless steel: slower speed, higher power)
Step 5: Preview the area
Use the preview/frame function to align the design with the tag.
Step 6: Start engraving
Begin the engraving process and monitor for safety and accuracy.
Step 7: Clean and finish
Once done, wipe off residue and polish the surface if needed.
Pros and Cons of Engraving on Dog Tag with Fiber Laser
Pros:
High precision and detail
Fast and efficient for small to medium batches
Non-contact process (no tool wear or damage)
Works on a variety of materials
Cons:
Requires expensive, specialized equipment.
Method 2: Engrave Dog Tag with a Rotary Tool
Using a rotary tool or engraving pen is a hands-on, affordable way to engrave dog tags. This method is great for DIY projects or one-off customizations, especially if you enjoy crafting or don't have access to a laser.
What You'll Need:
- Rotary tool or electric engraving pen
- Clamp, vise, or non-slip mat
- Polishing cloth or fine sandpaper
Step 1: Plan and Mark the Design
Use a stencil or marker to outline the text or pattern on the dog tag.
Step 2: Secure the Tag
Clamp the dog tag to your work surface to prevent slipping.
Step 3: Choose the Right Bit
Install a fine engraving bit suitable for the tag material.
Step 4: Start Engraving Slowly
Hold the tool like a pen and trace your design steadily. Light pressure works best.
Step 5: Clean and Polish
Wipe off dust and polish the tag if needed to improve clarity.
Pros and Cons of Engraving Dog Tag with Rotary Tool
Pros:
Affordable and accessible
No software or machine setup needed
Cons:
Requires a steady hand and practice
Less precise than laser or CNC engraving
Time-consuming for complex designs
Can result in inconsistent depth or clarity
Method 3: Engrave Dog Tag with Chisel and Hammer
Hand engraving with a chisel and hammer is a traditional technique that offers a rugged, handcrafted finish. It's best suited for those who appreciate craftsmanship and want a more personal, artisan-style engraving on metal dog tags.
What You'll Need:
- Small metal chisel or engraving punch set
- Ball-peen hammer or lightweight engraver's hammer
- Engraving block or vise (to securely hold the dog tag)
- Pencil or scribe (for sketching the design)
Step 1: Mark the Design
Draw or lightly scribe the design or text onto the dog tag as a guide.
Step 2: Secure the Tag
Place the tag on a hard surface and secure it firmly to avoid movement.
Step 3: Position the Chisel or Stamp
Align the chisel or stamp on the first letter or line of your design.
Step 4: Strike with Hammer
Tap the chisel or stamp with controlled force. Repeat for each letter or element.
Step 5: Clean and Finish
Remove any debris and polish the tag for a cleaner look.
Pros and Cons of Dog Tag Hand Engraving
Pros:
Doesn't require electricity or complex tools
Durable and long-lasting engraving
Cons:
Time-consuming, especially for detailed designs
Requires precision and practice
Limited to simple text or shapes
Method 4: Engrave Dog Tag via Stamping
Metal stamping is a popular and beginner-friendly method for customizing dog tags. Using metal letter or number stamps and a hammer, you can press permanent impressions into the surface, giving it a rugged, handmade look.

Source: Hand stamped Pet Tag for Teddy
What You'll Need:
- Metal stamps (alphabet, numbers, symbols)
- Ball-peen or metal stamping hammer
- Dog tags (preferably aluminum, brass, or stainless steel)
- Polishing cloth
Step 1: Plan and Align Your Design
Use tape or a stamping guide to mark your design placement and keep letters straight.
Step 2: Secure the Tag
Place the dog tag on a steel block and fix it in place with tape.
Step 3: Position the Stamp
Hold the metal stamp vertically over the desired spot.
Step 4: Strike with Hammer
Give one firm, controlled hammer strike to impress the stamp into the metal.
Step 5: Repeat and Fill (Optional)
Repeat for each character. Fill in the letters with a dark marker or enamel, then wipe clean
Pros and Cons of Stamping on Dog Tag
Pros:
Very affordable and easy to learn
No electricity or software needed
Cons:
Limited detail
Only works well on flat, soft metal
Mistakes are hard to fix
Method 5: Engrave Dog Tag with a Small CNC Machine
A small CNC engraving machine offers precision and repeatability, making it ideal for custom dog tag engraving—especially when you want consistent results across multiple pieces. It's a great option for small businesses, hobbyists, or advanced DIYers.
What You'll Need:
- Desktop CNC engraving machine
- Engraving bits
- CAM/CAD software
- Dog tags (typically aluminum, brass, or stainless steel)
- Polishing cloth
Step 1: Design Your Engraving
Create or import your design using CAD software and convert it to a toolpath with CAM software.
Step 2: Fix the Tag to the Work Bed
Use strong tape or clamps to secure the dog tag firmly on the CNC bed.
Step 3: Select and Install the Right Bit
Install a fine engraving bit and zero the machine on the surface of the tag.
Step 4: Set Material and Speed Parameters
Adjust spindle speed, feed rate, and depth based on tag material.
Step 5: Run the Engraving
Begin the engraving process and monitor the machine during operation for safety and precision.
Step 6: Clean and Polish
Start the job and monitor the process. Pause if needed to make adjustments.
Pros and Cons of Engraving Dog Tag with CNC Machine
Pros:
Extremely precise and detailed
Repeatable results — ideal for batch production
Fully automated process after setup
Cons:
High upfront cost for machine and software
Setup takes time for each new design
Method 6: Engrave Dog Tag with Cricut Maker
The Cricut Maker, known for crafting and DIY projects, can engrave on soft metals like aluminum using the engraving tip attachment. While it's not suitable for deep or hard-metal engraving, it's a great option for light, decorative engravings on dog tags—perfect for crafters and hobbyists.
What You'll Need:
- Cricut Maker
- StrongGrip mat
- Aluminum dog tags (Cricut recommends anodized aluminum)
- Painter's tape or masking tape (to secure the blank)
- Computer with Cricut Design Space software
Step 1: Create Your Design
Use Cricut Design Space to create or import your text or design. Resize it to fit the tag.
Step 2: Place Tag on Mat
Secure the dog tag to the StrongGrip mat using tape to prevent movement.
Step 3: Select Engraving Tip
Install the Cricut Engraving Tip into the machine's housing.
Step 4: Set Material and Settings
Choose “Aluminum Sheet” or similar material in Design Space for optimal pressure and passes.
Step 5: Start the Engraving
Begin the engraving process and wait for the machine to complete the design.
Step 6: Remove and Clean
Carefully remove the tag and wipe off any debris. Polish if needed.
Pros and Cons of Engraving on Dog Tag with Cricut Maker
Pros:
User-friendly
Great for decorative or light-duty engraving
Compact and ideal for small DIY setups
Cons:
Only works with soft metals (not suitable for stainless steel)
Shallow engraving, mostly for light marking
Conclusion
Engraving dog tags can be as simple or as sophisticated as you want it to be. From fast and precise laser engravers to hands-on tools like rotary pens or stamping kits, each method offers its own benefits. Whether you're personalizing a single tag or producing them in batches, choosing the right engraving method depends on the material, level of detail, and the tools you have.
Now that you know the top 6 ways to engrave dog tags, it's time to pick your method and start creating something meaningful.


