















Gift cards are popular gifts for birthdays, holidays, weddings, and other special occasions. However, presenting a gift card in a simple envelope can feel less personal. A handmade gift card holder adds creativity, decoration, and a more thoughtful presentation to the gift.
Depending on your materials, tools, and crafting skills, gift card holders can be made from paper, felt, wood, or modern laser-cut materials. Some methods are simple and beginner-friendly, while others focus on precision, durability, and customization.
In this guide, we will explore several popular ways to make a gift card holder and compare traditional DIY methods with modern laser cutting techniques.

In this article:
Method 1: Make a Paper Gift Card Holder with Cricut
Using a Cricut machine is one of the easiest ways to make a custom paper gift card holder. Cricut machines can precisely cut cardstock into decorative shapes and folded templates, making the process faster and cleaner than manual cutting.
Paper gift card holders are perfect for birthdays, holidays, weddings, graduations, and other special occasions. You can personalize them with colors, text, stickers, ribbons, or layered paper decorations.
Materials and Tools Needed
- Cricut cutting machine
- Cardstock or craft paper
- Cricut design software
- Cutting mat
- Glue or double-sided tape
- Ribbon or stickers (optional)
Steps to Make a Paper Gift Card Holder with Cricut
- Create or Upload a Template: Prepare a gift card holder template in Cricut Design Space.
- Load the Cardstock: Place the cardstock onto the cutting mat and load it into the Cricut machine.
- Cut the Design: Let the Cricut machine cut the paper template automatically.
- Fold and Assemble: Fold the template along the score lines and secure it with glue or tape.
- Decorate the Holder: Add ribbons, stickers, labels, or handwritten messages for customization.
Pros and Cons of Making a Paper Gift Card Holder with Cricut
Pros: Fast cutting, clean edges, and easy customization.
Cons: Requires a Cricut machine and paper materials are less durable.
Method 2: Make a Felt Gift Card Holder with a Sewing Machine
Felt gift card holders are soft, reusable, and easy to customize for holidays and special occasions. Using a sewing machine helps create cleaner stitching and makes the assembly process faster than hand sewing.
Felt is available in many colors and textures, allowing you to create themed gift card holders for Christmas, birthdays, weddings, or handmade gift packaging.
Materials and Tools Needed
- Felt fabric
- Sewing machine
- Fabric scissors
- Needle and thread
- Buttons, ribbons, or decorations (optional)
- Fabric glue (optional)
Steps to Make a Felt Gift Card Holder with a Sewing Machine
- Cut the Felt Pieces: Cut the felt fabric into the desired gift card holder shape and size.
- Prepare the Design: Fold or layer the felt pieces to create a pocket for the gift card.
- Sew the Edges: Use the sewing machine to stitch the edges and secure the holder shape.
- Add Decorations: Attach buttons, ribbons, embroidery, or decorative felt pieces if desired.
- Insert the Gift Card: Place the gift card inside the completed felt holder.
Pros and Cons of Making a Felt Gift Card Holder with a Sewing Machine
Pros: Soft texture, reusable, and highly customizable.
Cons: Requires sewing tools and takes longer than paper-based methods.
Method 3: Make a Wooden Gift Card Holder with a Saw
Wooden gift card holders offer a more premium and durable look compared with paper or felt versions. They are popular for holidays, weddings, business gifts, and personalized keepsakes.
Using a saw allows you to cut simple wooden shapes and create custom slots or compartments for holding gift cards securely. You can also paint, stain, or engrave the wood for additional decoration.
Materials and Tools Needed
- Thin wood board or plywood
- Saw
- Sandpaper
- Wood glue
- Pencil and ruler
- Paint, stain, or decorative materials
Steps to Make a Wooden Gift Card Holder with a Saw
- Design the Holder: Sketch the size and shape of the wooden gift card holder.
- Cut the Wood Pieces: Use a saw to cut the wooden panels and gift card slot sections.
- Sand the Edges: Smooth the edges and surfaces with sandpaper.
- Assemble the Holder: Glue the wooden pieces together and allow them to dry.
- Decorate the Holder: Add paint, stain, engraving, or personalized decorations.
Pros and Cons of Making a Wooden Gift Card Holder with a Saw
Pros: Durable, reusable, and premium-looking.
Cons: Requires woodworking tools and more manual effort.
Method 4: Make a Gift Card Holder with a Laser Cutter
Laser cutting is a modern and precise way to make custom gift card holders. Instead of cutting materials manually, the laser cutter follows a digital design file to create clean edges, detailed shapes, and accurate card slots.
Laser cutters can work with materials such as wood, acrylic, leather, cardboard, and felt, making them ideal for personalized gift card holder projects. You can also engrave names, holiday patterns, logos, or decorative designs directly onto the surface.
Materials and Tools Needed
- Laser cutter
- Wood, acrylic, leather, or cardstock
- Design software
- Wood glue or adhesive
- Sandpaper (optional)
- Paint or decorative materials (optional)
Steps to Make a Gift Card Holder with a Laser Cutter
- Create the Design File: Design the gift card holder template using vector software.
- Prepare the Material: Place the material inside the laser cutter and adjust the cutting settings.
- Cut and Engrave the Design: Use the laser cutter to cut the holder shape and engrave decorative details.
- Assemble the Holder: Glue or connect the pieces together if needed.
- Finish the Project: Add paint, ribbons, or personalized decorations to complete the holder.
Pros and Cons of Making a Gift Card Holder with a Laser Cutter
Pros: High precision, clean cuts, and easy customization.
Cons: Requires a laser cutter, design software, and higher setup cost.
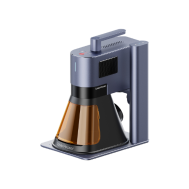
Recommended Portable Laser Cutter for Gift Card Holders: LaserPecker LP2 Plus
The LaserPecker LP2 Plus is a compact and portable laser engraver designed for small craft projects such as gift card holders, tags, ornaments, and personalized accessories.
-
Ultra-Fast Engraving Speed
Engraving speeds up to 4,000 mm/s help users complete personalized gift card holder projects quickly and efficiently. -
10W Diode Laser
The 10W diode laser supports deeper engraving and cleaner cutting on materials such as wood, leather, cardboard, and acrylic. -
Wide Material Compatibility
Supports multiple materials including wood, leather, acrylic, coated metal, paper, and more for various gift packaging and craft projects. -
Dual Red-Dot Focus System
The positioning system improves alignment accuracy when engraving small gift card holders and detailed designs. -
Portable Desktop Design
The compact structure makes the LP2 Plus suitable for home studios, craft fairs, and small workspaces. -
Expandable Accessories
Accessories such as the Slide Extension and rotary modules expand the engraving area and support additional creative applications.

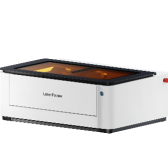
Recommended Desktop Laser Cutting Machine for Making Gift Card Holders: LaserPecker LX2
The LaserPecker LX2 is designed for users who want more advanced cutting and engraving capabilities for wooden gift card holders and other custom craft projects.
With larger working space, higher cutting capability, and precise engraving performance, the LX2 is suitable for creating detailed wooden gift card holders with decorative patterns, layered structures, and personalized engraving.
-
Precise Laser Cutting and Engraving
The LX2 creates clean cuts and detailed engraving results for wooden gift card holders, decorative inserts, and layered designs. -
Large Working Area
The spacious working area allows multiple gift card holder pieces to be processed in a single run, improving production efficiency. -
Multiple Laser Module Options
Interchangeable laser modules support different materials and project requirements for customized craft production. -
Wide Material Compatibility
Supports wood, acrylic, leather, cardboard, coated metal, and other materials commonly used for gift packaging and personalized products. -
Software-Controlled Precision
Digital workflow control improves repeatability and consistency when producing multiple gift card holders with the same design. -
Compact Desktop Design
Despite its larger cutting capabilities, the LX2 remains suitable for home workshops, studios, and small business environments.

FAQs About Making a Gift Card Holder
Q1: What Size Should a Gift Card Holder Be?
Most standard gift cards measure approximately 3.37 × 2.125 inches. A gift card holder should be slightly larger so the card can slide in and out comfortably. Many DIY templates add a small amount of extra space around the edges for easier insertion and better fit.
Q2: What Is the Best Material for a Wooden Gift Card Holder?
Thin plywood, birch wood, and MDF are commonly used for wooden gift card holders. Birch plywood is especially popular because of its smooth surface and attractive layered appearance. These materials are easy to cut, engrave, paint, and customize for different gift styles.
Q3: Can I Make a Gift Card Holder Without Special Tools?
Yes. Simple paper gift card holders can be made using scissors, glue, and basic craft materials. Felt holders may only require simple sewing tools or fabric glue. These beginner-friendly methods are suitable for DIY projects, classrooms, and family crafts.
Conclusion
Making your own gift card holder is a creative way to turn a simple gift into something more personal and memorable. Paper and felt holders are great for quick DIY projects, while wooden holders offer a more durable and premium appearance.
For makers who want cleaner cuts, detailed engraving, and scalable production, laser cutting provides a modern and efficient solution. Machines like the LaserPecker LP2 Plus and LaserPecker LX2 make it easier to create customized gift card holders using wood, leather, acrylic, paper, and other materials.
Whether you prefer traditional crafting or modern laser fabrication, creativity and personalization are what make a handmade gift card holder truly special.