Bookmarks are more than just things that hold your place in a book; they show off your style. You can make bookmarks to give as gifts, sell online, or just for your book club. They're pretty and useful.
This guide looks at supplies, ways, and tools to make personalized bookmarks, with a focus on why laser-cut bookmarks are often the best.

In this article:
- Part 1: Types of Materials for Personalized Bookmarks
- Part 2: Different Ways to Make Custom Bookmarks
- Method 1: Handmade Bookmarks
- Method 2: Printed Bookmarks
- Method 3: Laser-engraved or Laser-cut bookmark
- Method 4: Ordering Bookmarks Online
- Part 3: How to Make a Custom Bookmark with a Laser Engraver/Cutter
- Part 4: Common Mistakes to Avoid When Making Custom Bookmarks
- Part 5: FAQs about Making Personalized Bookmarks
Part 1: Types of Materials for Personalized Bookmarks
You can create custom bookmarks from lots of different stuff, depending on how you want them to look and feel, and how long you want them to last. Here are some popular options:
Type 1: Paper bookmarks
Bookmarks made of paper are super common because paper's cheap and you can get them easily. You can personalize it without problems, which is good for making a whole bunch. For a sturdier feel, try thicker cardstock, watercolor paper, or even laminate it. They're great as personal presents, school assignments, and getting your brand out there.
Pros: Lightweight, inexpensive, easy to customize.
Cons: Can bend, tear, or get damaged by water.
Type 2: Leather bookmarks
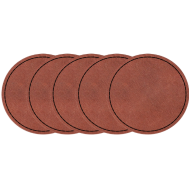
Leather bookmarks are super cool because they're strong and look great! Real leather gives a classy, old-school vibe. If you're trying to be nice to animals and the planet, go for fake leather - it looks good too. The best part is you can make these bookmarks your own by stamping, carving, or coloring them with your own awesome designs.

Pros: Elegant, long-lasting, soft texture.
Cons: Higher cost, limited color options, requires specific tools.
Type 3: Metal bookmarks
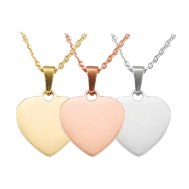
Metal bookmarks, usually crafted from steel, brass, or aluminum, have a stylish, modern look. They work great with laser engraving for designs and last a long time.
Pros: Sturdy, premium feel, ideal for engraving.
Cons: Heavier, more expensive, limited flexibility.
Type 4: Wooden bookmarks
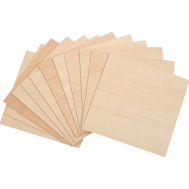
Wooden bookmarks? Totally a hit with crafters and those who love going green! Think bamboo, walnut, or maple - you can get them laser-etched with cool designs, names, or favorite sayings. The wood's natural grain just makes it feel extra cozy and nice to touch.
Pros: Eco-friendly, customizable with laser cutting, unique texture.
Cons: Rigid, may warp if exposed to moisture.
Type 5: Leaf Bookmark
For a more natural and delicate feel, try making bookmarks from dried leaves. Just laminate or coat them! Each one will be different, and you can add resin or clear acrylic to keep them safe.
Pros: Natural beauty, lightweight, biodegradable.
Cons: Fragile, limited availability, time-consuming to make.
Type 6: Acrylic and magnetic bookmarks
Acrylic bookmarks are a sleek and modern twist on traditional paper bookmarks — durable, customizable, and perfect for personal gifts or small crafts. With laser engraving and cutting, you can create precise shapes, intricate patterns, or even personalized names with a smooth, polished finish. Whether for personal use, gifting, or selling, laser-cut acrylic bookmarks add a stylish, creative touch to every page.
Pros: Durable, modern appearance, reusable.
Cons: Slightly heavier, requires precision tools.
Part 2: Different Ways to Make Custom Bookmarks
Making your own bookmarks can be done a few ways, depending on what you know, what you have, and what you like.
Method 1: Handmade Bookmarks
Making your own bookmarks is a super fun way to show off your personality! Just grab some thick paper - maybe even some with cool patterns - plus ribbons, stickers, and your fave pens! If you're feeling artsy, try painting or some cool lettering to make it extra special. To keep your bookmark from getting wrecked, laminate it, so it lasts longer!
Best for: Craft lovers, classroom projects, and small gift batches.
Method 2: Printed Bookmarks
Printed bookmarks are great when you need a lot of them made. You can whip up a design on your computer using tools like Canva, Adobe Illustrator, or Procreate, and then get them printed on some nice paper or cardstock. If you want to get fancy, add a layer of lamination or spot UV finish.
Best for: Authors, businesses, promotional giveaways.
Method 3: Laser-engraved or Laser-cut bookmark
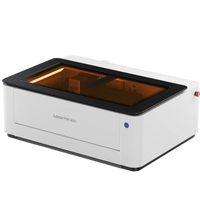
Laser engraver/cutter gives fantastic precision when engraving and cutting stuff like wood, leather, metal, and acrylic. You get a product that's clean, detailed, and lasts. Laser cutting is great for patterns, names, or logos.
Best for: Professional makers, Etsy sellers, or branding projects.
Method 4: Ordering Bookmarks Online
If you'd rather not make bookmarks, many sites allow you to design them and place an order. Check out Etsy, Vistaprint, and Zazzle for custom printing, laser engraving, and bulk orders.
Best for: Businesses, gifts, or when you need professional results without equipment.
| Method | Description | Best Materials | Durability | Precision | Recommended For |
|---|---|---|---|---|---|
| Handmade (DIY) | Crafted by hand using paper, glue, and decorations. | Paper, leaf, light cardstock | ★★☆☆☆ | ★★☆☆☆ | Hobbyists, kids, DIY enthusiasts |
| Printed Bookmarks | Designed digitally and printed professionally. | Paper, cardstock, thin acrylic | ★★★☆☆ | ★★★☆☆ | Authors, event organizers |
| Laser-engraved / Laser-cut | Uses a laser cutter to cut or engrave designs. | Wood, leather, metal, acrylic | ★★★★★ | ★★★★★ | Professional crafters, designers |
| Ordered Online | Custom bookmarks made through online platforms. | Paper, wood, leather, acrylic | ★★★★☆ | ★★★★☆ | Gifts, promotional or resale products |
Part 3: How to Make a Custom Bookmark with a Engraver/Cutter
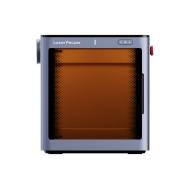
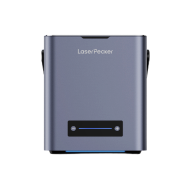
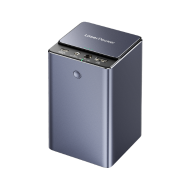
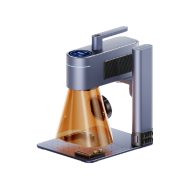
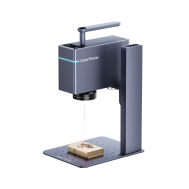
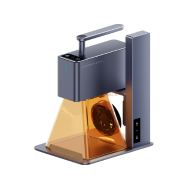
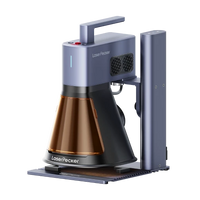
Laser-cutting a custom bookmark offers exactness and endless design ideas. There are a lot of choices, but the LP4, the first dual-laser engraver, is a great pick for new and experienced users. It mixes a 10W blue diode laser (450nm) with a 2W infrared laser (1064nm). The LP4 can engrave and cut over 300 materials, like wood, leather, acrylic, metal, and coated plastics. Here's how to make your own laser-cut bookmark with LP4 in a creative way.
Step 1: Choose Your Material
Your choice should match the vibe you're going for. Wood feels warm, leather makes it fancy, and acrylic looks modern. The LP4 works with stuff like lacquered metal, stainless steel, bamboo, and some plastics. It's got a laser that's good at handling metal or coated things, which some others can't.
Step 2: Prep Your Design
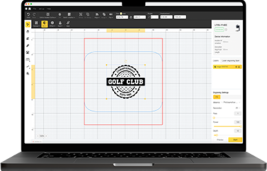
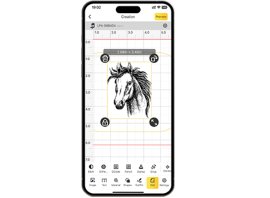
Use software like LightBurn, Adobe Illustrator, or LaserPecker Design Space to make your design. A typical bookmark size is 2 x 6 inches, but go with whatever you like. Toss in some designs, quotes, or names. With LP4, you can just drag and drop SVG or DXF files and get a preview before you start. This helps with alignment and stops you from wasting material.
Step 3: Set Up the Laser
Plug in your LP4 and secure your material. The touchscreen lets you easily swap between laser modes for different materials. Here's how:
- Use the Diode Laser to cut thick balsa wood or dark acrylic.
- Use the IR Laser to etch metals, plastics, or coated leather.
- Adjust the power, speed, and focus based on how thick your material is. The LP4 can etch quickly and with nice detail.
You can save your settings for later and use the Engrave Again button to quickly reproduce your designs.
Step 4: Etch and Cut
First, etch your designs, quotes, or logos, then cut out the bookmark shape. The LP4 lets you tweak the laser to follow the form of what you're working on. This makes sure your work looks even. The two lasers help make smooth edges with fewer burns than other machines.
Step 5: Clean and Finish
After cutting the bookmark, clean off any loose bits. Sand the edges of wood, wipe down acrylic, and polish leather. Since LP4 is precise, you won't have to do much cleaning. Adding tassels, ribbons, or a protective coat can make it even better. You'll get a pro-looking bookmark that lasts.
Step 6: Batch Production
If you're cranking out a lot of bookmarks for gifts or to sell, The LP4 makes it easy. You can line up a series of designs, etch them repeatedly, and the machine remembers the settings to keep things the same. The LP4 is good for anyone needing reliable results minus the headaches.
Part 4: Common Mistakes to Avoid When Making Custom Bookmarks
Even a small mistake can mess up your bookmark quality. Here are common errors and how to fix them:
Choosing the wrong material for the design
Certain materials work best for specific designs. Intricate lace, for example, might not work well on paper or leather because it could burn. But it could look fantastic on acrylic or wood. Testing your design beforehand is always a smart move.”
Ignoring durability and usability
A good bookmark should look nice and work well. Make sure it doesn't have sharp edges, isn't made of something that breaks easily, and isn't too thick, so it won't damage your book.
Not considering the audience or purpose.
Make sure your bookmark fits who you're giving it to. A kid's bookmark can have bright colors and cool shapes, but a business gift might need a simple, clean look.
Part 5: FAQs about Customizing a Baseball Glove
1. What is the standard bookmark size?
So, bookmarks are usually 2 x 6 inches – that's about 5 x 15 cm. But hey, you can mix it up! Some folks go for 2.5 x 7 inches or even 1.5 x 5 inches. It really comes down to what looks good with your design and the kind of book it's going in.
Big bookmarks rock for showing off cool art or quotes. Small ones? Perfect for those smaller paperbacks. If you're getting them printed or laser-cut, keep the size the same so everything looks balanced. And if you want to get a little wild, why not try out square or funky die-cut shapes? Gives things a modern vibe.
2. Can you make bookmarks with Cricut or a laser cutter?
So, you can use both Cricut and laser cutters to whip up bookmarks, but they each have their strengths. Cricuts are awesome for paper, vinyl, and that thin fake leather – perfect for fun, simple designs.
Now, laser cutters? They're the pros for super detailed stuff on tougher materials like wood or metal. Want a bookmark that's seriously polished and intricate? Laser cutter is your go-to. A lot of folks start with a Cricut and then level up to a laser cutter, like the LP4, down the road.
3. What Kind of Paper Is Best for Bookmarks?
For paper bookmarks, cardstock that's about 300–400 gsm is the sweet spot. It's got enough thickness to hold up but won't make your book feel stuffed. If you are going for a simple style, matte paper is always a good idea. Want those colors to pop? Glossy paper is your best bet. Want something different or good for the planet? Give textured or recycled paper a go. To keep those bookmarks safe from wear and tear, think about laminating them. And if you're printing a bunch, acid-free paper will keep them from turning yellow later on.
4. What's the best way to keep my handmade bookmarks in good shape?
If they're paper, just laminate them - easy peasy. Wood or leather? Slap on some clear sealant to keep water away and stop them from fading. Always store them flat, and keep them out of the sun. Bookmarks made of engraved metal or plastic? Those things should last forever without any damage.
Conclusion
Bookmarks are more than just page holders; they're a spot to let your creativity shine. Whether you're into simple or fancy, there's a bookmark that fits you – think anything from paperclips to cool metal designs, either made by hand or with a machine. For something durable and sleek, laser-cut bookmarks rock, especially if you have the equipment. Whether it's a fun hobby, a side income, or a heartfelt present, bookmarks make a big splash.


