Custom cutting boards serve as more than mere kitchen implements; they function as considerate presents, ornamental artworks, and individual expressions. Spanning from family culinary instructions inscribed on wood to personalized wedding tokens or company-branded boards for small enterprises, they blend practicality and importance in a manner that stands the test of time.
This guide will examine how to personalize a cutting board, and professional advice for attaining attractive, durable results. Whether you are a do-it-yourself hobbyist or seeking to launch a small enterprise, you will locate the requirements to individualize your cutting board.

In this article:
- Part 1: How to Choose the Right Cutting Board for Personalization
- Part 2: Four Best Methods to Personalize Your Cutting Board
- Method 1: Laser Engraving
- Method 2: Wood Burning
- Method 3: Stencil and Paint
- Method 4: Carve and Fill (Inlay)
- Part 3: Pro Tips for a Perfect Personalized Cutting Board
- Part 4: FAQs for Making Personalized Cutting Board
Part 1: How to Choose the Right Cutting Board for Personalization
Choosing a suitable cutting board requires considering both appearance and durability. Take into account these points:
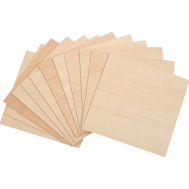
- Wood Type: Maple, walnut, and cherry hardwoods offer good engraving results and are durable.
- Surface Finish: A smooth, sanded surface is better. Rough surfaces could warp designs.
- Purpose: Decorative boards can have bigger engravings. Boards for use need to have food-safe finishes.
- Grain & Color: Light woods can help engravings stand out, while dark woods add more contrast.
After you have the right board, you can pick an engraving method that fits your design.
Part 2: Four Best Methods to Personalize Your Cutting Board
Here are four common methods for personalizing cutting boards, each offering a different aesthetic, tactile quality, and skill level needed.
Method 1: Laser Engraving: For a Flawless, Professional Look
Laser engraving offers a precise and quick way to personalize cutting boards with a professional touch. A focused light, emitted from the laser engraver, etches designs into the wood, making clean, lasting marks.

This method suits personal projects and small businesses because it gives similar results quickly. The engravings are safe for food and simple to care for, which is good for boards meant for use.
What You'll Need for Laser Engraving
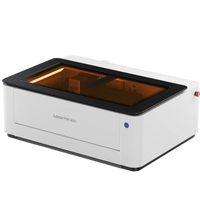
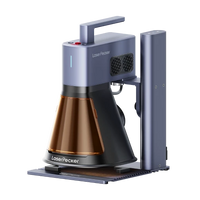
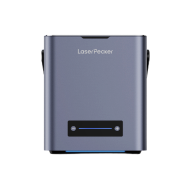
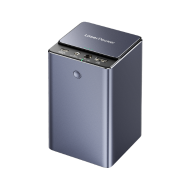
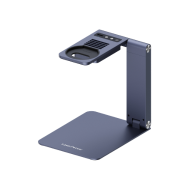
- A dual-laser engraver, such as the LP4 model, or equivalent.
- A clean, sanded cutting board.
- A design file, either in vector format or as a high-resolution image.
- Protective masking tape (optional).
Why LP4 Is a Good Choice
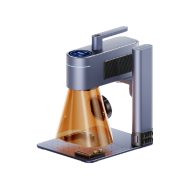
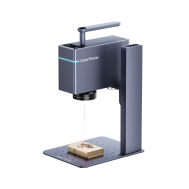
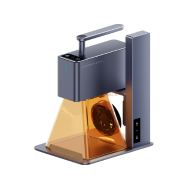
The LP4 Dual-Laser Engraver works well for this. It has two lasers: a 10W 450nm diode laser and a 2W 1064nm infrared laser. This lets it mark over 300 kinds of materials, like wood, bamboo, coated items, and even metal.Here's why LP4 is a good choice:
- Accurate and Fast: It engraves at speeds up to 4000mm/s with clear 8K quality.
- Two Lasers for Many Uses: Change between blue and IR lasers to work on wood and coated surfaces.
- Simple Controls: The touchscreen makes setup easy, with a function to repeat designs.
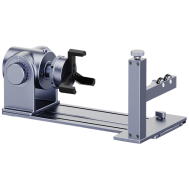
- Flexible Angles: Good for thick or curved items, so you don't have to move the board.
- Quality Results: Good for gifts, business branding, or home decoration.
Step-by-Step: How to Laser Engrave Your Cutting Board
- Step 1. Design Preparation: Make your artwork using vector software, or bring in a logo file.
- Step 2. Board Setup: Put the board flat onto the engraving area.
- Step 3. Laser Selection: For wood, pick the 450nm diode laser.
- Step 4. Power and Speed Settings: For harder woods, a medium power level and higher speed work well.
- Step 5. Preview Check: Use the preview to be sure the position and alignment are right.
- Step 6. Start Engraving: Begin the engraving and let the laser do its work.
- Step 7. Cleaning and Finishing: Wipe away any residue. Then, put on food-safe mineral oil to give it a nice finish and protection.
Method 2: Wood Burning
Wood burning gives a cutting board a warm, handcrafted aesthetic. The process involves using a heated pen tip to create designs directly on the wood.
Pros and Cons of Wood Burning
Pros:
- The method offers a warm, old-fashioned look.
- It needs only a few simple, inexpensive tools.
- It works well for artistic projects and smaller production runs.
Cons:
- Success needs both good hand control and the ability to keep working at it.
- The outcome can change based on how hard the wood is.
- This is not the best choice for detailed logo work.
When to Use the Wood Burning
This method is suitable for handmade gifts or designs that value old crafting methods, such as monograms, family names, or basic floral patterns.
Method 3: Stencil and Paint
Using stencils and paint provides a way to create custom designs with acrylic or food-safe paint, leading to visually appealing results.
Pros and Cons of Stencil and Paint
Pros:
- Beginners can pick it up without much trouble.
- Offers a complete color choice.
- Suits do-it-yourself projects or seasonal decorations.
Cons:
- It needs specialized equipment and a lot of time to work with.
- You have to make sure the resin is safe to use with food.
- The finished products will be heavy, and the whole process is more expensive.
When to Use the Stencil and Paint
These are suitable for decorative displays or themed gifts, not intended for direct food contact.
Method 4: Carve and Fill (Inlay)
The carve-and-fill technique involves creating recessed designs, either by hand or through CNC carving, and then filling these areas with resin or a different type of wood to create contrast.
Pros and Cons of Carve and Fill
Pros:
- The material provides a visually appealing texture and depth.
- It gives a high-quality, durable finish.
- This is great for creating standout items.
Cons:
- Might lose color or break with repeated cleaning.
- Needs a sealant to keep it safe.
- Doesn't look as professional as engraving.
When to Use the Carve and Fill
This would be suitable for family keepsakes, anniversary presents, or top-tier branding projects.
| Method | Precision | Durability | Skill Required | Color Options | Best For |
|---|---|---|---|---|---|
| Laser Engraving (LP4) | ★★★★★ | ★★★★★ | Medium | Limited | Professional & lasting designs |
| Wood Burning | ★★★★☆ | ★★★★☆ | High | Limited | Rustic handmade projects |
| Stencil & Paint | ★★★☆☆ | ★★☆☆☆ | Easy | High | Decorative boards |
| Carve & Fill (Inlay) | ★★★★★ | ★★★★★ | High | Medium | Luxury heirloom gifts |
In conclusion, while each method has value, laser engraving excels in accuracy, repeatability, and durability. For personalized items, whether a single gift or larger production runs, wood laser engraving tools like the LP4 allow for achieving professional-level results in a home or workshop setting.
Part 3: Pro Tips for a Perfect Personalized Cutting Board
Tip 1: Begin with good hardwood
For the best outcome, pick a strong, smooth wood such as maple, walnut, or cherry. These woods carve nicely and hold up well.
Tip 2: Cover the carving spot
Use tape to shield the area around where you'll be carving. This stops burn marks and keeps edges neat.
Tip 3: Try it out first
Always test your carving settings on a spare piece of wood. Change the speed, power, and focus until you get the look you want.
Tip 4: Seal it right
After carving, put on food-grade oil or beeswax to guard the design and the wood. This keeps the board safe to use with food and makes the carved design stand out.
Tip 5: Take care of it
Wash gently with warm water and soap, then dry. Don't soak it or put it in the dishwasher, as this can make it swell and crack. Oiling it often will keep it looking good.
Part 4: FAQs for Making Personalized Cutting Board
1. Is It Okay to Engrave a Cutting Board?
Yes, etching a cutting board is safe if done right. It only touches the surface, so your board stays strong and works just fine. After etching, just slap on some food-safe stuff like mineral oil or beeswax.
This keeps both the board and your design safe. If you grab a precision laser engraver like the LP4, you can really control how deep you go, keeping the etched part smooth and food-safe. It's a cool, lasting way to make it your own without messing up how it works.
2. Is It Better to Engrave or Burn Wood?
It all boils down to what you're going for. Wood burning is cool if you want that cozy, handmade vibe - think rustic or old-school stuff. But heads up, it takes practice to get good, and the wood makes a huge difference in how it turns out.
Laser engraving is where it's at if you need things super precise, repeatable, and quick. Something like the LP4 can knock out detailed designs, tiny text, or logos that would be a pain to do by hand. Plus, its laser beam makes for clean lines without any burn marks.
3. How Do I Care for and Clean a Personalized Cutting Board?
Always wash it by hand using gentle soap and warm water – keep it far away from the dishwasher. After washing, give it a quick dry with a towel to dodge any water damage or warping.
Every so often, rub it with some food-safe mineral oil or beeswax to bring back its moisture and keep that design looking sharp. If you have used a laser engraver like LP4, that design will stick around for ages. Unlike paint or stickers, laser markings are stuck for good in the wood and won't fade or peel off.
4. How Much Does It Cost to Personalize a Cutting Board?
How much you spend really rides on what you want. A simple stencil or paint job might only set you back a few bucks. But, if you go with a pro laser engraving, expect to pay somewhere between $30 and $100 a board. Really detailed stuff, like deep carvings or adding resin, will obviously cost more.
Now, if you find yourself making boards all the time, or you're running a small biz, think about grabbing a laser engraver like the LP4. It could pay for itself before you know it. You can crank out custom boards super fast, keep material costs low, and even redo old designs with its Engrave Again thing. All that speed and ease can save you a good chunk of change.
5. What Type of Wood is Best for a Personalized Cutting Board?
For keepsakes that look fantastic, hardwoods are your best bet. Maple's a winner-it's light with a smooth finish, which makes your designs stand out. Walnut brings a dark, classy feel, perfect for fancy stuff like initials. Cherry gets darker over time, giving it a warm, natural vibe.
When you're using the LP4 engraver, remember that wood types matter. The diode laser works magic on lighter woods like maple. Quick tip: skip softwoods like pine-they burn too easily and soak up liquid. Pick a nice hardwood, and your board will stay strong and look cool over the years.
Conclusion
A custom cutting board goes beyond simple kitchen use; it represents personal stories and artistic expression. Diverse methods, from simple wood burning to detailed engraving, cater to varied tastes. Laser engraving, done excellently with tools like the LP4 Dual-Laser Engraver, stands out when precision, speed, and product life are key. It mixes tech with art to make lasting, detailed personal items.


