


Acrylic is a versatile material used in signage, crafts, displays, and countless DIY projects. Its clarity, strength, and ease of fabrication make it a popular alternative to glass, but cutting it correctly is key to achieving professional-looking results. The right method depends on your tools, the thickness of the acrylic, and the level of precision your project demands.
In this guide, we'll explore 4 effective ways to cut acrylic, from high-tech options like laser cutters and rotary tool to more accessible tools like saws and scoring knives, so you can choose the best approach for your needs.

In this article:
- Method 1: Cut Acrylic with a Laser Cutter
- Method 2: Cut Acrylic with a Rotary Tool
- Method 3: Cut Acrylic with a Saw
- Method 4: Cut Acrylic with a Scoring Knife
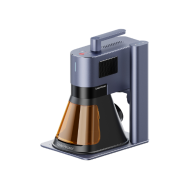
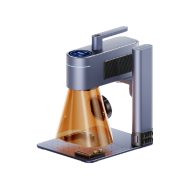
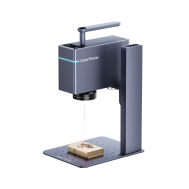
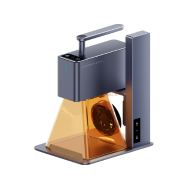
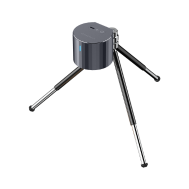
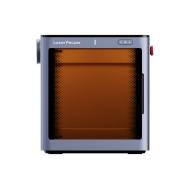
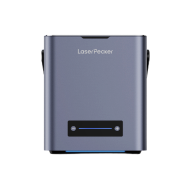
Method 1: Cut Acrylic with a Laser Cutter
A laser cutter uses a focused beam of light to cut acrylic with extreme precision, melting and vaporizing the material along the cut line.
This method produces clean, polished edges without the need for extensive finishing and can handle highly intricate patterns. It's widely used in professional sign-making, crafts, and custom acrylic projects.
Best for:
- Intricate, detailed designs
- Projects needing smooth, polished edges straight from the machine
- Cutting and engraving in the same process
Precision Level of Cutting Acrylic with a Laser Cutter
Very High — Can create fine details and sharp corners with exact repeatability.
Edge Finish Quality of Cutting Acrylic with a Laser Cutter
High — Produces a smooth, flame-polished edge without sanding; finish quality depends on material type and laser settings.
Best Thickness Range
Typically best for thin to medium sheets: 1.5 mm – 12 mm (1/16″ – 1/2″)
Can cut thicker acrylic with higher-power lasers, but slower and may require multiple passes.
Pros and Cons of Cutting Acrylic with a Laser Machine
Pros
- Exceptional accuracy and repeatability
- Clean, polished edges
- Handles intricate shapes and fine details
- Can cut and engrave in one setup
Cons
- Limited cutting depth on lower-power machines
- Produces fumes — requires proper ventilation
- Not ideal for very large sheets without an oversized bed
Method 2: Cut Acrylic with a Rotary Tool
A rotary tool, such as a Dremel, is a versatile handheld device that can cut, shape, grind, and polish acrylic using various attachments. It's best suited for small-scale projects, fine detail work, or making adjustments to pre-cut pieces. While not the fastest option for large sheets, it's excellent for precision trimming and creative shaping.
Best for:
- Small acrylic pieces and detailed cuts
- Shaping edges or making decorative patterns
- Adjusting or modifying pre-cut acrylic parts
Precision Level of Cutting Acrylic with a Rotary Tool
Medium–High — Offers good control for small cuts and curves, but requires a steady hand to keep lines perfectly straight.
Edge Finish Quality of Cutting Acrylic with a Rotary Tool
Medium — Edges may appear rough or melted if speed and pressure aren't controlled; may require sanding or flame polishing afterward for a smooth finish.
Best Thickness Range
Thin to medium sheets: 1.5 mm – 6 mm (1/16″ – 1/4″)
Not ideal for cutting thick acrylic in one pass
Pros and Cons of Cutting Acrylic with a Rotary Tool
Pros
- Highly versatile — can cut, grind, sand, and polish
- Ideal for curves, cutouts, and intricate shapes
Cons
- Heat buildup can melt acrylic if speed is too high
- Requires a steady hand and some practice for clean results
- Edges often need post-processing
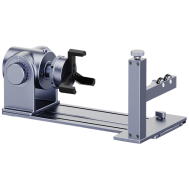
Method 3: Cut Acrylic with a Saw
Cutting acrylic with saws is a straightforward, accessible method that works well for both hobbyists and professionals.
Common tools include table saws, circular saws, band saws, and jigsaws, often fitted with fine-tooth blades designed for plastics. This approach is great for straight cuts, long sections, and basic curves, making it a versatile choice for various project sizes.
Best for:
- Straight cuts on large acrylic sheets
- Rough shaping before precision finishing
- Both DIY and professional workshop use
Precision Level of Cutting Acrylic with a Saw
Medium–High — High accuracy is possible with proper guides and jigs, but less suited for extremely fine, intricate shapes.
Edge Finish Quality of Cutting Acrylic with a Saw
Medium — Edges may show saw marks and require sanding or polishing; risk of chipping or melting if the wrong blade speed is used.
Best Thickness Range
Works well for thin to thick sheets: 2 mm – 25 mm (1/16″ – 1″)
Very thin sheets may crack if not supported properly
Pros and Cons of Cutting Acrylic with a Saw
Pros
- Cuts large pieces quickly
- Handles thicker acrylic with ease
Cons
- Edges usually need post-processing
- Not ideal for very intricate patterns
- Loud and creates dust/debris
Method 4: Cut Acrylic with a Scoring Knife
A scoring knife (also called an acrylic cutter) is a simple, low-cost hand tool designed to cut thin acrylic sheets by repeatedly scoring a straight line until the material can be snapped along the groove. It's a quiet, dust-free method that requires minimal setup, making it ideal for quick, straight cuts on small pieces.
Best for:
- Thin acrylic sheets and panels
- Quick, straight cuts without power tools
Precision Level of Cutting Acrylic with a Scoring Knife
Medium — Works well for straight lines but not for curves or intricate shapes. Accuracy depends on using a ruler or guide.
Edge Finish Quality of Cutting Acrylic with a Scoring Knife
Medium–Low — The snapped edge may be slightly rough and often needs sanding or polishing for a smooth finish.
Best Thickness Range
Best for thin sheets: up to about 3–5 mm (1/8″–3/16″)
Not effective on thick acrylic
Pros and Cons of Cutting Acrylic with a Scoring Knife
Pros
- Inexpensive and portable
- Great for beginners and small jobs
Cons
- Limited to thin acrylic
- Only works for straight cuts
- Not suited for complex designs or curves
Conclusion:
Whether you need the flawless, polished edges of a laser cut or the simplicity of a scoring knife for a quick straight cut, there's a method that fits your acrylic project. Each approach offers unique advantages in precision, finish quality, and material compatibility. By understanding these techniques, you'll be equipped to select the right tool for the job and produce clean, accurate cuts that bring your designs to life.


