Personalizing a knife with an engraving not only adds a unique touch but can also make it a meaningful gift or a signature tool for your kitchen or workshop.
While professional engraving services exist, many creative hobbyists and DIY enthusiasts prefer to do it at home. Fortunately, there are several practical methods to engrave a knife yourself, each offering different levels of precision, cost, and skill.
In this article, we'll explore 3 effective ways to engrave a knife at home: using a fiber laser engraver, hand engraving, and chemical etching. Whether you want a high-tech solution, a hands-on approach, or a chemical process, there's a method here for you.

In this article:
- Method 1: Engrave Knife with a Fiber Laser Engraver
- Method 2: Engrave Knife via Hand Engraving
- Method 3: Engrave Knife via Chemical Etching
Method 1: Engrave Knife with a Fiber Laser Engraver
What You'll Need for laser engraving knifes:
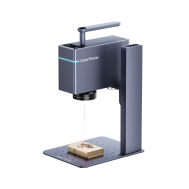
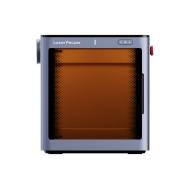
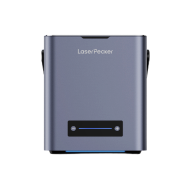
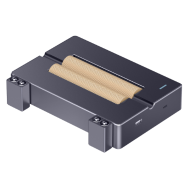
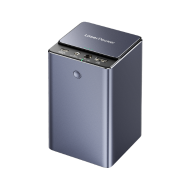
- Fiber laser engraving machine for knife
- Knife to be engraved (preferably stainless steel or compatible metal)
- Design software (e.g., LightBurn, LaserPecker Software & App)
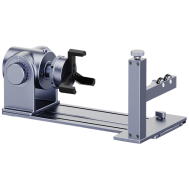
- Fixture or jig to hold the knife steady during engraving
Step 1: Prepare the Knife and Design
Clean the knife blade thoroughly with isopropyl alcohol to remove oils and dirt. Open your laser engraving software, create or import your design, and adjust its size to fit the blade. Set the engraving parameters such as power, speed, and frequency based on the metal type.
Step 2: Position the Knife in the Laser Engraver
Secure the knife firmly in the engraving fixture or jig to prevent movement. Proper positioning ensures accurate placement of your design on the blade.
Step 3: Start Engraving Process
Start the engraving through the software interface. The fiber laser will etch your design precisely onto the blade surface. Keep an eye on the process to ensure stability and accuracy.
Step 4: Clean and Inspect
After engraving, wipe the blade gently to remove any residue. Inspect the engraving for quality and depth, and adjust settings if necessary for re-engraving.
Pros and Cons of Fiber Laser Engraving on Knives
✔️Pros:
Extremely precise and detailed engravings.
Permanent and durable marks that resist wear and corrosion.
Fast and repeatable for multiple knives.
Non-contact process, so no physical pressure or damage to the blade.
❌Cons:
Requires expensive, specialized equipment.
Method 2: Engrave Knife via Hand Engraving
What You'll Need:
- Engraving tools (such as a handheld rotary tool with engraving bits, or traditional hand gravers)
- Clamp or vise to hold the knife steady
- Pencil or marker to sketch the design on the blade
Step 1: Prepare the Knife and Design
Start by cleaning the knife blade thoroughly to remove any dirt or oils. Lightly sketch your design or initials onto the blade using a pencil or fine marker as a guide. Secure the knife in a clamp or vise to keep it stable during engraving.
Step 2: Begin Engraving
Using your handheld rotary tool or gravers, carefully trace over your design on the blade. Work slowly and steadily, applying even pressure to create clear grooves. Use magnification if needed for detailed or small designs. Take breaks if necessary to maintain control and avoid fatigue.
Step 3: Clean and Inspect
Once you've finished engraving, wipe the blade clean with a cloth and alcohol to remove any metal dust. Inspect your work and make any refinements or touch-ups as needed with the engraving tool.
Pros and Cons of Hand Engraving on Knives
✔️Pros:
Highly customizable with full creative control over design.
Hands-on craft with a traditional, authentic feel.
❌Cons:
Time-consuming and requires patience and steady hands.
May not be suitable for very complex or precise designs
Method 3: Engrave Knife via Chemical Etching
What You'll Need:
- Acid etching solution
- Protective gloves and safety goggles
- Plastic or glass container for the etching solution
- Knife to be engraved
Step 1: Prepare the Knife and Design
Clean the knife blade thoroughly with soap and water, then wipe it with isopropyl alcohol to remove oils. Apply your stencil or resist material carefully to the blade where you want the design to appear. Make sure the edges are sealed well to prevent the acid from seeping under.
Step 2: Apply the Etching Solution
Put on your gloves and goggles for safety. Submerge the exposed blade area in the acid etching solution or apply it with a brush, depending on your setup. Leave the knife in the solution for the recommended time (usually 5–15 minutes), checking regularly to see the design developing.
Step 3: Neutralize and Clean
Once the desired depth is achieved, remove the knife from the solution and immediately neutralize the acid by rinsing the blade with a baking soda solution. Then, wash the blade thoroughly with water and soap. Remove the stencil or resist material and dry the knife completely.
Pros and Cons of Chemical Etching on Knives
✔️Pros:
Works well on various metals including stainless steel.
Produces a smooth, clean etched finish.
❌Cons:
Requires handling hazardous chemicals—safety precautions are a must.
Less precise than laser engraving for very fine details.
Conclusion
Engraving a knife at home is a rewarding way to add personality and style to a tool you use every day. The fiber laser engraver delivers precise, professional results but requires specialized equipment.
Hand engraving offers a traditional, artistic touch, perfect for those who enjoy craftsmanship and have patience. Chemical etching provides a middle ground with detailed, permanent marks using accessible materials but involves careful handling of chemicals.
Whichever method you choose, proper preparation and safety are key to achieving the best results. Now, with these creative options in hand, you’re ready to make your knife truly one-of-a-kind.

