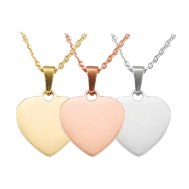
Engraving a necklace is a timeless way to personalize jewelry, making it truly unique and meaningful. Whether you want to add initials, a special date, or a custom design, there are several methods available—ranging from high-tech machines to traditional hand tools.
In this article, we'll explore 5 practical methods to engrave a necklace, each with its own set of tools, techniques, advantages, and limitations.

In this article:
Method 1: Engrave a Necklace with a Laser Engraving Machine
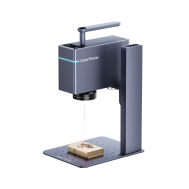
Engraving a necklace with a laser engraver is one of the most accurate, efficient, and professional methods. Whether you're working with metal, wood, leather, or acrylic pendants, laser engraving delivers clean and consistent results, even on small or intricate pieces.
Tools & Materials Needed for Laser Engraving a Necklace:
-
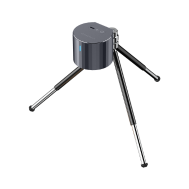
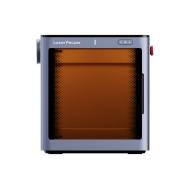
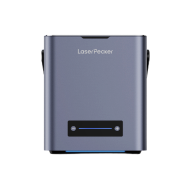
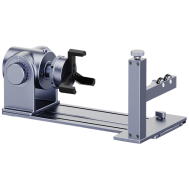
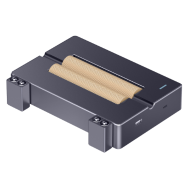
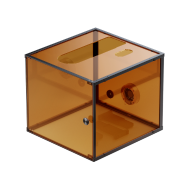
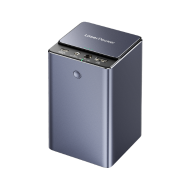
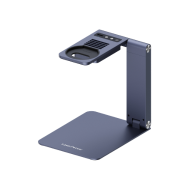
Laser Engraving Machine for necklace
Fiber laser: Best for metals (e.g., gold, silver, stainless steel, titanium)
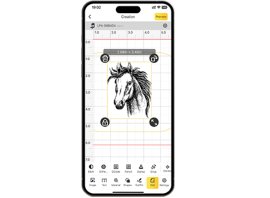
Diode laser: Can be used for wood, acrylic, or coated rings - Design software (e.g., LightBurn, LaserPecker Software & App)
- Necklace pendant or tag (metal, wood, acrylic, etc.)
Steps to Engrave a Necklace:
Step 1: Prepare the Design
Create or import your design in the engraving software. Include text, logos, patterns, or even photos. Set dimensions to match the pendant size
Step 2: Secure the Pendant
Place the necklace pendant flat on the work bed or secure it using a jig.
Step 3: Adjust the Machine Settings
Set appropriate power, speed, and line spacing based on the material. Focus the laser accurately using auto or manual focus.
Step 4: Run a Test Engraving (optional but recommended)
Test on a similar scrap piece to fine-tune the settings.
Step 5: Engrave the Necklace
Begin the engraving process. Monitor the engraving for any misalignment or smoke build-up (use air assist or ventilation if needed).
Step 6: Clean the Pendant
Wipe off residue with a damp cloth or use metal polish if necessary.
Pros and Cons of Engraving a Necklace with a Laser Engraving Machine:
Pros:
- High precision and detail, even for small text or complex designs
- Fast production – ideal for batch engraving
- Compatible with various materials (metal, wood, acrylic, leather)
- Non-contact process – no wear on tools or damage to the surface
- Excellent for commercial use and personalized gifts
Cons:
- High initial cost for the machine
💡 Engraving Necklace with Laser Engraving Machine is Best For:
- Stainless steel tags
- Bar pendants
- Dog tags
- Wooden or acrylic charms
- Logo engraving on nameplates
Method 2: Engrave a Necklace with Rotary Tool or Engraving Pen
Engraving a necklace with a rotary tool or handheld engraving pen is a popular choice for beginners and DIY crafters. It's an affordable and hands-on method that gives you flexibility to personalize necklaces without expensive machines.
Tools & Equipment Needed:
- Rotary tool (e.g., Dremel) or engraving pen
- Diamond-tipped or carbide engraving bits (for metal)
- Necklace pendant or tag (preferably soft metals like aluminum, brass, or copper; also works on wood and acrylic)
- Clamp or vise to hold the pendant steady
- Masking tape or stencil (optional, for guiding your design)
- Pencil or marker to sketch the design
Steps to Engrave a Necklace:
Step 1: Sketch or Transfer Your Design
Draw your design or text directly on the pendant using a pencil. You can also use a stencil or apply masking tape and trace the design.
Step 2: Secure the Pendant
Fix the pendant firmly in place using a clamp or non-slip mat to prevent movement.
Step 3: Choose the Right Bit
Attach a fine diamond tip or engraving bit to your tool for precision.
Step 4: Start Engraving
Turn on the rotary tool at low to medium speed.
Step 5: Start Engraving
Turn on the rotary tool at low to medium speed. Gently trace over your design—let the bit do the work, applying light pressure. Take your time for curves and small text to avoid slipping.
Step 6: Clean and Polish
Wipe the surface clean with a soft cloth. You can also use fine sandpaper or polish to remove burrs or rough edges
Pros and Cons of Engraving a Necklace with a Rotary Tool or Engraving Pen
Pros:
- Affordable – low entry cost compared to lasers or CNC machines
- Beginner-friendly – easy to learn with some practice
- Portable – small, lightweight tools for home use
- Works on a variety of materials: metal, wood, plastic, acrylic
- Ideal for custom one-offs or handmade gifts
Cons:
- Less precision than digital methods (laser/CNC)
- Can be hard to control, especially on small or slippery pendants
- Time-consuming for detailed designs
- Not suitable for mass production
- Vibration and noise may be tiring during longer sessions
💡 A Rotary Tool or Engraving Pen is Best For:
- Soft metal tags or charms
- Handmade gifts or craft fair items
- DIY personalization without digital tools
- Engraving initials, dates, or simple symbols
Method 3: Engrave a Necklace with Chisel and Hammer (Hand Engraving)
Hand engraving with a chisel and hammer is the oldest traditional method of engraving jewelry. It offers a timeless, artisanal look and is perfect for those who appreciate craftsmanship and unique, detailed work.
Tools & Materials Needed:
- Engraving chisels or gravers (various shapes and sizes)
- Small jeweler's hammer
- Necklace pendant or tag (typically soft metals like gold, silver, or brass)
- Bench pin or engraving block to support the piece
- Magnifying loupe or microscope for detailed work
- Pencil or marker for sketching design
- Safety goggles and gloves
Steps to Engrave a Necklace:
Step 1: Design Preparation
Sketch your design or text lightly on the pendant with a pencil or marker. Plan your engraving depth and direction carefully.
Step 2: Secure the Pendant
Place the pendant firmly on a bench pin or engraving block to stabilize it.
Step 3: Select the Chisel
Choose the appropriate chisel type based on your design—flat, V-shaped, or round gravers.
Step 4: Begin Engraving
Hold the chisel at the correct angle. Tap the chisel gently with the jeweler's hammer to carve out the design. Work slowly and precisely, following your design lines.
Step 5: Refine and Clean
Use fine files or polishing tools to smooth rough edges. Clean the pendant with a soft cloth to remove dust and debris.
Pros and Cons of Engraving a Necklace via Hand Engraving
Pros:
- Unique, handcrafted appearance with artistic value
- Deep, durable engraving that stands the test of time
- No need for electricity or high-tech machines
Cons:
- Requires significant skill, practice, and patience
- Time-consuming process compared to machine engraving
- Mistakes are difficult to correct
- Not suitable for very hard metals without experience
💡 Hand Engraving Necklace is Best For:
- High-end custom jewelry
- Vintage or antique-style engraving
- Personal gifts with handcrafted charm
- Soft metal pendants needing deep, textured designs
Method 4: Engrave a Necklace with a Jewelry CNC Machine
Using a CNC (Computer Numerical Control) machine for engraving necklaces combines precision machining with automation. This method is ideal for jewelers or businesses wanting detailed and consistent engravings on metal or other hard materials.
Tools & Equipment Needed:
- Jewelry CNC engraving machine (a milling machine designed for small, detailed work)
- Computer with CAD/CAM software
- Cutting/engraving bits (diamond-coated or carbide)
- Necklace pendant or tag (metal such as gold, silver, stainless steel, or brass)
- Fixture or clamp to hold the pendant steady during machining
- Safety gear (goggles, gloves, dust mask)
Steps to Engrave a Necklace:
Step 1: Design Your Engraving
Create or import your design in CAD software. Convert the design into a CNC-compatible format using CAM software. Adjust parameters like cutting depth, speed, and tool path.
Step 2: Set Up the Machine
Secure the necklace pendant firmly in the CNC machine's fixture. Install the appropriate engraving bit.
Step 3: Run a Test Simulation
Use software simulation to check the tool path and avoid mistakes.
Step 4: Start the Engraving Process
Begin machining, monitoring the process for any issues. The CNC machine will precisely carve your design onto the pendant surface.
Step 5: Finish and Clean
Remove the pendant carefully. Clean and polish the engraved area to enhance appearance.
Pros and Cons of Engraving a Necklace with a Jewelry CNC Machine
Pros:
- High precision and repeatability for multiple pieces
- Works well on hard metals and complex shapes
- Can produce intricate and detailed designs
- Automated process reduces manual labor
Cons:
- High initial investment and machine maintenance cost
- Requires training to operate CAD/CAM software and CNC machines
💡 Jewelry CNC Machine is Best For:
- Professional jewelers or small manufacturing shops
- Detailed logos, patterns, and serial numbers on metal pendants
- Hard metals where laser engraving is less effective
Method 5: Engrave a Necklace with Cricut Maker
The Cricut Maker is a versatile cutting machine popular for crafting. While it's primarily designed for cutting materials like vinyl, paper, and fabric, with the right tools and accessories, it can also be used for light engraving or etching on softer materials such as leather or anodized aluminum pendants.
Tools & Materials Needed:
- Engraving or debossing tool (Cricut Engraving Tip or Debossing Tip)
- Computer or mobile device with Cricut Design Space software
- Necklace pendant or tag made from compatible materials (leather, anodized aluminum, soft wood, acrylic)
- Masking tape (optional, to secure the pendant)
Steps to Engrave a Necklace:
Step 1: Design Your Pattern
Create or upload your design in Cricut Design Space. Adjust size to fit the necklace pendant.
Step 2: Prepare the Pendant
Secure the pendant onto the cutting mat, ensuring it doesn't move during engraving. Use masking tape to hold it in place if needed.
Step 3: Install the Engraving Tool
Attach the engraving tip or debossing tip into the Cricut Maker's tool holder.
Step 4: Set Material Settings
Choose the correct material profile in the software (e.g., leather, anodized aluminum).Adjust pressure and speed if your machine/software allows.
Step 5: Start Engraving
Send the design to the Cricut Maker and let it engrave or deboss the pendant. Monitor the process to ensure proper engraving depth and detail.
Step 6: Clean Up
Remove the pendant and wipe off any residue. Light polishing may enhance the final look.
Pros and Cons of Engraving a Necklace with Cricut Maker
Pros:
- Affordable and accessible for crafters and hobbyists
- Easy to use with a friendly software interface
- Ideal for soft materials like leather and anodized aluminum
- Great for simple designs, monograms, or decorative patterns
Cons:
- Limited to soft or coated materials; not suitable for hard metals
- Engraving depth and detail are limited compared to lasers or CNC
💡 A Cricut Maker is Best For:
- Leather necklace pendants with personalized designs
- Anodized aluminum tags or jewelry with light etching
- DIY crafters wanting to customize soft material pendants
Conclusion
Engraving a necklace can be as simple or as intricate as you want it to be. From the precision of laser engraving and CNC machines to the artisanal charm of hand engraving, each method offers unique benefits depending on your needs, budget, and skill level.
For hobbyists, tools like rotary engravers and even the Cricut Maker open up creative possibilities at home. By understanding these five methods, you can choose the best technique to add that special touch to your necklaces—making every piece a personal work of art.


