


Personalized rings have long held sentimental value—whether they feature a meaningful date, initials, or a symbolic design. Engraving a ring transforms a simple band into a unique keepsake, and thanks to modern tools, there are now several ways to achieve this.
In this article, we'll explore 4 practical and popular methods for engraving rings. Whether you're a hobbyist looking for a DIY approach or a professional jeweler seeking precision and efficiency, you'll find a method that suits your needs. From advanced laser engraving to traditional hand techniques, here's how to get started.

In this article:
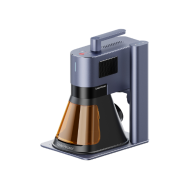
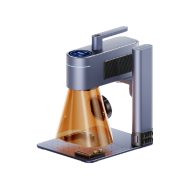
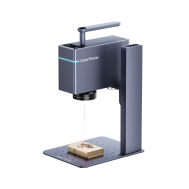
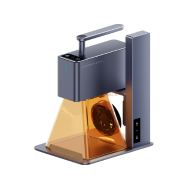
Method 1: Engrave a Ring with a Laser Engraving Machine
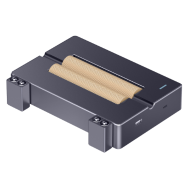
One of the most precise and professional methods for customizing rings is via laser engraving. With a laser engraver, you can etch names, special dates, or intricate patterns directly onto the ring's surface. It works on various materials like metal, wood, or ceramic and delivers clean, permanent results without physical contact. Ideal for both personal use and small business customization.
Tools & Equipment Needed for Laser Engraving a Ring:
-
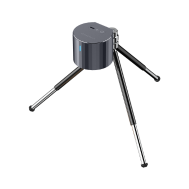
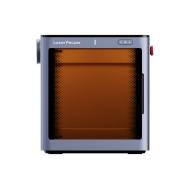
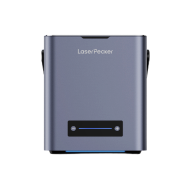
Laser Engraving Machine (preferably with a rotary attachment for cylindrical objects like rings)
Fiber laser: Best for metals (e.g., gold, silver, stainless steel, titanium)
Diode laser: Can be used for wood, acrylic, or coated rings - Rotary Axis / Ring Holder: To rotate the ring smoothly during engraving
- Design software (e.g., LightBurn, LaserPecker Software & App)
Steps to Engrave a Ring:
Step 1: Prepare the Design
Use design software to create or import your engraving text or pattern. Adjust the size to fit the ring's surface area.Set the engraving mode (fill, outline, etc.)
Step 2: Secure the Ring
Mount the ring on the rotary attachment or ring holder. Make sure it's tight and centered to avoid slipping during rotation.
Step 3: Adjust Laser Settings
Choose the correct power, speed, and frequency based on the ring material. Use preview/outline mode to confirm positioning.
Step 4: Test Engrave (Optional but Recommended)
Use a spare ring or a hidden area for testing.
Step 5: Start Engraving
Run the job and monitor the process. Ensure the ring rotates smoothly for even engraving.
Step 6: Clean the Ring
Use a cloth or alcohol wipes to remove dust or oxidation marks after engraving.
Pros and Cons of Engraving a Ring with a Fiber or IR Laser:
✔️ Pros:
- High precision and accuracy
- Non-contact process: No physical pressure or damage to the ring
- Supports complex designs: Text, patterns, logos, even photos (with the right settings)
- Works on various materials: Metals, wood, acrylic, ceramics, leather
❌ Cons:
- Learning curve for software and laser settings
Method 2: Engrave a Ring with Rotary Tool or Engraving Pen
Tools & Equipment Needed:
- Rotary Tool (e.g., Dremel) or a Manual Engraving Pen
- Diamond-tipped or carbide engraving bits (for metal)
- Vise or Ring Clamp (to hold the ring securely)
- Polishing cloth or metal polish (optional for finishing)
Steps to Engrave a Ring with Engraving Pen:
Step 1: Secure the Ring
Place the ring in a clamp, vise, or holder to prevent it from moving. Make sure it's stable but not overly tight to avoid scratching or bending.
Step 2: Mark Your Design
Lightly draw your design or text on the ring using a fine marker or pencil.Alternatively, use a stencil or adhesive template for cleaner lines.
Step 3: Select the Right Bit
Choose a fine engraving bit suitable for the ring's material. Diamond or carbide tips are recommended for metal.
Step 4: Start Engraving
Turn on the rotary tool or use the engraving pen with steady hands.Slowly trace your design, applying light, consistent pressure. It's better to go over the same line multiple times than press too hard at once.
Step 5: Refine and Clean
After engraving, clean off any dust or marker residue. Use a polishing cloth to buff the area for a clean finish.
Pros and Cons of Engraving a Ring with a Rotary Tool or Engraving Pen:
✔️ Pros:
- Inexpensive compared to laser or CNC engraving
- Portable and accessible
- Supports complex designs: Text, patterns, logos, even photos (with the right settings)
- Works on various materials: Metals, wood, acrylic, ceramics, leather
❌ Cons:
- Easier to make mistakes, especially if your hand slips
- May leave rough edges or uneven depth
- Takes longer than laser or CNC methods
This method is ideal for DIY projects or personalized gifts, especially if you're comfortable with hand tools.
Method 3: Hand Engrave a Ring with a Chisel and Hammer
Tools & Equipment Needed for Hand Engraving a Ring:
- Graver or Chisel (small, fine engraving tools for metal)
- Small Hammer (preferably a chasing hammer)
- Ring Clamp or Engraving Block (to hold the ring steady)
- Magnifying Glass or Jeweler's Loupe (for detailed work)
- Design template or fine-tipped marker
- Polishing cloth and finishing tools
Steps to Hand Engrave a Ring:
Step 1: Secure the Ring
Place the ring in a clamp, vise, or engraving block so it won't shift while working.
Step 2: Mark the Design
Use a scribe, fine-tipped marker, or transfer method to place your design onto the ring surface. Keep the design small and simple if you're a beginner.
Step 3: Position Your Tools
Hold the chisel or graver at the correct angle, usually around 30–45°. Position your hammer in your dominant hand and the graver in the other.
Step 4: Begin Engraving
Lightly tap the chisel with the hammer to begin cutting into the ring. Work slowly and carefully along your design lines. For curves or intricate designs, rotate the ring (or use a rotating engraving block) as needed.
Step 5: Clean and Finish
After engraving, gently clean the ring with a soft cloth. Use metal polish if necessary to enhance the contrast and smooth the surface.
Pros and Cons of Engraving a Ring with a Chisel and Hammer
✔️ Pros:
- Traditional, artisan method used in fine jewelry
- Produces deep, permanent engravings
- Allows for highly detailed and artistic designs
- No electricity or software needed
❌ Cons:
- Requires skill and practice
- Easy to make mistakes (no undo button!)
- Time-consuming
- Not ideal for very small rings or ultra-fine detail unless you're experienced
This method is best for those who value craftsmanship and have the patience to learn a traditional technique. It's commonly used in high-end or antique-style jewelry engraving.
Method 4: Engrave a Ring with a Jewelry CNC Machine
Tools & Equipment Needed:
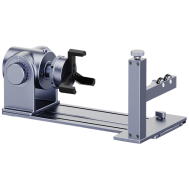
- Jewelry CNC Engraving Machine (typically 3-axis or 4-axis)
- CNC-compatible Design Software
- G-code Generator (often built into the software)
- Jewelry Ring Fixture or Chuck (to hold the ring securely)
- Engraving Bit or Tool Head (appropriate for metal)
- Coolant system or air assist (optional, for cleaner results)
Steps to Hand Engrave a Ring with Jewelry CNC Machine:
Step 1: Create or Import Your Design
Use CAD software to design the engraving—text, patterns, logos, or symbols. Make sure the design fits the curvature and width of the ring. Convert the design into toolpaths and export as G-code.
Step 2: Prepare the CNC Machine
Install the correct engraving bit and set the spindle speed. Mount the ring on the CNC fixture or rotary chuck to ensure it won't move. Load the G-code file into the CNC machine via your control software.
Step 3: Adjust Machine Settings
Set the origin point (usually center-top of the ring). Adjust feed rate, depth, and speed according to the ring's material. Run a dry test (without cutting) to confirm alignment.
Step 4: Engrave the Ring
Start the engraving process and monitor the machine. Ensure smooth movement, especially if using a rotary axis for 360° engraving.
Step 5: Clean and Polish
Once done, clean off any dust or metal shavings. Polish the engraved area if needed for clarity and finish.
Pros and Cons of Engraving a Ring with a Jewelry CNC Machine
✔️ Pros:
- Highly precise and repeatable
- Perfect for mass production or batch customization
- Works on a wide range of metals (gold, silver, steel, titanium)
❌ Cons:
- Expensive equipment and software setup
- Requires CAD/CAM skills
- Slower to set up than laser engraving
- Not ideal for one-off jobs unless you're already using CNC tools
This method is ideal for professional jewelers or small-scale manufacturers who want consistent, high-quality engraving on rings—especially when producing multiple pieces or customizing intricate designs.
Conclusion:
Ring engraving can be as simple or as detailed as you want—it all comes down to your tools and creative goals.
Among the methods available, laser engraving stands out for its speed, precision, and ability to produce clean, permanent results on a wide range of materials.
Whether you're making a personalized gift or launching a custom jewelry business, we recommend trying a jewelry laser engraver for its professional finish and user-friendly operation. It's a powerful way to bring your ring designs to life with ease and accuracy.


