


Personalized bracelets are a meaningful way to express love, identity, or creativity — and engraving is what gives them that special touch. Whether you're crafting a gift, starting a handmade jewelry business, or simply trying something new, there are several ways to engrave a bracelet depending on your tools, budget, and experience level.
In this guide, we'll walk you through five practical bracelets engraving methods — from high-tech machines to traditional hand tools — so you can choose the one that works best for your project.

In this article:
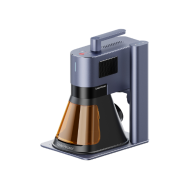
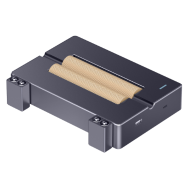
Method 1: Engrave a Bracelet with a Laser Engraving Machine
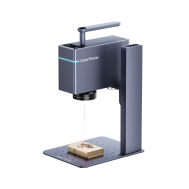
Laser engraving is one of the most popular and effective methods for customizing bracelets. It provides high precision, clean lines, and supports a wide range of materials like metal, leather, wood, acrylic, and silicone.
Tools & Materials Needed for Laser Engraving a Bracelet:
-
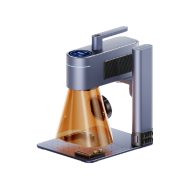
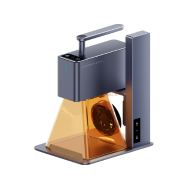
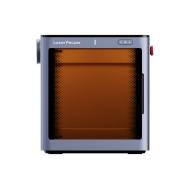
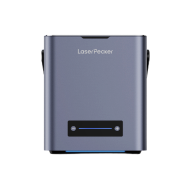
Laser Engraving Machine for bracelet
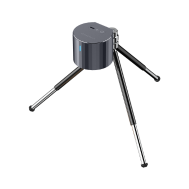
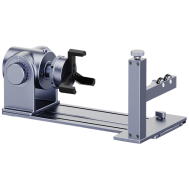
- Rotary Axis: Needed for engraving on curved bracelets like bangles or cuffs.
- Design software (e.g., LightBurn, LaserPecker Software & App)
- Bracelet Blank: Can be made of stainless steel, aluminum, leather, wood, silicone, etc.
Steps to Engrave a Bracelet with a Laser Engraver:
Step 1: Choose or Create a Design
Use design software to create your pattern, text, or logo. Keep in mind the size and curve of the bracelet to ensure the design fits well.
Step 2: Prepare the Bracelet
Clean the surface thoroughly to remove dust or oil. Secure the bracelet firmly on the laser bed or rotary tool to prevent any shifting during engraving.
Step 3: Adjust the Machine Settings
Select the material type and adjust the laser power, speed, and focus height accordingly. If using a rotary attachment, enable rotary mode.
Step 4: Preview the Engraving Area
Use the machine's preview function to check the design alignment. Make any necessary adjustments before proceeding.
Step 5: Start the Engraving Process
Begin engraving and monitor the process closely to ensure safety and accuracy.
Step 6: Post-processing
After engraving, wipe down the bracelet to remove any residue. Apply finishing touches such as polishing metal or conditioning leather, depending on the material.
Pros and Cons of Engraving a Bracelet with a Laser Engraving Machine:
✔️Pros:
- High precision and detail — perfect for small or intricate designs.
- Fast production – ideal for batch engraving
- Non-contact process
- Fast and repeatable — ideal for batch production or commercial use.
- Works on many materials — from metals to leather and wood.
❌Cons:
- High initial cost for the machine
Method 2: Engrave a Bracelet with a Rotary Tool or Engraving Pen
Using a rotary tool or manual engraving pen is a great option for hobbyists or DIY enthusiasts. It's a hands-on, low-cost method suitable for metal, wood, plastic, or leather bracelets — perfect for making one-of-a-kind pieces at home.
Tools & Equipment Needed:
- Rotary tool or engraving pen
- Bracelet Blank - Any flat or slightly curved bracelet material: metal, wood, acrylic, plastic.
- Clamp or vise to hold the bracelet steady
Steps to Engrave a Bracelet with a Rotary Tool:
Step 1: Choose and Prepare Your Bracelet
Select a bracelet made of metal, wood, or plastic, and clean its surface to remove dust or oils. Secure it in place using a clamp or soft vise to prevent movement during engraving.
Step 2: Sketch Your Design
Lightly draw your desired pattern or text on the bracelet using a pencil or marker. You can also use stencils or transfer paper for more precise outlines.
Step 3: Choose the Right Bit
Attach a suitable engraving bit to your rotary tool—diamond or carbide tips for metal, and softer bits for wood or plastic—ensuring it's firmly in place.
Step 4: Start Engraving
Turn on the rotary tool at low to medium speed.
Step 5: Clean and Polish
Once done, brush off debris and wipe the surface clean. Polish metal for a shiny finish or apply sealant to wood to protect the engraving.
Pros and Cons of Engraving a Bracelet with a Rotary Tool or Engraving Pen
✔️Pros:
- Budget-friendly
- Portable and compact
- Good for custom, freehand designs
❌Cons:
- Requires steady hand and patience
- Less precise than laser or CNC
- Time-consuming for detailed designs
- Can produce uneven depth
- Dust and debris
Method 3: Engrave a Bracelet with Chisel and Hammer
Hand engraving using a chisel and hammer is a traditional technique that offers deep, permanent markings with a handcrafted feel. It's commonly used for metal bracelets, especially by experienced jewelers or metalworkers who value artisanal results.
Tools & Materials Needed:
- Metal Bracelet - Works best on softer metals like silver, brass, copper, or gold.
- Engraving chisels or gravers (various shapes and sizes)
- Small jeweler's hammer
- Clamp, Engraving Block, or Vise
- Polishing Cloth or Abrasive Pad
Steps to Engrave a Bracelet with Chisel and Hammer:
Step 1: Prepare the Bracelet
Clean the bracelet and fix it tightly in a vise or engraving block to prevent any movement. The stability of your piece is crucial for accuracy.
Step 2: Mark the Design
Use a scribe tool or fine marker to outline the design on the bracelet's surface. Make sure the design is clear and proportionate to the available space.
Step 3: Position the Chisel
Place the chisel's tip at the beginning of your design, holding it at the correct angle depending on the desired depth and line shape
Step 4: Start Engraving
Tap the chisel lightly with a hammer to cut into the surface. Move slowly and precisely, working in short strokes along the lines of your design.
Step 5: Clean and Finish
After engraving, brush away any metal shavings and polish the surface to enhance contrast and give it a clean, finished look.
Pros and Cons of Engraving a Bracelet via Hand Engraving
✔️Pros:
- Deep, permanent engraving with a handmade, artistic appearance.
- No electricity required, making it ideal for low-tech settings.
- Works well on precious metals, especially for luxury or antique-style bracelets.
❌Cons:
- Requires significant skill, practice, and patience
- Time-consuming process compared to machine engraving
- Mistakes are difficult to correct
Method 4: Engrave a Bracelet with a Jewelry CNC Machine
CNC (Computer Numerical Control) engraving is a professional and highly precise method used in jewelry manufacturing. It is ideal for engraving detailed text, patterns, or even 3D designs on metal bracelets, especially in medium to large production batches.
Tools & Equipment Needed:
- Jewelry CNC engraving machine (a milling machine designed for small, detailed work)
- Computer with CAD/CAM software
- Bracelet Blank
- Fixture or clamp to hold the pendant steady during machining
Steps to Engrave a Bracelet with a Jewelry CNC Machine:
Step 1: Design Your Artwork
Create your design using vector graphics or CAD software. Convert the design into a toolpath (G-code) suitable for your CNC machine.
Step 2: Prepare the Bracelet
Secure the bracelet onto the machine bed or in a jig. If the bracelet is curved, mount it on a rotary fixture to maintain even depth.
Step 3: Set Up the Machine
Install the correct engraving bit, set the zero point (origin), and adjust speed, depth, and feed rate based on the bracelet material.
Step 4: Run the Engraving Job
Start the engraving process and monitor the operation for precision and safety. Ensure the bracelet remains firmly held throughout.
Step 5: Finish and Clean
After engraving, remove the bracelet and clean off any metal shavings or dust. Polish the surface to enhance clarity and shine.
Pros and Cons of Engraving a Bracelet with a Jewelry CNC Machine
✔️Pros:
- Extremely precise and repeatable
- Professional-grade quality
- Supports complex designs
- Good for batch production
❌Cons:
- Setup time can be long
- Not portable — usually a stationary, workshop-bound method.
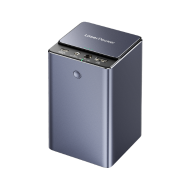
Method 5: Engrave a Bracelet with Cricut Maker
The Cricut Maker, equipped with an engraving tip, allows you to engrave soft, flat metal surfaces like aluminum bracelet blanks. It's a beginner-friendly, accessible option for personalized jewelry, though it's limited to certain materials and shapes.
Tools & Materials Needed:
- Cricut
- Computer or mobile device with Cricut Design Space software
- Metal Bracelet Blank (Must be flat and soft, usually anodized aluminum or aluminum blanks designed for Cricut.)
- Masking tape (optional, to secure the bracelet)
- Polishing Pad or Tool
Steps to Engrave a Bracelet with Cricut Maker:
Step 1: Design Your Pattern
Open Cricut Design Space and create or import your engraving design. Keep it simple and within the size limits of your metal blank.
Step 2: Prepare the Material
Place the bracelet blank on the StrongGrip mat and tape all edges securely to prevent movement during engraving.
Step 3: Set Up the Machine
Load the Engraving Tip into your Cricut Maker, select the correct material setting (e.g., "Aluminum Sheet"), and position your design exactly where the blank is placed.
Step 4: Start Engraving
Begin the engraving process. The machine will lightly scratch the surface according to your design. Stay nearby to ensure it runs smoothly.
Step 5: Clean and Polish
Once finished, remove the blank and clean off any debris. Use a polishing pad to brighten the design or smooth rough spots.
Pros and Cons of Engraving a bracelet with Cricut Maker
✔️Pros:
- Beginner-friendly
- Affordable for casual users
❌Cons:
- Limited to flat, thin materials
- Not ideal for hard metals — can't engrave steel, brass, or gold.
Conclusion
Engraving a bracelet can be as simple or as advanced as you want it to be. Whether you prefer the precision of a laser or CNC machine, the hands-on feel of a rotary tool, or the charm of traditional hand engraving, each method has its strengths. Consider your material, budget, and design complexity before you start.
With the right tools and a bit of practice, you'll be able to create beautiful, personalized bracelets that carry meaning — and leave a lasting impression.


