Engraved bricks are a timeless way to add personalization, commemorate events, or create lasting messages in public spaces, memorials, and garden paths. Whether you're crafting a single decorative piece or managing a large-scale fundraising project, choosing the right engraving method is key to achieving durability, clarity, and style.
In this guide, we'll explore four effective methods to engrave bricks — from high-tech precision tools to hands-on DIY approaches—so you can find the one that best suits your needs, budget, and project size.

In this article:
- Method 1: Engrave Bricks with a Laser Engraving Machine
- Method 2: Engrave Bricks with Rotary Tool or Engraving Pen
- Method 3: Engrave Bricks via Sandblasting
- Method 4: Engrave Bricks via a CNC Machine
- FAQs: Hot Questions About Engraving Bricks
Method 1: Engrave Bricks with a Laser Engraving Machine
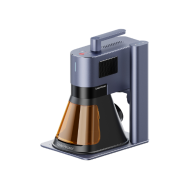
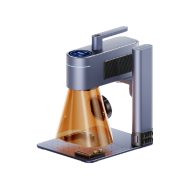
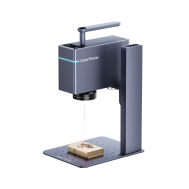
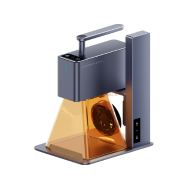
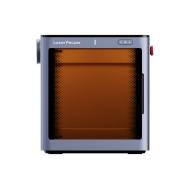
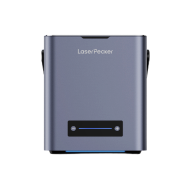
Laser engraving is a precise and clean way to personalize or mark bricks, especially for indoor decor, commemorative tiles, or fundraising pavers. High-powered fiber lasers can etch text and designs onto smooth brick surfaces by removing the top layer or altering the color.
What You'll Need for Laser Engraving Bricks:
- Fiber laser engraving machine
- Clay or concrete bricks (preferably with a flat, smooth surface)
- Design software (e.g., LightBurn, LaserPecker Software & App)
- Rotary tool or electric engraving pen
- Brick (clay, concrete, or stone-based; preferably smooth surface)
- Clamp, vise, or non-slip mat
- Polishing cloth or fine sandpaper
- Sandblasting cabinet or sandblasting gun + air compressor
- Abrasive media
- Bricks (preferably smooth-surfaced clay or concrete bricks)
- Vinyl stencil or rubber resist mask
- Transfer tape (for applying stencil)
- CNC machine
- Brick (clay or concrete, preferably flat and smooth)
- Design & CAM software
- Clamp, vacuum table, or jig to hold the brick
Steps to Laser Engrave a Brick
Step 1: Design Your Artwork
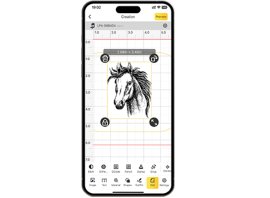
Create or import your text, logo, or pattern in design software. Adjust the size to match the engraving area on the brick.
Step 2: Position the Brick
Place the brick on the laser bed. Make sure it's level and steady. Use spacers if needed for support.
Step 3: Adjust Laser Settings
Set appropriate power, speed, and focus height based on the type of brick (test on a spare brick first)
Step 4: Preview the Area
Use the frame or outline preview to check alignment. Make fine adjustments as needed.
Step 5: Start Engraving
Begin the engraving process. Monitor for smoke, dust, or fire risk. Use air assist and ventilation if available.
Step 6: Post-Engraving Cleanup
Once done, wipe off any soot or dust. Optionally seal the surface for durability.
Pros and Cons of Laser Engrave a Brick
👍Pros:
High precision with clean lines
Great for detailed logos, text, or small graphics
No physical contact = minimal risk of damaging the brick
👎Cons:
Laser machine must be powerful and have enough bed space
Method 2: Engrave Bricks with a Rotary Tool or Engraving Pen
Using a rotary tool (like a Dremel) or an engraving pen is a hands-on and budget-friendly way to engrave bricks—ideal for DIY projects, artistic signs, or personal garden markers. While it's slower than other methods, it gives you complete creative control.
Required Tools:
Steps to Engrave a Brick with a Rotary Tool
Step 1: Plan Your Design
Draw directly on the brick with a marker or place a stencil over it.
Step 2: Secure the Brick
Use a clamp, vise, or rubber mat to hold the brick steady and prevent slipping.
Step 3: Select and Install the Right Bit
Use a diamond burr or carbide tip designed for hard surfaces like stone or concrete.
Step 4: Begin Engraving
Hold the tool like a pen and gently trace your design. Use light pressure and work slowly to control the cut.
Step 5: Clean Up
Brush off the dust and wipe the engraved area with a damp cloth. Optional: seal the engraving with clear masonry sealer.
Pros and Cons of Engraving a Brick with a Rotary Tool
👍Pros:
Low-cost and beginner-friendly
Great for small or personalized projects
👎Cons:
Labor-intensive and time-consuming
Not suitable for fine detail or large batches
Requires steady hands and some practice
Method 3: Engrave Bricks via Sandblasting
Sandblasting is one of the most common and professional methods for engraving bricks, especially for outdoor applications like memorial bricks, donor paths, and garden installations. It works by blasting abrasive material over a masked surface to etch the exposed areas of the brick.
Required Tools:
Steps to Engrave Bricks via Sandblasting
Step 1: Prepare Your Design
Use a vinyl cutter or plotter (like a Cricut) to create a stencil from sandblast-resistant material.
Step 2: Apply the Stencil
Transfer the stencil onto the brick surface. Make sure the edges are fully sealed to prevent blow-under.
Step 3: Mask the Rest of the Brick
Cover any area that should remain untouched using masking tape or extra stencil material.
Step 4: Set Up the Sandblaster
Load the abrasive media into your sandblaster and adjust the air pressure (usually between 60–100 PSI).
Step 5: Begin Sandblasting
Wearing full protective gear, blast the exposed areas in short bursts until the desired depth is achieved.
Step 6: Clean and Finish
Remove the stencil and dust. Clean the brick thoroughly. Optionally, apply a sealer for durability.
Pros and Cons of Engraving Bricks via Sandblasting
👍Pros:
Deep, long-lasting engraving (ideal for outdoor use)
Clean and consistent results with crisp edges
👎Cons:
Requires a sandblasting setup and safety precautions
Messy process — needs good ventilation or outdoor space
Not ideal for very small-scale or one-off jobs
Method 4: Engrave Bricks via a CNC Machine
Engraving bricks with a CNC (Computer Numerical Control) machine is a precise and repeatable method ideal for detailed designs, consistent lettering, or batch production. The CNC router uses a rotating cutting bit to mill away the surface of the brick, creating a deep and permanent engraving.
Required Tools:
Steps to Engrave a Brick Using a CNC Machine
Step 1: Create Your Design
Use design software to create or import your engraving layout. Convert it to toolpaths in CAM software with appropriate depth and passes.
Step 2: Secure the Brick
Clamp the brick firmly to the CNC bed or use a custom jig to hold it in place. Ensure it's perfectly level.
Step 3: Install and Set the Bit
Insert a durable engraving bit suitable for masonry. Set the origin point and zero the bit to the brick surface.
Step 4: Set Parameters
Adjust speed, feed rate, plunge depth, and number of passes according to the brick material and bit type. Always test on a spare brick first.
Step 5: Start the Job
Run the CNC job and monitor for vibrations or tool wear. Use a dust collector or vacuum to manage debris.
Step 6: Post-Processing
Once complete, clean the surface and remove any dust. Optionally seal the engraved area for outdoor durability.
Pros and Cons of Engraving a Brick Using a CNC Machine
👍Pros:
Highly precise and repeatable
Capable of deep, durable engraving
👎Cons:
Requires CNC knowledge and setup time
Generates significant dust and noise
FAQs: Hot Questions About Engraving Bricks
1. What are Engraved Bricks typically used for?
Engraved bricks are commonly used for memorializing loved ones, fundraising initiatives, creating pathways in gardens or public spaces, commemorating special events, or as personalized gifts.
2. Which materials are suitable for engraving bricks?
Bricks made from materials like clay or concrete are often preferred for engraving due to their durability and compatibility with various engraving methods.
3. What designs or messages can be engraved on bricks?
Designs may include names, dates, quotes, logos, symbols, or even photographs. The possibilities are vast, allowing for personalized and unique engravings.
4. What is the lifespan of engraved bricks?
Engraved bricks, when properly installed and maintained, can endure for decades, often remaining legible and intact for 50 years or more, depending on the environmental conditions.
5. Are there limitations in the size or font of the engraving?
While there might be practical limitations based on the size and surface area of the brick, modern engraving techniques often allow for a wide range of font styles and sizes.
6. How weather-resistant are engraved bricks?
Engraved bricks are generally weather-resistant, especially when sealed or coated appropriately. Proper sealing can protect the engravings from elements like rain, snow, and UV rays.
7. Can previously laid bricks be engraved?
Yes, previously laid bricks can often be engraved, although it might require specialized equipment or techniques. However, it's typically easier to engrave bricks before they are laid in a structure or pathway.
8. What's the difference between laser and mechanical engraving of bricks?
Laser engraving uses high-precision lasers to etch designs, providing intricate detailing. Mechanical engraving involves physically cutting or carving the brick's surface using tools, providing a more handcrafted appearance.
9. Can engraved bricks be customized for specific fundraising campaigns?
Absolutely, engraved bricks are commonly used in fundraising campaigns. Organizations often sell personalized bricks as a way to raise funds for specific causes, allowing donors to leave a lasting mark.
10. How can one maintain engraved bricks over time?
Regular cleaning and applying protective coatings or sealants can help maintain engraved bricks. Periodic inspections for damage or wear are also recommended to ensure their longevity.
Conclusion
Brick engraving can be approached in several ways, each offering its own advantages. Laser engraving provides clean detail for decorative or indoor pieces, while sandblasting and CNC machining are ideal for long-lasting, professional outdoor applications. For personal or artistic projects, a rotary tool offers flexibility and hands-on control.
No matter which method you choose, engraved bricks can turn ordinary surfaces into meaningful, enduring statements. Choose the technique that matches your tools and vision—and start carving your message in stone.


