


Engraved pens are more than writing tools—they're personal, meaningful, and often treasured as gifts, keepsakes, or branded items. Whether you're looking to customize a metal pen with initials, engrave a logo on a wooden barrel, or craft a one-of-a-kind design, choosing the right engraving method makes all the difference.
In this guide, we'll walk you through four effective ways to engrave pens — from high-tech tools like laser and CNC machines to hands-on approaches like rotary or hand engraving—so you can pick the method that suits your needs, skill level, and materials.

In this article:
- Method 1: Engrave a Pen with a Laser Engraving Machine
- Method 2: Engrave a Pen with a Rotary Tool
- Method 3: Engrave a Pen via Hand Engraving
- Method 4: Engrave a Pen with a Small CNC Machine
- FAQs: Hot Questions About Engraving Pens
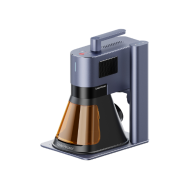
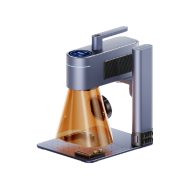
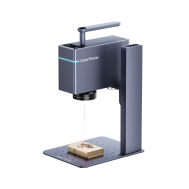
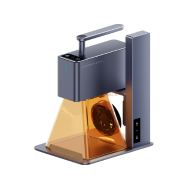
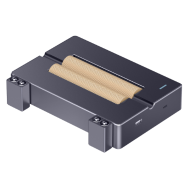
Method 1: Engrave a Pen with a Laser Engraving Machine
Laser engraving is one of the most popular and precise methods for customizing pens. It works by using focused laser energy to mark or etch the surface, making it ideal for creating names, logos, or intricate patterns on metal, wood, acrylic, or coated pens.
What You'll Need for Laser Engraving a Pen:
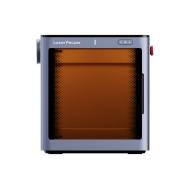
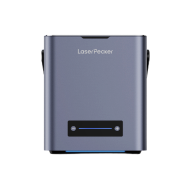
- A laser engraving machine
- Pens with engravable surface (metal, wood, acrylic, coated plastic)
- Design software (e.g., LightBurn, LaserPecker Software & App)
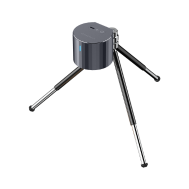
- Rotary attachment (recommended for cylindrical pens)
Steps to Engrave a Pen with a Laser Machine
Step 1: Create or Import the Design
Use design software to prepare the name, logo, or pattern. Match the design size to the engravable area of the pen barrel.
Step 2: Secure the Pen
Place the pen into a rotary attachment to allow the laser to engrave around the cylindrical surface without distortion. For flat pens, fix them directly onto the laser bed.
Step 3: Set Parameters
Adjust the laser's power, speed, frequency, and focus based on your material type. Use test runs if needed to find the ideal settings.
Step 4: Preview the Position
Use the frame or outline function to preview the engraving area. Make sure everything is aligned and sized properly.
Step 5: Start Engraving
Begin the engraving. Monitor the process for safety and accuracy. Use fume extraction or air assist if needed.
Step 6: Clean and Inspect
Once complete, wipe off residue or soot using a soft cloth. Inspect the result for consistency and clarity.
Pros and Cons of Laser Engrave a Pen
👍Pros:
Highly precise and professional results
Great for detailed logos, text, or small graphics
Works on various materials (metal, wood, acrylic, leather, etc.)
👎Cons:
Laser machine must be powerful and have enough bed space
Method 2: Engrave a Pen with a Rotary Tool
Engraving a pen with a rotary tool is a hands-on, accessible method ideal for DIYers or hobbyists. With the right bits, you can engrave names, initials, or simple patterns on metal, wood, or plastic pens. It's especially useful for one-off gifts or artistic customization.
Required Tools:
- Rotary tool or electric engraving pen
- Clamp, vise, or non-slip mat
Steps to Engrave a Pen with a Rotary Tool
Step 1: Mark the Design
Draw your design or initials directly on the pen with a fine-tip marker, or apply a stencil for guidance.
Step 2: Secure the Pen
Use a clamp, soft-jaw vise, or foam pad to keep the pen from moving while you work.
Step 3: Choose the Right Bit
Attach a diamond or carbide engraving bit, depending on the pen's material.
Step 4: Start Engraving
Turn on the rotary tool and gently follow your design using light pressure. Let the tool do the cutting—don't force it.
Step 5: Refine and Clean
Go over any uneven lines again for depth or consistency. Then wipe the pen with a cloth to remove dust and debris.
Pros and Cons of Engraving a Pen with a Rotary Tool
👍Pros:
Inexpensive and easy to get started
Great for one-off custom gifts
👎Cons:
Less precision than laser or CNC
Requires steady hands and patience for neat results
Method 3: Engrave a Pen via Hand Engraving
Hand engraving is a traditional and highly skilled technique that involves manually carving into the pen's surface using fine engraving tools. It's perfect for creating elegant, personalized, and artistic results—especially on high-end or collectible pens.
Required Tools:
- Hand graver
- Engraving vise or clamp (to secure the pen)
- Magnifying glass or jeweler's loupe (for fine detail work)
Steps to Hand Engrave a Pen
Step 1: Plan the Design
Sketch your design or lettering onto the pen's surface using a fine-tip marker or pencil.
Step 2: Secure the Pen
Use a jeweler's vise or a padded clamp to hold the pen firmly and avoid movement during engraving.
Step 3: Select and Prepare the Graver
Choose the appropriate graver shape for your design. Make sure it's sharp for clean cuts.
Step 4: Begin Engraving
Hold the graver at a consistent angle and push or scoop it along your traced lines. Take your time and work in small sections.
Step 5: Clean Up
Brush off any metal shavings or dust. Optionally polish the engraved area for a smooth finish.
Pros and Cons of Hand Engrave a Pen
👍Pros:
Creates elegant, artisan-quality results
Ideal for luxury pens and heirloom gifts
👎Cons:
Requires skill and practice (steep learning curve)
Time-consuming and not suited for bulk jobs
Mistakes are hard to correct
Method 4: Engrave a Pen with a Small CNC Machine
Using a small CNC machine is a precise and repeatable method for engraving pens—especially ideal for small-scale production or when consistent quality is essential. CNC engraving combines digital design with automated cutting, allowing for deep and permanent engraving on materials like metal, wood, or acrylic.
Required Tools:
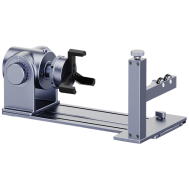
- CNC machine
- Brick (clay or concrete, preferably flat and smooth)
- Design & CAM software
- Clamp, vacuum table, or jig to hold the brick
Steps to Engrave a Pen Using a CNC Machine
Step 1: Create Your Design
Use design software to create or import your pattern, name, or logo. Generate the toolpaths with CAM software suited to your machine.
Step 2: Secure the Pen
Use a custom jig, rotary fixture, or soft-jawed clamp to hold the pen steadily and precisely in place on the CNC bed.
Step 3: Select the Right Bit and Settings
Install the appropriate engraving bit and set the correct spindle speed, feed rate, and depth per pass based on the material.
Step 4: Run a Test Pass
Always test on a scrap or sample pen to check alignment and cut quality.
Step 5: Begin Engraving
Start the job and monitor for vibrations, misalignment, or tool wear. Use dust control as needed.
Step 6: Clean and Inspect
Remove the pen, brush off debris, and inspect the engraving. Optional: polish or seal the engraved surface.
Pros and Cons of Engraving a Pen Using a CNC Machine
👍Pros:
High precision and consistency
Excellent for repeating logos or batch production
👎Cons:
Requires CNC knowledge and setup time
Generates significant dust and noise
FAQs: Hot Questions About Engraving Pens
1. Can any type of pen be engraved?
Engraving is most effective on pens with smooth and flat surfaces. Ideal materials include metal, wood, high-quality plastic, and leather-wrapped pens. However, intricate designs may vary based on the material, so it's essential to choose pens compatible with engraving techniques.
2. What types of messages can be engraved on pens?
Engraved messages can range from names, dates, and quotes to intricate designs and company logos. The versatility of engraving allows for personalization according to the occasion and recipient.
3. How deep does the engraving go on a pen?
The depth of engraving depends on the chosen method and settings. Laser engraving, for example, can achieve varying depths based on the machine's power and speed settings. It's important to consider the material and purpose when determining the appropriate engraving depth.
4. Can pens with intricate designs be engraved?
Yes, laser engraving technology allows for intricate and detailed designs on pens. However, the complexity of the design may affect the engraving time and require careful calibration of the laser settings.
5. Are there limitations on the size of pens that can be engraved?
Most laser engraving machines come with adjustable settings to accommodate different pen sizes. It's essential to check the specifications of your specific engraving machine and, if applicable, use a rotary attachment for cylindrical objects.
6. How do I clean and maintain an engraved pen?
Cleaning engraved pens involves gentle wiping with a soft, damp cloth to remove any residue. To maintain the engraving's longevity, avoid abrasive cleaners or harsh chemicals. Store engraved pens in a protective case or pouch to prevent scratches.
7. Can fountain pens be engraved?
Yes, fountain pens can be engraved, but extra care is needed due to their intricate design and delicate nibs. It's advisable to choose a method that minimizes the risk of damage, such as laser engraving on the pen's body.
8. Is it possible to engrave multiple pens simultaneously?
Engraving multiple pens simultaneously is feasible with some laser engraving machines equipped with rotary attachments. Ensure that each pen is securely placed and properly aligned to achieve consistent results.
9. Can I engrave pens at home, or do I need professional services?
While some smaller, desktop laser engraving machines are suitable for home use, professional engraving services may be preferred for intricate designs or large quantities. Consider factors such as the complexity of the project, equipment availability, and your engraving expertise.
10. Are there restrictions on the use of copyrighted designs for engraving?
Engraving copyrighted designs without permission may infringe on intellectual property rights. It's advisable to obtain permission or use designs that are in the public domain or have appropriate licensing. Always respect copyright laws and guidelines when engraving pens with specific designs.
Conclusion
Pen engraving can be as simple or as advanced as you want it to be. Laser engravers offer speed and precision, perfect for detailed logos or bulk jobs. Rotary tools are great for DIY projects and hands-on personalization, while hand engraving adds a unique, artisan touch. If you're after consistency and deeper cuts, a small CNC machine delivers professional results with repeatable accuracy.
Whichever method you choose, engraving turns an ordinary pen into something truly memorable—so pick your tool, plan your design, and start engraving your creativity into every line.


