


Engraved pencils are a simple yet thoughtful way to add personalization, branding, or creativity to everyday writing tools. Whether you're customizing pencils for students, wedding favors, promotional gifts, or handmade products, choosing the right engraving method makes all the difference.
In this guide, we’ll explore 5 practical ways to engrave pencils — from high-precision laser and CNC techniques to hands-on methods like stamping and rotary engraving. Each approach has its own tools, workflow, and ideal use case. Let’s help you find the best one for your needs.

In this article:
- Method 1: Engrave Pencils with a Laser Engraving Machine
- Method 2: Engrave Pencils with a Rotary Tool
- Method 3: Engrave Pencils with a Small CNC Machine
- Method 4: Engrave Pencils with Cricut Maker
- Method 5: Engrave Pencils via Stamping
- FAQs: Hot 10 Questions About Engraving Pencils
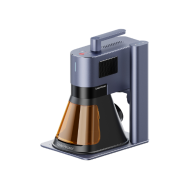
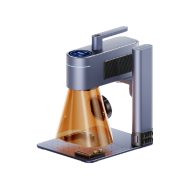
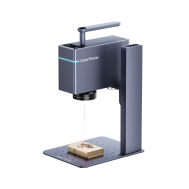
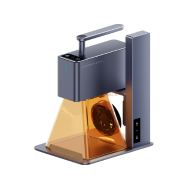
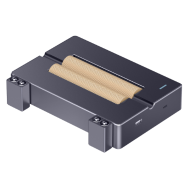
Method 1: Engrave Pencils with a Laser Engraving Machine
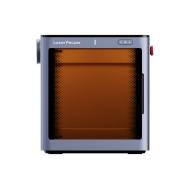
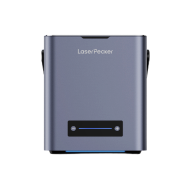
Laser engraving is the most precise and efficient way to personalize pencils, whether for gifts, branding, or school supplies. It works by burning or etching the surface of wooden or painted pencils using focused laser energy.
What You'll Need for Laser Engraving a Pencil:
- A laser engraving machine
- Pencils with engravable surface (metal, wood, acrylic, coated plastic)
- Design software (e.g., LightBurn, LaserPecker Software & App)
Steps to Engrave a Pencil with a Laser Engraving Machine
Step 1: Design Your Layout
Use software to type the name, phrase, or logo. Resize to fit the pencil barrel (typically 5–8 mm height).
Step 2: Position the Pencil
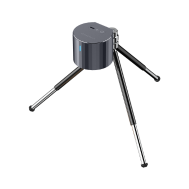
Place the pencil on the laser bed. If it's round, use a rotary attachment. For hexagonal pencils, lay them flat in a jig to keep them from rolling.
Step 3: Set Parameters
Set power, speed, and focus according to the pencil material.
Step 4: Preview the Position
Use the frame/outline tool to ensure the engraving area is aligned correctly with the pencil.
Step 5: Start Engraving
Run the engraving. Monitor for safety and ensure the pencil doesn’t shift during the job.
Step 6: Clean Up
Wipe off any smoke marks or debris with a soft cloth. Optionally, apply light sanding or finish.
Pros and Cons of Laser Engrave a Pencil
👍Pros:
Highly precise and professional results
Can handle logos, text, serial numbers, etc.
Works on various materials (metal, wood, acrylic, leather, etc.)
No physical pressure — low risk of damaging the pencil
👎Cons:
Laser engravers can be expensive for beginners
Method 2: Engrave Pencils with a Rotary Tool
Using a rotary tool is a hands-on and affordable method for engraving pencils. It’s ideal for DIY enthusiasts looking to personalize a small batch of wooden pencils with names, designs, or simple patterns. While less precise than laser engraving, it offers a personal, handcrafted touch.
Required Tools:
- Rotary tool or electric engraving pencil
- Clamp, vise, or non-slip mat
- Pencil (preferably wooden or painted; avoid soft rubber coatings)
Steps to Engrave a Pencil with a Rotary Tool
Step 1: Plan and Mark Your Design
Sketch the name, initials, or pattern directly on the pencil using a fine marker or apply a stencil.
Step 2: Secure the Pencil
Clamp the pencil in place using a soft-jawed vise or wrap it in foam or cloth to prevent damage.
Step 3: Choose and Attach the Bit
Use a fine engraving bit—diamond tips are great for fine lines, while burr tips work well for deeper etching.
Step 4: Start Engraving
Turn on the rotary tool at medium to high speed. Gently follow your guide marks using light, steady pressure. Let the bit do the work—don’t press too hard.
Step 5: Clean and Touch Up
After engraving, wipe away dust with a soft cloth. You can add paint or ink in the grooves for a more visible effect.
Pros and Cons of Engraving a Pencil with a Rotary Tool
👍Pros:
Low-cost and accessible method
Great for one-off custom gifts
👎Cons:
Less precision than laser or CNC
Requires steady hands and patience for neat results
Not ideal for mass production
Method 3: Engrave Pencils with a Small CNC Machine
A small CNC machine offers precision engraving through automated cutting, ideal for deep and repeatable marks on pencils—perfect for small workshops, makerspaces, or those creating custom products in batches. It’s especially effective on wooden pencils, whether flat, round, or hexagonal, with the right clamping setup.
Required Tools:
- Small CNC
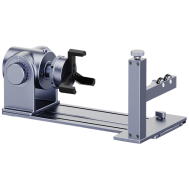
- Custom pencil jig or clamp (to hold pencils securely)
- Wooden or painted pencils
Steps to Engrave a Pencil with a Small CNC Machine
Step 1: Create or Import the Design
Design text or a logo using CAD software and generate toolpaths with CAM software. Adjust size to fit the pencil surface (usually ~5–8 mm high).
Step 2: Secure the Pencil
Place the pencil in a custom jig, rotary attachment, or soft clamp to prevent movement. For round pencils, a rotary fixture or V-block may help.
Step 3: Select the Bit and Machine Settings
Install a fine engraving bit. Set spindle speed, feed rate, and depth of cut according to material.
Step 4: Test and Align
Run a test pass on scrap wood or an extra pencil. Use the CNC’s zeroing feature to ensure proper alignment.
Step 5: Start Engraving
Launch the engraving job and monitor the process for accuracy, bit wear, or tool drag.
Pros and Cons of Engraving a Pencil with CNC Machine
👍Pros:
High precision and consistency
Supports deeper engraving than laser
👎Cons:
Requires design and CNC software knowledge
Setup takes time, especially for alignment
Not ideal for one-off or quick jobs
Method 4: Engrave Pencils with Cricut Maker
While the Cricut Maker is best known for cutting paper, vinyl, and leather, it can also lightly engrave soft materials like coated pencils using the engraving tip. This method is more like surface scratching than true engraving, but it can produce decorative, personalized results—especially on painted or foil-covered pencils.
Required Tools:
- Cricut Maker
- Adhesive (e.g., painter’s tape or glue dots) to hold the pencil in place
- Pencils with soft coatings (e.g., painted or foil-wrapped pencils; not raw wood)
Steps to Engrave a Pencil with Cricut Maker
Step 1: Create Your Design
Open Cricut Design Space and design your name, logo, or text. Keep it small (approx. 5–8 mm high) and set it to “Engrave” as the operation type.
Step 2: Prepare the Mat
Place the pencil on the StrongGrip mat. Use tape or glue dots to keep it from shifting. Flat or hexagonal pencils work best for this.
Step 3: Align and Frame the Are
Use the grid in Design Space to align your design to the pencil’s position on the mat.
Step 4: Start Engraving
Click “Make It” and let the Cricut lightly etch the design into the pencil coating. Monitor to ensure the pencil stays in place.
Step 5: Clean the Surface
Gently wipe the pencil to remove dust or flakes. Optionally, fill in the engraving with paint or metallic marker for better visibility.
Pros and Cons of Engraving a Pencil Using a Cricut Maker
👍Pros:
Easy and accessible for Cricut users
Great for decorative or craft use
Can be done at home safely
👎Cons:
Limited to surface etching (not true engraving)
Doesn’t work on bare wood or curved pencils
Method 5: Engrave Pencils via Stamping
Stamping is a traditional and effective method for marking pencils with names, logos, or serial numbers, commonly used in mass production. This technique involves pressing or hammering a metal stamp into the pencil surface—usually flat or hexagonal wooden pencils—to create a permanent impression.
Required Tools:
- Metal letter or logo stamp set
- Hammer or mallet (preferably brass or dead blow)
- Pencil (wooden and uncoated or lightly coated are ideal)
Steps to Engrave a Pencil via Stamping
Step 1: Choose and Align the Stamp
Select the appropriate letter or logo stamp. Position it on the flat side of the pencil where you want the mark to appear.
Step 2: Secure the Pencil
Lay the pencil flat on a hard surface or stamping block. Optionally, use a jig or clamp to keep it from moving.
Step 3: Strike the Stamp
Hold the stamp vertically and strike it firmly with a hammer. A single, controlled hit gives the best results. Repeat for each letter if stamping by hand.
Pros and Cons of Engraving Pencils via Stamping
👍Pros:
Simple, manual method—no software or electricity required
Permanent and deep markings
Works well on flat or hexagonal wooden pencils
👎Cons:
Not suitable for round pencils without special jigs
Can crack or break soft or brittle pencils if hit too hard
FAQs: Hot 10 Questions About Engraving Pencils
1. What is pencil engraving?
Pencil engraving involves the process of etching designs, text, or patterns onto the surface of pencils using various methods like laser engraving, hand engraving, or utilizing specialized machines.
2. What types of pencils can be engraved?
Wooden pencils are commonly used for engraving due to their smooth surface. However, mechanical pencils, colored pencils, and other materials suitable for engraving can also be used.
3. How does pencil engraving differ from pencil embossing?
Pencil engraving involves etching or carving designs into the surface, creating a visible indentation. Pencil embossing, on the other hand, raises the surface material to form a raised, textured design.
4. How to engrave a name on a pencil?
Engraving a name on a pencil can be done using various methods like laser engraving, hand engraving, or using specialized engraving machines. One method involves creating a stencil or design, then using an engraving machine to etch the name onto the pencil's surface.
5. What tools are needed to engrave pencils?
Tools required for pencil engraving may include engraving machines, fine-point blades, design software, adhesive materials for stencils, cleaning supplies, and safety gear.
6. Is pencil engraving permanent?
Yes, pencil engraving, when done correctly, creates permanent markings on the surface of the pencil, ensuring durability and longevity of the engraved design or text.
7. Can you engrave multiple pencils with the same design?
Yes, identical designs or text can be engraved on multiple pencils using engraving machines or methods that allow for batch processing.
8. Are there any limitations to what can be engraved on pencils?
The limitations may depend on the engraving method used and the precision of the equipment. However, intricate designs, logos, text, and patterns can typically be engraved on pencils.
9. What are some creative ideas for engraved pencils?
Engraved pencils make excellent personalized gifts, promotional items, or unique stationery. They can feature names, quotes, logos, or decorative designs tailored for special occasions or branding purposes.
10. How to personalize pencils for gifting purposes?
Personalizing pencils for gifting involves choosing meaningful designs, names, or messages and using engraving techniques to etch them onto the pencil's surface, creating unique and thoughtful gifts.
Conclusion
Engraving pencils is a creative way to personalize everyday items—whether for gifting, branding, or adding a special touch to your craft projects. Each method offers its own benefits.
- Laser engraving is perfect for fast, clean, and professional results.
- Rotary tools are great for hands-on customization.
- CNC machines deliver consistency and precision for small-scale production.
- Cricut engraving adds a decorative touch to coated pencils.
- Stamping provides a traditional, durable finish ideal for bulk marking.
No matter which method you choose, engraving transforms ordinary pencils into something unique and meaningful. Pick the approach that fits your tools and goals—and start creating your own custom designs today.


