Want to personalize a spoon for a gift, a keepsake, or a craft project? Engraving is a great way to turn a simple spoon into something unique and meaningful. From elegant initials to fun designs, engraving lets you add a personal touch to metal cutlery with tools ranging from advanced machines to simple hand tools.
In this article, we’ll explore six practical methods for engraving a spoon — including options for beginners, hobbyists, and professionals. Whether you have access to a laser engraver, a CNC machine, or just want to DIY with hand tools or a rotary tool, there's a method here that suits your needs, budget, and creativity.

In this article:
- Method 1: Engrave a Spoon with a Laser Engraving Machine
- Method 2: Engrave a Spoon with a Rotary Tool
- Method 3: Engrave a Spoon via Hand Carving Tool
- Method 4: Engrave a Spoon with Cricut Maker
- Method 5: Engrave a Spoon via Stamping
- Method 6: Engrave a Spoon via CNC Machine
- FAQs: Hot Questions About Engraving A Spoon
Method 1: Engrave a Spoon with a Laser Engraving Machine
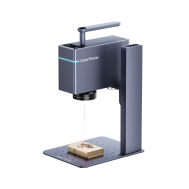
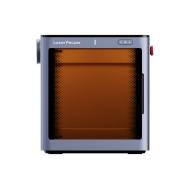
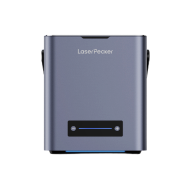
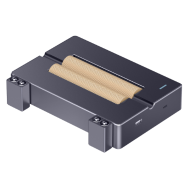
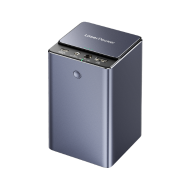
Laser engraving is one of the most efficient and precise ways to customize a spoon. Whether for personal gifts, branding, or decorative purposes, this method allows you to engrave text, logos, or patterns with high detail on both metal and wooden spoons.
What You'll Need for Laser Engraving a Spoon:
-
A laser engraving machine
Fiber laser: for metal spoons
Diode laser: for wooden spoons - Design software (e.g., LightBurn, LaserPecker Software & App)
Steps to Engrave a Spoon with a Laser Machine
Step 1: Clean the Spoon
Wipe the surface to remove oil or dust for better engraving results.
Step 2: Prepare Your Design
Use software to create or import your design, and adjust it to fit the spoon’s engraving area.
Step 3: Position and Focus
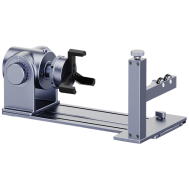
Secure the spoon on the laser bed. If engraving on a curved surface, use a rotary attachment. Adjust the focus.
Step 4: Set Parameters
Select the right speed, power, and number of passes based on the material.
Step 5: Run a Preview or Test Pass
Use a light outline or test engraving to confirm alignment.
Step 6: Engrave
Start the engraving. Monitor the process for safety.
Pros and Cons of Laser Engrave a Spoon
👍Pros:
Highly precise and professional results
Great for detailed logos, text, or small graphics
Fast and repeatable for batches
👎Cons:
Laser machine must be powerful and have enough bed space
Method 2: Engrave a Spoon with a Rotary Tool
Using a rotary tool is a hands-on and budget-friendly way to engrave spoons. It’s ideal for DIY enthusiasts who want to add simple designs, initials, or patterns on metal or wooden spoons without investing in expensive machinery.
Required Tools:
- Rotary tool or electric engraving pen
- Clamp, vise, or non-slip mat
Steps to Engrave a Spoon with a Rotary Tool
Step 1: Clean and Secure the Spoon
Remove any grease or dirt. Clamp the spoon securely to prevent slipping.
Step 2: Mark the Design
Sketch your design directly on the spoon with a marker or use a stencil.
Step 3: Choose the Right Bit
Diamond-tip bit: best for metal
Carbide or HSS bit: better for wood
Step 4: Engrave Slowly and Steadily
Turn on the rotary tool and start engraving with light pressure. Let the tool do the work—don't press too hard.
Step 5: Wipe and Refine
Clean off dust. For wood, lightly sand the engraved area. For metal, polish it if needed.
Pros and Cons of Engraving a Pen with a Rotary Tool
👍Pros:
Inexpensive and easy to get started
Great for personal, handmade touch
👎Cons:
Requires steady hand and patience
Hard to achieve very fine detail
Method 3: Engrave a Spoon via Hand Carving Tool
Hand carving is a traditional and artistic method best suited for wooden spoons. It gives a personal, rustic touch and allows for deep, textured designs. This method doesn’t require electricity, making it perfect for small craft projects or off-grid work.
Required Tools:
- Hand Carving Tools
- Engraving vise or clamp (to secure the pen)
- Wooden Spoon (softwoods like basswood or birch are easier to carve)
- Sandpaper (for smoothing the surface after carving)
Steps to Hand Engrave a Spoon
Step 1: Choose the Spoon and Tools
Select a smooth, clean wooden spoon and appropriate carving tools depending on the design
Step 2: Secure the Spoon
Use a clamp or hold the spoon firmly on a stable surface to prevent movement.
Step 3: Sketch the Design
Lightly draw your pattern or letters on the spoon with a pencil
Step 4: Start Carving
Carefully follow the design lines with the carving tools. Use shallow cuts at first and increase depth as needed.
Step 5: Finish the Surface
Once the design is complete, sand the edges and apply a food-safe finish or oil to preserve the wood and highlight the carving.
Pros and Cons of Hand Engrave a Pen
👍Pros:
No electricity required
Highly personalized and artistic
👎Cons:
Only works on wood (not suitable for metal spoons)
Time-consuming
Requires practice and good control
Method 4: Engrave a Spoon with Cricut Maker
The Cricut Maker is a versatile smart cutting machine that can also engrave certain materials using a special engraving tip. While it can’t engrave metal or wood spoons directly, it’s ideal for engraving on metal sheets (like aluminum blanks) that can later be attached to spoons for decorative or personalized purposes.
Required Tools:
- Cricut Maker
- StrongGrip Mat
- Blank wooden or metal spoon (for attachment)
Steps to Engrave a Spoon with Cricut Maker
Step 1: Create Your Design
Open Cricut Design Space and create or import the text/design you want engraved.
Step 2: Place the Metal Blank on the Mat
Secure your aluminum blank onto a StrongGrip mat using masking tape to prevent movement.
Step 3: Engrave the Design
Send the project to the Cricut and let it engrave the design onto the metal tag.
Step 4: Clean and Attach
After engraving, clean off any debris. Attach the engraved blank to the spoon using glue or a decorative method (like wrapping with wire or tying with ribbon).
Pros and Cons of Engraving a Pen Using a CNC Machine
👍Pros:
High precision with clean lines
Ideal for repeatable designs
👎Cons:
Only works with specific materials (like aluminum)
Method 5: Engrave a Spoon via Stamping
Metal stamping is a traditional and hands-on method for engraving words, names, or designs onto spoons using steel stamps and a hammer. It’s a popular DIY technique for personalizing flatware—especially vintage or stainless steel spoons—with a charming handmade touch.
Required Tools:
- Steel alphabet/number stamps
- Metal spoon (preferably stainless steel or silver-plated)
- Metal stamping hammer (or a regular small hammer)
Steps to Engrave a Spoon via Stamping
Step 1: Choose and Prepare the Spoon
Use a flat area of the spoon (typically the bowl). If it’s slightly curved, you may need to flatten it with a rubber mallet.
Step 2: Mark the Stamping Area
Use masking tape to create a straight guide line and hold the spoon in place.
Step 3: Stamp the Design
Position a steel stamp on the metal and hit it firmly once with a hammer to leave a clean impression. Repeat for each character or design.
Step 4: Darken the Engraving
Rub a black permanent marker or stamping enamel over the stamped letters and wipe away the excess to make the impression stand out.
Step 5: Polish the Spoon
Use a polishing cloth or steel wool to clean up any residue and give it a finished look.
Pros and Cons of Engraving a Spoon via Stamping
👍Pros:
No power tools required
Affordable and beginner-friendly
👎Cons:
Requires precision and steady hands
Mistakes can't be undone
Method 6: Engrave a Spoon via CNC Machine
Engraving a spoon with a CNC (Computer Numerical Control) machine is a precise, automated method ideal for professional or batch customization. With the right setup and design, CNC machines can engrave intricate text or graphics onto metal spoons with consistent depth and detail.
Required Tools:
- CNC engraving machine
- Metal spoon (preferably stainless steel or aluminum)
- Work-holding jig or clamp to secure the spoon
Steps to Engrave a Spoon via CNC Machine
Step 1: Design Your Engraving
Create or import your text/logo design into CAD software and convert it into a toolpath using CAM software.
Step 2: Secure the Spoon
Firmly clamp the spoon to the CNC bed using a custom jig or clamp to avoid movement during engraving.
Step 3: Load the Tool and Set Zero Point
Install the appropriate bit and set the origin point (X, Y, Z) based on your design.
Step 4: Run the Engraving Job
Start the CNC process and monitor the engraving to ensure it proceeds smoothly.
Step 5: Finishing Touches
Once complete, clean and polish the spoon to remove debris and enhance the visibility of the engraving.
Pros and Cons of Engraving a Spoon via CNC Machine
👍Pros:
Extremely precise and consistent
Capable of complex and detailed designs
👎Cons:
Expensive equipment and software
Steeper learning curve
FAQs: Hot Questions About Engraving A Spoon
1. Can Any Spoon Be Engraved?
Opt for materials like stainless steel or silver. Ensure the spoon's surface is clean and smooth.
2. What Tools Are Essential for Spoon Engraving?
Basic tools include a suitable spoon, engraving tools, safety gear, and design transfer materials.
3. Is Spoon Engraving Beginner-Friendly?
Absolutely! Beginners can achieve impressive results with the right tools and a bit of practice.
4. Which Engraving Technique Should I Choose?
Consider hand engraving for precision, electric engraving for efficiency, or chemical etching for unique designs.
5. Do I Need Design Skills for Spoon Engraving?
Not necessarily. Start with simple designs and use templates or stencils to assist.
6. How Do I Care for Engraved Spoons?
Clean with care using a soft brush or cloth. Avoid abrasive cleaners to preserve the engraved design. Regular maintenance ensures longevity.
Conclusion
Engraving a spoon can be as simple or sophisticated as you want it to be. Whether you're using a laser engraving machine for precision, a Cricut for crafting, or hand tools for a personal touch, each method has its own charm and level of accessibility.
By choosing the method that fits your goals, tools, and skill level, you can create a custom-engraved spoon that's perfect for gifts, events, or personal collections. Now that you've seen all the options, it’s time to pick your favorite technique and start engraving!


