


Signs do a lot. They tell people where to go, what something is, and build a brand. Good signs need to be easy to read, tough, and look good doing it. Laser cutting has become a go-to way to make signs. It's sharp, works on lots of things, and gives a clean look that's hard to get any other way.
This guide will go over why laser cutting is great for signs, how it stacks up against other ways of making them, and how using two lasers can do even more. We'll talk about which materials work best and the steps to make your own signs.

In this article:
Part 1: Why Laser Cutting is Popular for Making Signs
When it comes to making signs, laser cutting has become super popular, and for good reason. It's precise, speedy, and opens up all sorts of design options. Old ways of cutting signs - think doing it by hand - often leave rough edges. You then have to spend extra time cleaning things up.
A laser? It gives you clean, smooth edges from the start, saving you effort. Plus, laser cutting is all about consistency. Got a digital design? Great! Every single sign will match perfectly. This is a major win for businesses wanting their branding to look uniform across the board.
Finally, whether you need a sign or a hundred, laser cutting is a smart bet. You can get a single sign made for a small shop or outfit a huge event with tons of signs, and know they'll all look fantastic.

Part 2: Why Laser Cutting Outperforms Other Sign Cutting Methods
You can make signs in lots of ways - cutting by hand, using CNC milling machines, die cutting, even waterjets. People still use these, but they can take longer to set up, cost more to keep running, or only work with certain things.
Laser cutting is different since it doesn't use blades that get dull. It's great for small details and can cut many types of material. It's quicker, neater, and more flexible than older methods, and that makes it a favorite for making signs now.
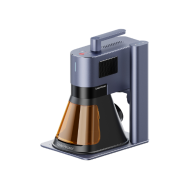
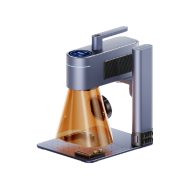
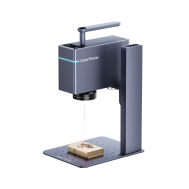
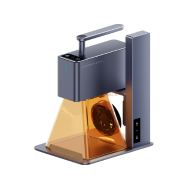
Product Insight - Laser Cutting Signs
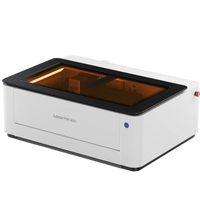
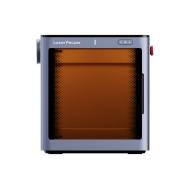
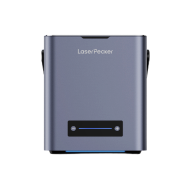
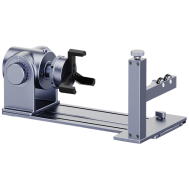
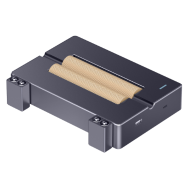
To see the advantages of laser cutting, we can examine a contemporary dual-laser system, like LaserPecker LP5, designed for both engraving and cutting. A system like this combines a 20W fiber laser with a 20W diode laser in one unit. That allows the machine to handle many different sign materials.
Accuracy and Speed
A key thing about this machine is its accuracy. Engraving reaches 0.0027 mm accuracy, so even the smallest details in logos, patterns, and text are clear. For sign makers, this means very fine fonts and lettering are sharp and easy to read.
Speed is also important. This laser can move as fast as 10,000 mm each second, so projects get done quicker. This is helpful for businesses that need many signs completed fast, like stores preparing for sales or event planners facing deadlines.
Material Versatility
Two lasers give you more choices than single-laser machines:
- The fiber laser can cut thin metal sheets such as brass, stainless steel, aluminum, and titanium, up to 1 mm thick. It produces precise, clean edges that are ideal for durable outdoor signs and labels.
- The diode laser is great for cutting and engraving materials like wood, acrylic, and plastics. It can cut wood up to 20 mm thick and acrylic up to 15 mm thick, creating smooth edges without needing sanding.
With both lasers, sign makers can work with different materials using one machine. You could cut acrylic letters, engrave a metal plate for durability, and add a wood background for a nice look, all using one system.
Efficient Process
These dual-laser systems are made to be user-friendly. They have preview modes that show how the design will look before cutting, which lowers errors. They also partner with design programs like LightBurn and have a mobile app, so changing settings or switching projects is quick.
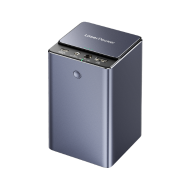
Often, these machines are small and easy to move, around 6 kilograms. They're useful in different places. This is good for businesses or designers with little workspace or who want to move the machine.
How It Helps with Signs
For making signs, these skills give you worthwhile results:
- 3D letters: Thick acrylic or wood can be cut and stacked to make signs that stand out.
- Signs with different materials: Wood, metal, and acrylic together add visual interest and give signs a unique look.
- Outdoor signs: Metal engravings last when exposed to the weather, so they are lasting for public places.
- Custom designs: Detailed engraving on different materials ensures logos and text look professional.
By mixing power, speed, and material choices, dual-laser systems are a top choice for making signs today. You have creative power and can make signs fast, working from simple custom signs to big orders for businesses.
Part 3: Choosing the Right Materials for Laser-Cut Signs
Acrylic
You can get acrylic in a bunch of colors and looks. It's light, can handle the weather, and is great if you want a sign that lights up. When you laser cut it, the edges are so smooth that you usually don't have to do any extra work on them.
Wood
If you want a sign that feels natural, plywood, MDF, or hardwood are good picks. They're nice for signs that have a rustic feel. They cut without problems, and you can mark them to add details.

Metal
Stainless steel, aluminum, and brass are strong and give a modern vibe. They're good if you want a sign that looks fancy or industrial. You can laser cut thin sheets of metal so they're exact. That makes them last if they're outside.
Plastic and Composites
These are cheap, light, and can be used for many things. They can look like pricier stuff, but don't cost as much to make.
Paperboard and Cardboard
These are best for signs you only need for a bit, like for an event, or if you're testing out a design. They're simple to cut and super cheap.
What you should use all depends on where you're putting the sign, how long you need it to stick around, and how you want it to look.
Part 4: Step-by-Step Guide to Laser Cutting Signs
Making a laser-cut sign might look hard at the start, but if you split it into easy steps, anyone can do it. If you follow the steps, your signs will look sharp and great. Here's how to laser-cut signs to get you going:
- Know what it's for: Is it for your brand, cool decoration, directions, or a party?
- Make a design: Use vector files (like SVG or DXF) to cut, and regular images for engraving. Make sure your design is clear and can be scaled without losing quality.
- Get your stuff ready: Choose the right material and clean it first.
- Set up the laser: Change the power, speed, and focus depending on what you're cutting. Do some small tests to see if it looks good.
- Hold it down: Make sure the material doesn't move. Check the alignment with a preview.
- Start cutting: Begin cutting and watch the first few passes to make sure the edges are clean. Keep the air flowing for safety.
- Clean up: Take off any films, wipe it down, smooth the edges, or paint it.
- Put it all together: If you have layers, stick them together. Add what you need to hang it up, and check to be sure it looks good and will last.

Part 5: Applications of Laser-Cut Signs
Laser-cut signs are really versatile and work well in lots of places. Sure, they guide people and label rooms, but they also look good and build your brand. Shops, schools, restaurants - you name it - can use these signs to look sharp, make a statement, and get creative.
Here's a quick look at how different industries use laser-cut signs:
| Application | Examples |
|---|---|
| Retail | Logos, displays, eye-catching signs |
| Corporate | Lobby signs, nameplates, directional signs |
| Events | Wedding decorations, trade shows, custom signs |
| Hospitality | Menus, art pieces, illuminated signs |
| Public Spaces | Safety signs, directional signage, access signs |
| Education | Classroom, lab, campus maps |
| Art | Installations, decorative pieces |
| Promotions | Keychains, plaques, desk signs |
Laser-cut signs work great for creative projects and everyday stuff. So, businesses, schools, and artists should find them really useful.
Part 6: FAQs about Laser-Cut Signs
1. Can laser cutters handle any material?
Laser cutters are really flexible, but some materials just don't work. Wood, acrylic, most plastics, and thin metals are great. Some machines can even handle both metal and other materials. But PVC is a no-go because it creates bad fumes when cut. If you pick the right system, it can handle almost any sign material you'd normally use.
2. How exact are laser-cut signs?
Laser systems can make copies of designs down to tiny sizes. The edges are even, clean, and the same every time, so you can see details you wouldn't normally catch. This is great for fancy fonts, detailed logos, or designs you couldn't do by hand. Businesses can keep their branding the same on every sign, no matter the size.
3. Can laser-cut signs last outside?
Sure—if you use the right stuff. Acrylic and metals like stainless steel or aluminum can handle weather, sunlight, and hot or cold temperatures. Wood signs can also last outside if you seal them. Laser cutting makes clean, sealed edges, so these signs don't wear out as fast as those made with regular cutting. It's not just the material, it's the clean cut that makes them tough.
4. Is laser cutting cheap?
The machines cost a bit up front, but the process pays for itself over time. Laser cutting is quick, doesn't need much work by hand, and wastes very little material. The accuracy stops mess-ups on small jobs, and the speed lowers the price for big jobs. You save on labor and finishing, which makes it cheaper than older ways of making signs, especially if you make signs all the time.


