Custom door mats? They're a simple trick to inject some personality into your space. They greet people, represent your brand, or just give your home a bit more flair as a decoration - a custom mat brings character right to your doorstep. With current engraving, printing options, and resin tricks, making your own door mats is easier than ever.
This guide will walk you through some great ways to do it, show you how to laser-engrave designs, and give you tips to help them last.

In this article:
- Part 1: 5 Ways To Customize Door Mats
- Method 1: Handmade Custom Doormats
- Method 2: Laser-Engraved Doormat
- Method 3: Screen Printing or Digital Printing
- Method 4: Molded Base with Personalized Finishing
- Method 5: Resin Pouring / Epoxy Encapsulation
- Part 2: How to Laser Engrave Designs and Text on Doormats
- Part 3: Tips for Making Door Mats
- Part 4: FAQs about Making a Personalized Door Mat
Part 1: 5 Ways to Customize Door Mats
Doormats are made from lots of things-coir, rubber, plastic, and fabric, and each one gives a special touch to your place. If you want a doormat that is special to your home, here are five ideas to get you started.
Method 1: Handmade Custom Doormats
Handmade door mats are an easy way to give your home a bit of personality. They're simple to make yourself, with stencils and outdoor paint. You can add a custom welcome message or a cool design. These mats are a hit with DIY fans. They're also good if small businesses want to sell something different. They may not last a lifetime, but they offer a rustic, genuine touch that makes them great as gifts or for sprucing up your own front door.

Method 2: Laser-Engraved Doormat
Laser engraving is super precise and lasts ages. Basically, it burns the top layer of stuff like coir, cork, or rubber mats to carve in whatever you want - words, designs, logos, you name it. The finish is neat, can handle the weather, and looks really pro. It's a cool option if you're a business or just someone at home who wants things to look top-notch and exactly the same every time.

Method 3: Screen Printing or Digital Printing
With printing, the ink goes straight onto the material. Screen printing works very well for bold colors and simple designs. Digital printing allows for more intricate images. Just note that these prints might fade with heavy use or if left in the sun, so sealing them properly is important.

Method 4: Molded Base with Personalized Finishing
Custom rubber or PVC mats with logos or names can be made to order. This industrial method makes very tough mats, often seen in hotels, offices, and places that want to promote their brand. They cost more and need molds to be made; the quality and exactness are top-notch.
Method 5: Resin Pouring / Epoxy Encapsulation
Epoxy resin pouring is a popular do-it-yourself trend where people embed things like photos, names, or glitter under a clear resin layer. The result is a glossy, waterproof, and fancy finish. This works best for indoor or decorative mats because it's not really suited for busy outdoor spots.
Comparison Table
| Method | Suitable Materials | Design Precision | Durability | Best For | Skill Level |
|---|---|---|---|---|---|
| Laser Engraving (Recommended) | Coir, Rubber, Cork, PVC | ★★★★★ | ★★★★★ | Businesses, premium gifts | ★★☆☆☆ |
| Handmade Painting | Coir, Fabric | ★★☆☆☆ | ★★☆☆☆ | DIY users, casual makers | ★★★☆☆ |
| Screen/Digital Printing | Fabric, Rubber | ★★★★☆ | ★★★☆☆ | Marketing or colorful designs | ★★★☆☆ |
| Molded Custom Base | Rubber, PVC | ★★★★★ | ★★★★★ | Hotels, corporate branding | ★★★★★ |
| Resin/Epoxy Pouring | MDF, Wood, Acrylic | ★★★☆☆ | ★★★★☆ | Indoor décor, creative art | ★★★☆☆ |
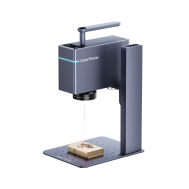
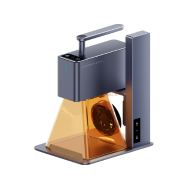
Laser engraving is a great choice because it's affordable, precise, and creates long-lasting results. Tools such as the LP4, with its dual-laser tech, work well on many different materials, making the process even better.
In the next section, we'll guide you through the step-by-step process of creating custom door mat using a laser engraver or cutter.
Part 2: How to Laser-Engrave Designs and Text on Doormats
Laser engraving is a fast and precise way to make pro-level, durable designs on all sorts of doormats. Follow the steps below to laser engrave designs and text on door mats.
Tools and Materials Prepare
Before starting, gather these items:
- A diode laser engraver
- Design software like LightBurn or LaserPecker Design Space
- Masking tape or protective sheet
- Flat mats made of coir, rubber, cork, or PVC
- AirPurifier or a fume extractor
- Cleaning brush or compressed air
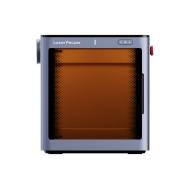
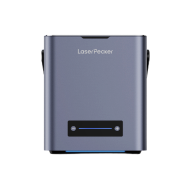
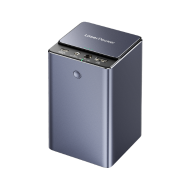
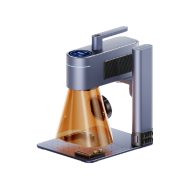
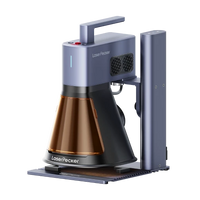
Choosing a versatile laser engraver is important. The LP4 Laser Engraver is a solid choice. As a dual-laser machine, it has a 10W blue diode laser (450nm) and a 2W infrared laser (1064nm). It works well on soft materials, rubber, or coated PVC, creating even designs without burn marks. It's simple to use with a touchscreen and can engrave at different angles, making it great for beginners and professionals alike.
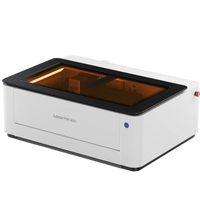
Or, you can choose the LaserPecker LX2. With powerful 20W/40W/60W diode laser options, it's built to cut through larger materials effortlessly—making it the ultimate choice for large doormat engraving projects.
Steps of Personalized Door Mats by Laser Engraver
Step 1: Design Time
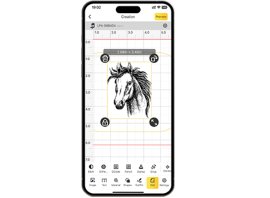
Start with your design. Use software like LightBurn or LaserPecker Design Space to make crisp shapes and clear words. Go for simple, strong designs – thin lines don't always work because of the material's texture. Try out different fonts and spacing to see what looks good on the mat you are using. Black and white files usually give the best results, and centering your text or logo helps it look professional.
Step 2: Mat Prep
Clean the mat to remove dust, and lay it flat to stop errors. Tape or clip it to the laser bed to hold it still. If your mat was rolled up, flatten it with weights before you start. Make sure the design lines up on your screen so it prints straight and centered.
Step 3: Laser Settings
Different materials react differently. Coir and cork do well with low to medium power and slow speeds to get dark marks, but avoid burning. Rubber or PVC can take a bit more power. Always test on a small spot first, and save the settings that give you the best lines. With machines like the LP4, you can change power and speed as you go, so you don't have to restart.
Step 4: Engraving
Start engraving and watch closely. Lasers like the LP4 give a consistent depth and clean edges. Good airflow is needed to clear smoke and stop residue from messing up your design. If you're working on big mats, engrave in parts to keep things sharp. Wait until the surface is cool before touching it.
Step 5: Final Touches
Once done, brush off any bits and wipe with a dry cloth. A light coat of clear outdoor sealant can bring out the color and protect against water or fading. Check under good light, and if some spots look too light, engrave them again using the LP4's Engrave Again feature. A polish gives a clean, nice finish, ready for use or gifting.
Part 3: Tips for Making Door Mats
- Choose strong materials like coir, rubber, or PVC. They hold up outside and show off engravings well.
- Go for bold designs. Small details get lost in rough materials.
- Make sure surfaces are clean and dry before you start engraving for even results.
- If you paint or print on the mat, seal it with outdoor polyurethane to keep the colors from fading.
- Use templates to line up logos or borders perfectly.
- If you're using epoxy resin, pour it slowly and gently heat it to get rid of bubbles.
- Add names or house numbers to give your mat a personal and inviting touch.
- Always test your settings on scrap material first to get the right depth and look.
- Keep your mat clean by shaking or brushing it each week to keep the engraved parts clear.
With the good design, right laser settings, and quality stuff, you can design door mats that last, look good, and show off your style. They're great for homes, offices, or showing off your brand.
Part 4: FAQs about Making a Personalized Door Mat
1. What materials are best for laser-engraved doormats?
Coir, cork, and rubber work best. They don't get ruined by the heat and keep the design looking good. Coir is more natural and old-school, while rubber looks modern and clean. Don't use thin fabric because it can burn. If you want something tough with details, try a coir with a rubber back.
2. Can I engrave colored designs with a laser?
Lasers usually make dark or one-color marks, so you can't get full color that way. But you can try other things. You could engrave the main design and then use outdoor paint to make it colorful. Some folks engrave the outline and paint in the colors. It mixes tech and art!
3. How long does a custom laser-engraved doormat last?
If you select good stuff and seal it up, the engravings can stay around for like three to five years, or maybe longer. Laser engraving doesn't peel off or fade like those vinyl or ink things. Being outside can age the surface, but the engraving should stick around. Just clean it every so often and add a light coat to keep it fresh.
4. Is laser engraving safe to do at home?
Yeah, if you watch yourself and have the right stuff. New desktop engravers, such as the LP4, have sensors for safety. Make sure you wear safety glasses and have air flow in the area. For the highest level of protection, a LaserPecker standard enclosure is recommended, which blocks 99.9% of laser light, so you can engrave safely without safety glasses. Also, don't let it run without anyone watching. If you're careful, it can be a fun thing to do at home.
Conclusion
Custom door mats blend how well something works with what you like, making a great first impression for any place. You can choose painted designs, fun prints, or precise laser engraving - each has its own cool style.
That said, laser engraving is really accurate, lasts a long time, and is super efficient, especially if you use a strong dual-laser setup like the LP4. With the proper tools, some creativity, and careful work, you can make door mats that greet everyone and show off your taste for a long time.


