Leather book covers offer protection, style, and a personal touch. They keep your books safe while turning them into lasting keepsakes. Making one yourself lets you experiment with methods and designs, creating a cover that shows off your skills.
This article shows you how to make a leather book cover. We’ll go over different ways of doing it, from using hand tools to machines like Cricuts, CNCs, and laser cutters. I'll break down what's good and bad about each way, list the tools you'll need, and give you simple steps to crafting your own unique leather book cover.

In this article:
- Part 1: Why Make Your Own Leather Book Cover?
- Part 2: Top 4 Methods to Make a Leather Book Cover
- Method 1: Make a Leather Book Cover by Hand
- Method 2: Make a Leather Book Cover with Cricut
- Method 3: Make a Leather Book Cover with a CNC Machine
- Method 4: Make a Leather Book Cover with a Laser Cutter
- Part 3: Creative Ideas for DIY Leather Book Covers
- Part 4: Tips for Making the Best Leather Book Cover
- FAQs Questions about Making a Leather Book Cover
Part 1: Why Make Your Own Leather Book Cover?
Making your own leather book cover lets you be in charge. Pick your leather, check the size, and add your own touch with things like your initials or special stitching. With this craft, try adding creative bits like initials, engravings, or cool stitches to turn a plain book into a special keepsake. It’s a fun and useful thing to do, mixing how it works with your own style.
Part 2: Top 4 Methods to Make a Leather Book Cover
There are multiple ways to make a leather book cover, each with trade-offs in accuracy, customization, and equipment. These four methods suit diverse skill levels, whether you prefer handcrafting or using machines to speed up the work.
Method 1: Make a Leather Book Cover by Hand
Making a leather book cover by hand is an old-school craft. It takes some skill, a lot of patience, and careful work.
Pros and Cons
Pros: You’re in charge of everything. You pick the leather, the stitch style—everything. You don’t even need fancy machines.
Cons: It takes a while to become skilled at it. Hand tools aren’t as perfect as machines, so errors can be tough to fix.
Tools and Materials
- Real or fake leather
- Cutting board and cutter or knife
- Ruler and measuring tape
- Leather punch and awl
- Waxed thread and needles
- Edge smoother and burnisher
- A book or notebook to measure
Step-by-Step Guide
Step 1: Measure your book, leaving a bit of extra room for folding and sewing when you cut.
Step 2: Cut the leather to the right size using a cutter or knife.
Step 3: Make consistent, evenly spaced holes for sewing along the edges. A leather punch or awl works great.
Step 4: Sew the edges tightly with waxed thread using a strong stitch so that they hold firmly.
Step 5: Smooth and polish the edges with a smoother, burnisher, and some wax.
Step 6: Make it your own! Add stamps, patterns, or some color.
Step 7: Put the cover on your book and make sure it fits well.
Method 2: Make a Leather Book Cover with Cricut
Cricut machines can cut many things, even thin leather. They're quicker and more exact than cutting by hand.
Pros and Cons
Pros: You get exact cuts and clean edges. Also, you can use digital patterns. It's great if you're just starting and want good results without a lot of hand-cutting.
Cons: It’s better to use thin leathers; the size of what you can make depends on how big your Cricut's cutting area is.
Tools and Materials
- Cricut machine with a deep-cut blade
- Leather sheet for Cricut (real or fake, less than 2.4mm thick)
- Strong grip cutting mat
- Ruler and cutting tools for changes
- Thread, needle, or glue to put it together
Step-by-Step Guide
Step 1: Whip up your book cover design in Cricut Design Space, or snag one that’s already good to go.
Step 2: Slap your leather piece onto a strong grip mat – make sure it sticks really good.
Step 3: Toss in that deep-cut blade and adjust your machine’s settings; get them just right for the leather you are using.
Step 4: Let the Cricut do its thing and slice that leather. Keep an eye on it to make sure the edges come out nice and clean.
Step 5: Gently peel off the cut pieces, little by little. Be careful, you want to avoid any stretching or tearing.
Step 6: Put it all together. You can sew or glue it; whatever works
Step 7: Spice it up! Put on some vinyl, foil, or stitches to make it stand out.
Method 3: Make a Leather Book Cover with a CNC Machine
A CNC machine lets you cut thick leather or make carved designs. It's a stronger way to produce leather goods.
Pros and Cons
Pros: Very exact and consistent, it can manage thick or stiff leathers. It can carve detailed patterns and cut many covers fast.
Cons: You need a CNC setup, which can cost a lot and be tricky to use. It also takes longer to set up than easier ways.
Tools and Materials
- A CNC machine with bits or a laser for leather
- Leather sheets (real, thick, or patterned)
- Clamps to hold the leather in place
- CAD software to design your cover
- Thread, glue, or rivets to hold the edges together
Step-by-Step Guide
Step 1: Design it using CAD software. Change sizes and engravings as needed.
Step 2: Put the leather sheet on the CNC machine. Make sure it's secure.
Step 3: Pick the right cutting bit and set how deep it should cut.
Step 4: Test it on some scrap material to be sure it's cutting right.
Step 5: Cut and carve the leather based on your design.
Step 6: Put the cover together by sewing, using rivets, or glueing.
Step 7: Smooth the edges and add polish or conditioner to protect the leather:
Method 4: Make a Leather Book Cover with a Laser Cutter
Laser cutting and engraving can revolutionize your leather work, improving accuracy, speed, and creative options. A laser cutter isn't just for cutting shapes; it can also add designs, text, or logos to leather.
Pros and Cons
Pros: Laser cutters give really clean cuts, work for all sorts of designs, and let you add custom engravings. Plus, they're faster and more exact than cutting leather by hand.
Cons: You have to have a laser cutter and know a bit about design. Also, you could end up with burn marks on your leather if you don't get the settings just right.
Tools and Materials
- A laser cutter
- Leather sheets (vegetable-tanned are best for engraving)
- LaserPecker Design Space for your patterns
- Thread, glue, or snaps for assembly
Step-by-Step Guide
Step 1: Get your book cover design ready on your computer. Think about the size and all the cool details you want.
Step 2: Grab your leather and put it on the laser cutter. Make sure it's stuck down well, so it doesn't move around.
Step 3: Adjust the laser settings just right for your leather. You don't want to burn it!
Step 4: Time to cut out all the leather bits for your cover.
Step 5: If you want, engrave some designs, initials, or a logo onto the leather to make it your own.
Step 6: put some leather oil on it to keep it looking good for ages.
Step 7: Apply leather oil or conditioner to protect and maintain the leather’s appearance.
Making Leather Book Covers with the LP5
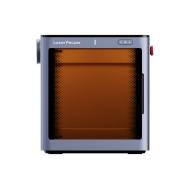
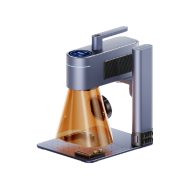
The LaserPecker LP5 upgrades leather crafting. It uses two lasers: a 20W blue diode laser and a 20W fiber laser. Together, they make this a strong, all-around tool for leather projects, be it simple cuts or detailed engravings.

Source: LaserPecker LP5 FaceBook Group
Engraving: The fiber laser lets you etch crisp text, logos, or detailed designs onto leather for a lasting, pro touch. The diode laser is great for cool patterns on natural stuff like leather or wood.
Cutting: The LP5’s diode laser cuts up to 20mm of basswood and thick items precisely. Plus, the fiber laser handles 1mm metal sheets if you want to add metal to your leatherwork. For leather, the diode laser cleanly cuts thin to medium pieces, helping you make smooth-edged book covers and custom cut-outs.
Quick and Exact: It engraves at up to 10,000mm/s, so even tricky or raised leather designs are done fast, with all the details kept sharp.
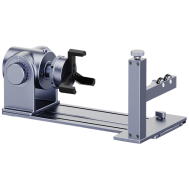
Do More: Add-ons like the slide extension (160 × 300mm work area) and the rotary extension for round stuff let you do more than just flat covers. Think straps, buckles, or matching items.
Simple and secure: The LP5 uses LightBurn and LaserPecker Design Space for easy drag-and-drop use. Built with a safety box makes it safe to use inside, whether in studios or classrooms.
For leather book covers, the LP5 does more than just cut and engrave. It lets you customize and improve your projects with pro-level detail, speed, and flexibility.
Part 3: Creative Ideas for DIY Leather Book Covers
So you've got the basics of a leather book cover down. Now comes the really cool bit – making it yours. It's not just about making it look pretty. It's about turning it into something special. Think unique gift or a personal touch for your own books. Here's how to make your leather book cover pop:
Initials or Names: Make your cover special by adding initials. This is a nice personal touch, especially if it's a gift.
Two-Tone Leather: Use two kinds of leather for a cool look. Try dark brown with light brown for something modern.
Embossed Designs: Put designs on your cover to make it stand out. Simple patterns look great.
Fancy Stitching: Use colorful thread to stitch patterns. It turns a plain cover into a work of art.
Leather and Fabric: Mix leather with denim or cotton. It gives you a unique style and feel.
Part 4: Tips for Making the Best Leather Book Cover
Even if you've got all the right gear, the little things matter big time in the end. Nail your measurements, pick good leather, and focus on how you finish things off. That way, your cover will not only look pro but also last and feel awesome to hold. Here's some simple advice to help you get it right:
Measure Twice, Cut Once: Get your book's size down pat – length, width, the whole deal. Add a bit extra for folding and stitching. Trust me, spot-on measurements save leather and make it fit just right.
Choosing Leather: If you want to carve something, get vegetable-tanned leather. Need something soft to work with? Grab a softer kind. Better leather means your cover will last longer and look awesome.
Test it Out: Before you cut, sew, or whatever, try your design on some scrap leather. This way, you can mess with your tools and not mess up the good stuff.
Make Edges Look Great: Get an edge beveler, a burnishing tool, and wax to smooth and shine your edges. Clean edges make it look good and keep the leather from falling apart.
Taking Care: Once you're done, treat your cover with leather conditioner or oil. It'll make the color pop, add shine, and keep it looking good for, like, forever.
FAQs: Questions about Making a Leather Book Cover
1. What leather works best for book covers?
Veg-tan leather is usually the best option. It's tough and keeps its shape nicely. Plus, you can stamp it, engrave it, or dye it to jazz it up. If you want something softer that bends easily, go with chrome-tanned or oil-tanned leather. If you're just starting, thinner leather is easier to cut and sew. But, thicker leather gives a more fancy feel.
2. Do I need special tools to make a leather book cover?
Not really, but you'll need more patience. A sharp knife, ruler, and some tough thread will work if you're just messing around. If you try proper leather tools – like a hole punch or edge finisher - you'll see the difference fast. They help the cover look cleaner and more professional without a ton of extra effort.
3. How do I care for a leather book cover?
Treat it like a nice pair of shoes - clean and condition it now and then. Some light leather oil or conditioner will keep it from drying out and cracking. Don't get it super wet or leave it in the sun. If it gets dirty, just wipe it with a damp cloth and let it dry on its own.
4. Can I customize leather book covers for gifts or to resell?
For sure. That's a big reason why people like them. You can stamp initials on it, engrave a cool saying, or add a cool stitch to the sides to make them pop. A leather cover that’s handmade feels personal, so it’s a mindful gift. And if you want to sell them, people dig that each one is a bit different.
Conclusion
Want to give your books a personal touch? Try making a leather cover! It’s a cool, practical project. You can cut the leather by hand, or if you have a Cricut or laser cutter, that works too. Either way, the cover will scream you. Grab your stuff, get crafty, and transform a regular book into a keepsake that lasts.


