


Custom tumblers have become a popular way to showcase personal style, promote brands, or create memorable gifts. Whether you want to add a name, logo, or a unique design, making custom, tumblers at home is easier than ever. From high-tech laser engraving to simple DIY decals, there are several creative methods to transform a plain tumbler into a personalized masterpiece.
In this article, we'll explore 5 practical and creative ways you can customize your tumblers right at home, with step-by-step guides, pros, and cons to help you choose the best method for your needs.

In this article:
- Method 1: Make Custom Tumblers with a Laser Engraver
- Method 2: Make Custom Tumblers with UV Printer
- Method 3: Make Custom Tumblers with Cricut
- Method 4: Make Custom Tumblers via Heat Press
- Method 5: Make Custom Tumblers via Waterslide Decals
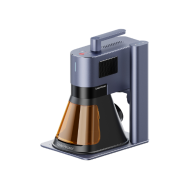
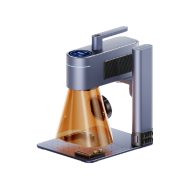
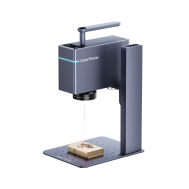
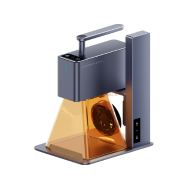
Method 1: Make Custom Tumblers with a Laser Engraver
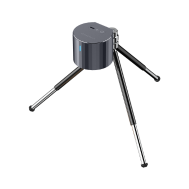
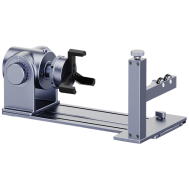
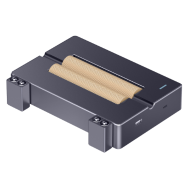
Laser engraving uses a focused beam to etch designs directly onto a tumbler's surface, creating a clean, permanent finish. It's ideal for stainless steel or powder-coated tumblers. With a rotary attachment, the tumbler rotates smoothly for even engraving. This method offers high precision and durability, making it a top choice for personalized tumblers designs.
What You'll Need for laser engraving tumblers:
- Diode or fiber Laser engraver (rotary attachment recommended for curved tumblers)
- Stainless steel or powder-coated tumbler
- Masking tape or wet paper towel (if required)
- Design software (e.g., LightBurn, LaserPecker Software & App)
- Ventilation (for safety)
Step 1: Prepare Your Design
Open your design in compatible software like LightBurn or the LaserPecker software & app. Resize it to fit the tumbler and make sure the layout looks right. If needed, mirror the design or adjust the position to suit how the tumbler will be engraved.
Step 2: Set Up the Tumbler
Attach the rotary module and place the tumbler on it securely. Make sure the surface is clean and the tumbler is level so it rotates smoothly. A stable setup helps avoid misalignment during engraving.
Step 3: Adjust Settings and Engrave
Select the right power, speed, and focus for your material—usually higher power for stainless steel. Once everything is ready, start the engraving and watch closely to ensure it runs smoothly.
Step 4: Clean the Tumbler
Clean the tumbler afterward to remove any residue.
Pros of laser engraving tumblers
Durable & Permanent: The engraving won't peel, fade, or scratch over time.
Professional Finish: Creates clean, detailed, and high-contrast results, especially on powder-coated or stainless steel tumblers.
Customizable: Supports a wide range of designs, from text to intricate patterns and logos.
No Consumables Needed: Unlike decals or vinyl, it doesn't rely on ink or adhesive materials.
Cons of laser engraving tumblers
Higher Initial Cost: Requires a laser engraver and rotary attachment, which may be costly for casual users.
Ventilation Required: Engraving can produce smoke or fumes, so proper ventilation is important for indoor use.
Method 2: Make Custom Tumblers with UV Printer
UV printing uses ultraviolet light to instantly cure special inks as they're printed directly onto the surface of a tumbler. Unlike engraving, it doesn't remove material but adds a thin printed layer on top. This method allows for full-color, photo-quality designs and works well on smooth materials like metal, plastic, acrylic, or glass. It's commonly used in commercial settings, but compact desktop UV printers are now available for home use.
Step 1: Prepare Your Design
Use design software (like Adobe Illustrator or a UV printer's built-in app) to create or import your artwork. Make sure the design resolution is high, especially if you're printing photos or fine details. Export the file in the format your printer supports, such as PNG or PDF.
Step 2: Set Up the Tumbler
Place the tumbler onto the rotary jig or fixture inside the UV printer. Clean the surface to ensure good ink adhesion. Some tumblers may need a primer or pre-treatment, especially if they are smooth or coated. Secure the tumbler and check the alignment before printing.
Step 3: Print and Cure
Select the proper print settings based on the tumbler material and ink type. Start the printing process—UV light will cure the ink instantly as it's applied. After printing, let the tumbler sit briefly for full curing. If needed, apply a clear coat for added protection.
Pros of make custom tumblers with an UV printer
Full-Color Printing: Allows for vibrant, detailed images and gradients that engraving can't produce.
Smooth Surface: Ink layers are thin and smooth to the touch.
Fast Output: Once set up, the printing process is quick and consistent.
Cons of make custom tumblers with an UV printer
Not Fully Permanent: Ink may chip or fade over time, especially on curved or handled areas without topcoat protection.
Higher Setup Cost: UV printers are more expensive and require specialized inks and maintenance.
Limited Durability: Less resistant to scratches or dishwasher use compared to laser engraving.
Method 3: Make Custom Tumblers with Cricut
Cricut machines don't engrave directly onto tumblers like lasers do, but they're great for creating vinyl decals or stencils that can be applied to tumblers. This method is ideal for beginners who want custom designs without investing in a laser or UV printer. You can either apply the vinyl directly for a colorful design or use it as a stencil for etching or painting. It's especially useful for plastic, stainless steel, or coated tumblers.
Step 1: Design Your Artwork
Use Cricut Design Space to create or upload your design. Resize it to fit the tumbler's curved surface, keeping it simple and bold for easier application.
Step 2: Cut and Weed the Vinyl
Send the design to your Cricut machine to cut. Once cut, carefully weed away the unwanted vinyl using a weeding tool, leaving only your design.
Step 3: Apply Transfer Tape
Place transfer tape over the weeded design, then peel the backing off so the vinyl sticks to the tape. This makes it easier to transfer the design onto the tumbler.
Step 4: Place the Vinyl on the Tumbler
Clean the tumbler surface and carefully position the vinyl design using the transfer tape. Press firmly and smooth out air bubbles with a scraper or credit card.
Step 5: Remove Transfer Tape
Slowly peel off the transfer tape, leaving the vinyl decal on the tumbler surface.
Pros of make custom tumblers with Cricut
Affordable & Beginner-Friendly: Cricut machines are relatively affordable and easy to use.
Versatile Uses: You can use the same setup for mugs, water bottles, glassware, and more.
Cons of make custom tumblers with Cricut
Not Permanent:Vinyl can peel or wear off over time, especially with washing.
Manual Application: Requires careful hand placement to avoid bubbles or misalignment.
Method 4: Make Custom Tumblers via Heat Press
Heat press engraving (often called sublimation or heat transfer) uses heat and pressure to transfer designs onto specially coated tumblers. This method works best on tumblers with a polyester or polymer coating that bonds with sublimation ink. It allows for vibrant, full-color, and durable designs but requires specific equipment and materials.
Step 1: Prepare Your Design
Create or import your design using design software. Make sure the colors and resolution are suitable for sublimation printing. Print the design in reverse (mirrored) on sublimation transfer paper using sublimation ink.
Step 2: Prepare the Tumbler
Place the tumbler on the heat press's rotary attachment or a suitable jig. Ensure the tumbler is clean, dry, and free of dust or grease to ensure proper ink transfer.
Step 3: Heat Press the Design
Wrap the printed transfer paper around the tumbler, securing it with heat-resistant tape. Set the heat press to the manufacturer's recommended temperature and time settings (usually around 400°F for 6-7 minutes). Start the heat press so the tumbler rotates evenly, allowing the heat and pressure to transfer the design onto the surface.
Step 4: Remove and Cool
Carefully remove the tumbler from the press and peel off the transfer paper while still warm. Allow the tumbler to cool completely before handling.
Pros of make custom tumblers via heat press
Vibrant Full-Color Designs: Produces bright, photo-quality images with gradients and fine details.
Durable and Dishwasher Safe: When done properly on coated tumblers, designs resist fading and washing.
Cons of make custom tumblers via heat press
Requires Special Coated Tumblers: Works only on polyester-coated surfaces, limiting material choices.
Expensive Equipment Needed: Requires a heat press with a rotary attachment and sublimation printer/inks.
Setup Time and Skill: Precise temperature, pressure, and timing are needed to avoid smudging or fading.
Limited to Curved Surfaces: Larger or oddly shaped tumblers may not fit well in the heat press.
Method 5: Make Custom Tumblers via Waterslide Decals
Waterslide decals are thin, printed designs on special paper that you soak in water to release the decal, then slide it onto the tumbler's surface. This method lets you apply detailed, colorful images with smooth edges, ideal for DIY customization. After application, a clear sealant or epoxy is usually applied to protect the design and make it durable.
Step 1: Print Your Design
Print your custom artwork or logo onto waterslide decal paper using an inkjet or laser printer, depending on the decal paper type. Make sure the design is sized correctly to fit your tumbler.
Step 2: Prepare the Tumbler
Clean the tumbler's surface thoroughly to remove dust, oils, or grease. A clean surface helps the decal adhere better and prevents bubbles or wrinkles.
Step 3: Soak and Apply the Decal
Cut out the printed decal and soak it in water for about 30 seconds or as instructed. The decal will loosen from its backing. Slide the decal carefully onto the tumbler, positioning it precisely. Use a soft cloth or sponge to smooth out bubbles and excess water gently.
Step 4: Dry and Seal
Allow the decal to dry completely, usually several hours or overnight. For durability and a finished look, apply a clear coat spray or epoxy resin over the decal to protect it from scratches, fading, and water damage.
Pros
Full-Color, Detailed Designs: Allows photo-quality, complex images and gradients.
Affordable and Accessible: Requires minimal equipment — just a printer and decal paper.
Smooth Finish: Decals lie flat and smooth on the tumbler surface. Versatile: Works on many materials and shapes.
Cons
Less Durable Without Sealant: Decals can scratch, peel, or fade without a protective coating.
Requires Careful Application: Prone to wrinkles, bubbles, and misalignment during transfer.
Time-Consuming: Needs drying time and sealing for lasting results.
Conclusion
Customizing tumblers at home is a fun and rewarding way to express creativity or create personalized gifts. Each method—from laser engraving and UV printing to vinyl decals and waterslide transfers—offers unique benefits depending on your budget, equipment, and desired finish. Whether you prefer the professional look of engraving or the colorful flexibility of vinyl, these five methods make it easy to bring your ideas to life. Now, pick the method that suits you best and start creating your one-of-a-kind custom tumblers today!


