


A personalized brick can add meaning to an entrance, memorial, garden, or pathway. Brick laser engraving offers a precise, non-contact way to create detailed, durable designs more consistently than traditional methods.
This guide covers how the process works, suitable bricks and machines, common applications, and essential safety tips.

Part 1: Understanding Brick Laser Engraving
1.1 What Is Brick Laser Engraving?
Brick laser engraving uses a focused laser beam to create permanent text, logos, patterns, photos, or symbols on a brick’s surface.
It is commonly used for memorial bricks, address signs, garden decorations, and business logos. Unlike paint or stickers, the design is engraved directly into the brick for greater durability.
1.2 How Does Laser Engraving Work on Brick?
The laser applies controlled heat to remove or alter the brick’s surface, creating visible contrast. The result depends on the brick’s material, color, and texture.
Smooth clay bricks often produce clearer details than rough concrete bricks. Laser power, speed, focus, and the number of passes also affect the final result, so testing is recommended.
1.3 What Laser Engraving Machine Is Best for Brick Projects?
The best machine depends on the brick type, design size, required detail, workload, and available working area.
Diode lasers are practical for DIY projects and small businesses, while CO2 lasers are better suited to larger bricks and higher-volume production. A 10W diode laser can handle basic designs, while a 20W model offers greater efficiency for detailed or repeated engraving.
450nm Diode Laser
A 450nm diode laser is a practical choice for personalized brick projects, including:
- Family address bricks
- Memorial bricks
- Garden signs
- Decorative landscape bricks
- Personalized outdoor decorations
Choose the laser power based on the project’s size, detail, and production frequency.
CO2 Laser
CO2 lasers offer higher power and larger working areas, making them suitable for commercial brick engraving, large designs, and batch production. However, they usually require more space and a dedicated setup.
1064nm Fiber Laser
A 1064nm fiber laser is mainly designed for metal engraving and is not the first choice for standard bricks. However, a multi-laser machine can be useful for users who also engrave stainless steel, aluminum, and other metals.
Part 2: Why Choose Laser Engraving for Bricks?
Reason 1: Create Permanent and Weather-Resistant Designs
Laser engraving creates permanent marks directly on the brick surface. Unlike paint, printed graphics, or stickers, engraved designs will not easily fade, peel, or wear away outdoors.
This makes laser engraving suitable for memorial bricks, address bricks, garden signs, and other outdoor decorations.
Reason 2: Produce Fine Details and Sharp Text
A laser can create clear text, detailed patterns, logos, QR codes, and even grayscale images on suitable bricks.
This flexibility allows users to combine names, numbers, logos, and decorative elements in one personalized design.
Reason 3: Repeat Designs with Consistent Accuracy
Once a digital design is prepared, it can be reused across multiple bricks with consistent positioning, spacing, and quality.
This is useful for memorial programs, fundraising campaigns, school projects, community installations, and batch production.
Recommended Laser Engraver for Brick Laser Engraving: LaserPecker LP5
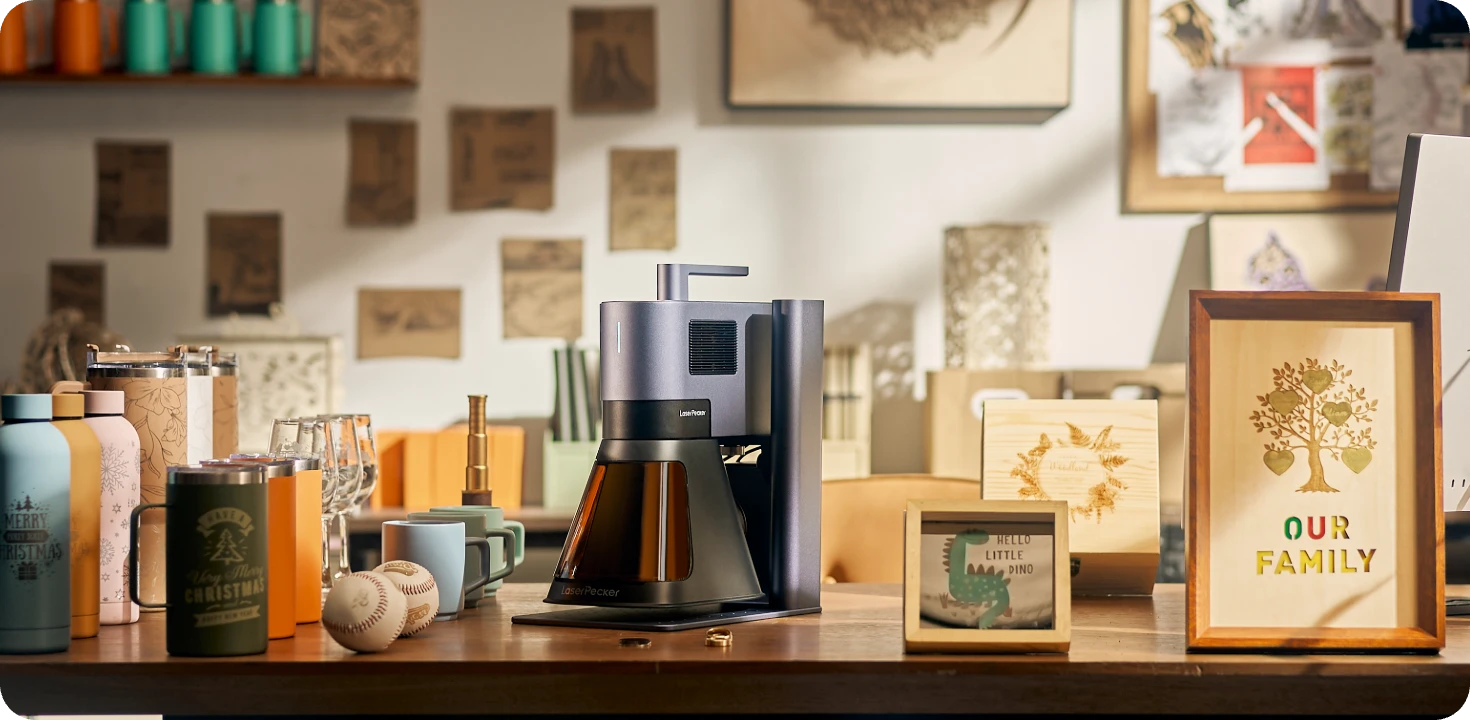
The LaserPecker LP5 is a dual-laser engraver suitable for personalized bricks, memorial bricks, address signs, garden decorations, and other custom projects.
Its fiber laser supports detailed surface engraving on suitable brick and stone materials, while its high-speed workflow makes it practical for both one-off designs and repeated orders. Because brick composition and finish vary, test the material before engraving the final piece.
-
20W Fiber Laser for Detailed Surface Engraving
The 20W fiber laser can create permanent text, numbers, logos, and decorative patterns on suitable brick and stone surfaces. The final contrast depends on the brick's color, composition, and finish. -
3D Grayscale Engraving for Detailed Artwork
Grayscale control supports designs with varied depth and shading, making it useful for decorative artwork, memorial graphics, and more detailed brick designs. -
Engraving Speed of Up to 10,000 mm/s
High-speed engraving improves efficiency when producing repeated designs for memorial programs, fundraising projects, business orders, or other small-batch applications.
Part 3: What Types of Bricks Can Be Laser Engraved?
Type 1: Clay Bricks
Clay bricks usually have smooth surfaces that produce clear contrast. They are suitable for memorial bricks, address signs, logos, text, and outdoor decorations.
Type 2: Concrete Bricks
Concrete bricks can be engraved, but their rough texture and mixed composition may affect the result. Test a similar brick first to find suitable settings.
Type 3: Paving Bricks
Paving bricks are ideal for adding family names, house numbers, welcome messages, or decorative designs to patios, walkways, entrances, and garden paths.
Type 4: Decorative Landscape Bricks
Landscape bricks can be engraved as garden signs, plant markers, inspirational messages, or personalized outdoor gifts.
Type 5: Memorial Bricks
Memorial bricks can preserve names, dates, and personal messages in schools, churches, parks, and community spaces. Laser engraving creates detailed, permanent tributes for individual or fundraising projects.
Case Study: How to Laser Engrave a Personalized Family Address Brick in 5 Steps
Creating a personalized family address brick is a practical way to add a custom touch to a home entrance, garden pathway, or outdoor living space.
In this project, a plain clay brick is transformed into a decorative address marker featuring a family name, house number, and simple botanical elements.
Preparation Checklist
Before starting the brick engraving process, prepare the following items:
- Flat clay brick with a smooth engraving surface
- Laser engraving machine suitable for brick projects
- LaserPecker Design Space or LightBurn software
- Family address design file
- Simple decorative elements such as a laurel border or home icon
- Cleaning brush or soft cloth for removing brick dust
- Stable work surface or positioning tools for brick alignment
- Similar brick material for testing laser settings
Step 1: Choose the Right Brick
Selecting a suitable brick is the first step for achieving clear engraving results. For a family address brick project, a flat clay brick with a relatively smooth surface is a practical choice because it provides a consistent engraving area for text and decorative elements.
Before engraving, check the brick size, surface condition, and placement location. Make sure the available engraving area is large enough for the family name, house number, and additional design elements while leaving enough space around the edges for a balanced appearance.
Step 2: Set Up the LaserPecker LP5 and Prepare the Brick
Place the brick securely on a stable work surface to prevent movement during engraving. Import the design file into the engraving software like LaserPecker Design Space or LightBurn and use the preview function to confirm the engraving position before starting the process.
For brick projects, proper alignment is important because even small shifts can affect the appearance of text and decorative patterns. Before engraving the final brick, users can test settings on a similar piece of brick material to check the contrast and engraving effect.
Step 3: Create Your Family Address Design
A classic American-style family address brick often combines simple text with decorative elements that match outdoor home designs. For this project, the design can include:
- Family Name (such as “The Anderson Family”)
- House Number (for example, “1286”)
- Simple Laurel Border
- Small Home Icon
A clean layout helps ensure that important information remains easy to read from a distance. Simple decorative elements such as borders or icons can add personality without making the design appear crowded.
Step 4: Configure the Laser Settings and Run a Test
Brick surfaces can vary depending on material composition, texture, and color, so testing the laser settings before the final engraving is recommended. Adjust parameters such as power, speed, and engraving passes based on the test result.
The goal is to create clear text and defined edges while avoiding unnecessary surface damage. A short test engraving on a similar brick allows users to fine-tune the settings and achieve a more consistent final result.
Step 5: Engrave, Clean, and Display the Finished Brick
After confirming the design and settings, begin the final engraving process. Once completed, remove any remaining brick dust and debris from the surface to reveal the finished design clearly.
A personalized family address brick can be displayed at a front entrance, garden pathway, porch area, or outdoor landscape feature. With proper material selection and engraving preparation, it can become a long-lasting decorative piece that adds a personal touch to a home exterior.
FAQs: Hot Questions about Brick Laser Engraving
Q1. Can you laser engrave bricks?
Yes. Machines such as the LaserPecker LP5 and LX2 can engrave permanent text, logos, patterns, and images on suitable bricks.
Results depend on the brick type, texture, laser settings, and power. Clay, decorative, and some concrete bricks are common choices.
Q2. What types of bricks can be laser engraved?
Clay, concrete, paving, landscape, and memorial bricks can be engraved. However, their different textures and compositions may produce different results.
Clay bricks often provide clearer contrast, while rough concrete bricks usually require more testing.
Q3. Does laser engraving damage a brick?
Laser engraving only alters a small area of the surface and should not weaken the brick when suitable settings are used. Always test a similar brick first.
Q4. Can you engrave photos on bricks?
Yes. Some bricks can produce grayscale photo engravings with suitable settings. Use a clear, high-contrast image and test it before engraving the final brick.
Q5. How long does laser engraving on brick last?
Laser-engraved designs can last for many years because they are created directly on the brick surface instead of being applied with paint, ink, or stickers.
Q6. Can engraved bricks be used outdoors?
Yes. Engraved bricks are suitable for garden decorations, address markers, pathways, memorials, and landscaping. Proper material selection and settings help improve outdoor durability.
Q7. Is brick laser engraving suitable for memorial projects?
Yes. It can create permanent names, dates, messages, and tributes for schools, churches, parks, community spaces, and fundraising programs.
Q8. What is the best laser engraver for brick engraving?
The best machine depends on the brick, design, and workload. A diode laser is suitable for many common brick projects.
For greater material flexibility, the LaserPecker LP5 combines a 20W diode laser for suitable brick surfaces with a 20W fiber laser for metals and other materials.
Conclusion
Brick laser engraving provides a durable way to personalize address bricks, garden decorations, memorials, and branded displays.
Choose a suitable brick and laser, test the settings, and follow proper preparation and safety steps to achieve reliable results.


