


Every fall, pumpkins become a popular choice for Halloween decorations and creative seasonal projects. While traditional carving remains a classic activity, pumpkin laser engraving offers a cleaner and more precise way to create detailed artwork, custom messages, logos, and photo-style designs by removing only the outer surface of the pumpkin.
Whether you're creating home decorations, personalized event displays, or seasonal products, laser engraving makes it easier to achieve consistent and intricate designs. In this guide, you'll learn how pumpkin laser engraving works, compare it with traditional carving, explore design ideas, and follow a step-by-step process to complete your first project.

In this article:
- Part 1: Understanding Pumpkin Laser Engraving
- 1.1 What Is Pumpkin Laser Engraving?
- 1.2 How Does Laser Engraving Work on a Pumpkin?
- 1.3 What Laser Engraving Machine Is Best for Pumpkin Projects?
- Part 2: Why Use Laser Engraving Instead of Traditional Pumpkin Carving?
- Part 3: What Designs Can You Engrave on a Pumpkin?
- Case Study: How to Create a Personalized Halloween Jack-o'-Lantern with Laser Engraving and Cutting
- FAQs: Hot Question about Laser Engraving a Pumpkin
Part 1: Understanding Pumpkin Laser Engraving
1.1 What Is Pumpkin Laser Engraving?
Pumpkin laser engraving is the process of using a focused laser beam to remove a thin layer of the pumpkin's outer rind without cutting all the way through the shell. By controlling the engraving depth, users can create visible patterns, lettering, portraits, and decorative textures while preserving the pumpkin's overall structure.

1.2 How Does Laser Engraving Work on a Pumpkin?
A laser engraver directs concentrated energy onto the pumpkin's surface, removing the dark orange outer skin layer while leaving the lighter flesh underneath exposed. Since the engraved area reflects light differently, the finished design becomes visible without requiring deep cuts or hollowed-out sections.

*Pumpkin Carving vs. Pumpkin Laser Engraving
Although both methods create decorative pumpkins, they differ in workflow, appearance, and creative flexibility.
Traditional pumpkin carving uses knives or carving tools to cut away parts of the pumpkin. It works well for simple faces and openings, but it requires manual cutting and cleanup. The final result also depends heavily on the person's carving skills and hand-cutting accuracy.
Pumpkin laser engraving uses a focused laser beam to mark the outer surface. It can create detailed graphics, text, logos, photos, and fine patterns with minimal mess. Once the settings are adjusted correctly, the laser can also produce consistent and repeatable results.
1.3 What Laser Engraving Machine Is Best for Pumpkin Projects?
The right laser engraver depends largely on the size of your projects and how you plan to use it. Since pumpkins have curved surfaces and natural variations, features such as accurate positioning, adjustable focus, and stable engraving performance can make the process easier, especially for beginners.
For larger seasonal decorations, classroom activities, workshops, or small businesses creating multiple customized pumpkins, a machine with a spacious working area provides additional flexibility. A larger workspace also accommodates oversized pumpkins and reduces repositioning during more complex designs.
#1 Recommended - Desktop Laser Engraver
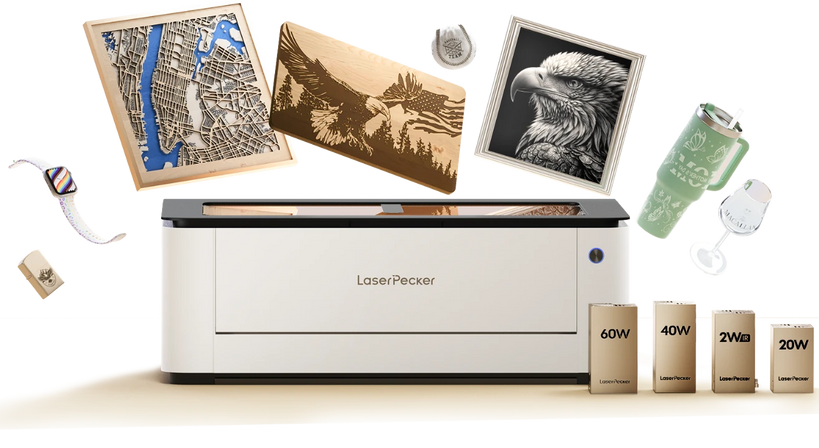
The LaserPecker LX2 is well suited for engraving Halloween faces, names, logos, decorative patterns, and other detailed designs on pumpkins. Its non-contact engraving process marks the outer surface without the manual cutting and cleanup required for traditional pumpkin carving.
The overhead camera helps users preview the design directly on the pumpkin, while the autofocus system adapts the laser to its curved and uneven surface. This makes it easier to position artwork accurately and produce consistent details across different pumpkin shapes and sizes.
-
3D Surface Adaptive Autofocus for Uneven Pumpkins
The autofocus system adjusts to variations in the pumpkin's curved surface, helping maintain a suitable focal distance and produce clearer engraving across uneven areas. -
12MP/6K Overhead Camera for Accurate Placement
The built-in camera provides a detailed preview of the pumpkin and design, making it easier to position faces, text, logos, and decorative artwork before engraving begins. -
Point-to-Shape™ Design Alignment
Point-to-Shape™ helps align artwork with the pumpkin's visible shape and available engraving area, reducing placement errors on irregularly shaped pumpkins. -
Fine Engraving Precision of ≤0.01 mm
High positioning precision supports intricate lines, small text, layered patterns, and detailed Halloween graphics that would be difficult to reproduce with manual carving tools.
#2 Recommended - Handheld Laser Engraver
The LaserPecker LP2 Plus is suitable for engraving Halloween faces, names, text, logos, and decorative patterns on pumpkin surfaces. Its 10W diode laser can remove or darken the outer skin to create visible designs without cutting completely through the pumpkin.
When paired with the Rotary Extension, the LP2 Plus can better accommodate the pumpkin's rounded shape. Careful focusing and a small test engraving are recommended because surface curvature, moisture, color, and rind thickness can affect the final contrast.
-
10W Diode Laser for Surface Engraving
The 10W diode laser can mark the pumpkin's outer skin, making it suitable for creating Halloween artwork, lettering, logos, and decorative line designs. -
Rotary Extension for Rounded Pumpkins
The Rotary Extension helps support and rotate compatible pumpkins, allowing designs to follow more of the curved surface while reducing the need for manual repositioning. -
Up to 4,000 mm/s Engraving Speed
The fast engraving system helps complete detailed patterns efficiently, which is useful when preparing several personalized pumpkins for parties, events, or seasonal displays. -
Precision for Detailed Halloween Designs
Accurate laser movement supports fine outlines, small text, facial details, and intricate patterns that can be difficult to reproduce consistently with traditional carving tools.

Part 2: Why Use Laser Engraving Instead of Traditional Pumpkin Carving?
Traditional pumpkin carving can be messy, time-consuming, and limited in detail. Pumpkin laser engraving creates precise surface designs without cutting through the pumpkin, making it a cleaner and more controlled option for home decorations, events, and commercial projects.
Reason 1: Create Detailed Designs
Laser engraving can reproduce fine lines, shading, patterns, portraits, and complex artwork that are difficult to create with carving tools. Digital designs can also be resized and reused to produce consistent results on multiple pumpkins.
Reason 2: Reduce Mess and Cleanup
Instead of opening the pumpkin and removing its pulp and seeds, the laser removes only a thin layer of the outer skin. This reduces waste and makes cleanup faster, especially when engraving several pumpkins.
Reason 3: Add Personalized Names, Logos, and Artwork
Users can engrave names, greetings, logos, event branding, and original artwork directly onto pumpkins. Each design can be changed digitally, making it easy to create personalized decorations for parties, weddings, festivals, schools, and business displays.
Reason 4: Suitable for Home, Events, and Businesses
Laser-engraved pumpkins can be used as home decorations, event centerpieces, school craft projects, storefront displays, and seasonal promotional products.
Reason 5: Support Batch Production
The same design file and settings can be reused across multiple pumpkins, helping makers produce consistent results for local markets, retail displays, events, and seasonal orders.
Part 3: What Designs Can You Engrave on a Pumpkin?
Pumpkin laser engraving supports many types of digital designs, from classic Halloween graphics to personalized messages, photos, and business logos.
#1: Halloween Faces and Patterns
You can engrave jack-o'-lantern faces, ghosts, bats, witches, skulls, spiderwebs, haunted houses, and other Halloween graphics. Detailed floral, geometric, Celtic, and mandala patterns are also easier to create with a laser than by hand.
#2: Names and Personalized Messages
Names, monograms, family greetings, wedding dates, and short messages can turn pumpkins into personalized decorations for parties, weddings, classrooms, and family events.
#3: Logos and Brand Promotions
Businesses can engrave logos, QR codes, and promotional graphics on pumpkins for storefronts, restaurants, festivals, trade shows, and seasonal events.
#4: Photo Engravings and Custom Artwork
Photos, portraits, pet images, and illustrations can be converted into grayscale designs and engraved on the pumpkin's surface. High-contrast images with simple backgrounds usually produce the clearest results.
Case Study: How to Create a Personalized Halloween Jack-o'-Lantern with Laser Engraving and Cutting
To demonstrate the complete workflow, let's create a personalized Halloween pumpkin featuring a family name, a haunted house illustration, and a carved jack-o'-lantern face. In this case study, the design combines both laser engraving and laser cutting to produce a finished pumpkin ready for seasonal display.
For this project, we use the LaserPecker LX2, which provides enough working area to accommodate pumpkins of different sizes while supporting both engraving and cutting in a single workflow. The following steps can also be adapted for creating personalized Halloween decorations, porch displays, or seasonal event props.
Preparation Checklist for Pumpkin Laser Engraving
- Medium-sized pumpkin with a stable base
- Clean cloth for removing surface moisture and debris
- Laser engraving machine with suitable working area
- LaserPecker Design Space
- Prepared SVG, PNG, or vector design file
- Test material or a small pumpkin section for parameter testing
- Proper ventilation and safety equipment
Step 1: Select and Prepare the Right Pumpkin
The first step is choosing a pumpkin that matches the planned design. A pumpkin with a flatter engraving area is easier for beginners because it reduces distortion when placing graphics. Avoid pumpkins with soft spots, deep grooves, or damaged surfaces, as uneven areas may affect engraving consistency.
After selecting the pumpkin, clean the surface and allow it to dry completely. For this example, the maker chooses a medium pumpkin with a smooth front area large enough for a 4-inch Halloween illustration and a short personalized message. The pumpkin is positioned securely before moving to the engraving setup.
Step 2: Set Up the LaserPecker LX2 and Position the Pumpkin
Place the pumpkin securely inside the engraving area and use the built-in camera together with Point-To-Shape positioning to align the Halloween artwork on the smoothest section of the pumpkin. Before starting the full project, preview the design to confirm that both the engraved artwork and the cut-out features are correctly positioned.
Step 3: Create and Adjust Your Design
For this project, the artwork includes a haunted house silhouette, several flying bats, and the family name "The Wilson Family" engraved across the front of the pumpkin. The eyes, nose, and mouth of the jack-o'-lantern are prepared as cutting paths, while the decorative artwork and lettering are engraved at a shallower depth to create contrast without removing the pumpkin skin.
Step 4: Position the Pumpkin and Configure Laser Settings
Begin by engraving the haunted house illustration and family name before switching to the cutting paths for the pumpkin face. Since pumpkins vary in thickness and moisture content, perform a quick test on the back of the pumpkin first, then fine-tune the engraving and cutting settings until the desired appearance is achieved.
Step 5: Start Engraving and Evaluate the Results
After the engraving and cutting are complete, remove the cut sections from the jack-o'-lantern face and gently wipe away any surface residue. Place an LED candle inside the pumpkin to illuminate the engraved family name and Halloween artwork. The finished project combines personalized engraving with clean cut-out features, creating a unique seasonal decoration suitable for front porches, entryways, or Halloween parties.
FAQs: Hot Questions about Laser Engraving a Pumpkin
Q1. Can you laser engrave a real pumpkin?
Yes. A laser removes a thin layer of the pumpkin's outer skin to create text, patterns, and artwork without cutting through it. For better results, use a fresh pumpkin with a smooth surface, clean and dry it, and test the settings on a small area first.
Q2. Is laser engraving better than carving a pumpkin?
It depends on the design. Traditional carving is better for cutout jack-o'-lanterns, while laser engraving is better for detailed patterns, messages, logos, and photos. Engraving also creates less mess and makes designs easier to repeat.
Q3. What laser settings work best for pumpkins?
The best settings depend on the pumpkin's freshness, moisture, skin thickness, and surface texture. Start with low power or a faster speed, perform a test engraving, and adjust gradually until you achieve clear contrast without damaging the pumpkin.
Q4. Can you engrave photos on a pumpkin?
Yes. High-contrast photos with clear subjects and simple backgrounds usually work best. Convert the image to grayscale and adjust its contrast before engraving for a more recognizable result.
Q5. How long does a laser-engraved pumpkin last?
Its lifespan depends on its freshness, storage temperature, moisture, and engraving depth. Keep it in a cool, dry place and handle it carefully. For a reusable decoration, consider engraving an artificial pumpkin.
Q6. Can beginners laser engrave pumpkins?
Yes. Beginners should start with a simple design, secure the pumpkin, and test the settings on a small area. Compact machines such as the LaserPecker LP4 suit smaller projects, while the LaserPecker LX2 offers more space and camera-assisted positioning for larger pumpkins.
Q7. Is the LaserPecker LP4 good for pumpkin engraving?
Yes. The LaserPecker LP4's 10W diode laser can engrave designs on pumpkin skin. Its compact size makes it practical for beginners, home workshops, craft fairs, and small customization businesses.
Q8. Is the LaserPecker LX2 suitable for large pumpkin engraving and cutting?
Yes. Its 500 × 305 mm working area can accommodate larger pumpkins, while its 12MP camera and Point-to-Shape™ positioning help align designs. Air Assist can also support cleaner cutting for suitable jack-o'-lantern projects.
Q9. Can you engrave artificial pumpkins?
Yes, but check the material before engraving because some plastics and coatings can release harmful fumes or react poorly to heat. Use only laser-safe materials with proper ventilation and smoke extraction.
Q10. What are the best pumpkin engraving ideas for Halloween?
Popular ideas include jack-o'-lantern faces, ghosts, haunted houses, family names, Halloween messages, pet portraits, logos, and event artwork. Choose simple graphics for quick decorations or detailed designs for personalized displays and products.
Conclusion
Laser engraving offers a clean and precise way to decorate pumpkins with Halloween patterns, names, logos, photos, and other custom designs. It is suitable for home projects, events, schools, and small businesses.
For better results, choose a suitable machine, prepare the pumpkin carefully, and test the laser settings before engraving. Machines such as the LaserPecker LP2 Plus and LaserPecker LX2 can support both small DIY projects and larger seasonal displays.


