Custom golf balls are getting more popular with golfers, companies, and sports fans. You can put your initials on them so you know which ones are yours, make unique presents for tournaments, or create company-themed gear. Custom golf balls mix looking good with being useful.
In this guide, we'll cover how to customize golf balls, why making them your own matters, how to print or engrave them best, and simple steps to get results that last and look pro. First, let's see why making your own golf balls is a good idea.

In this article:
- Part 1: Why Customize Golf Balls
- Part 2: Top 5 Methods for Customizing Golf Balls
- Method 1: Pad Printing
- Method 2: Heat Transfer Printing
- Method 3: UV Printing
- Method 4: Vinyl Stickers
- Method 5: Laser Engraving (Recommended)
- Part 3: How to Customize Golf Balls with a Laser Engraver
- Part 4: Factors to Consider When Customizing Golf Balls
- Part 5: FAQs for Making a Custom Golf Ball
Part 1: Why Customize Golf Balls?
Adding your personal touch to golf balls isn't just about looks. When you're on the course by yourself, it keeps your ball from getting mixed up, and it also lets you flaunt your style. Spotting your initials or logo on the green? That's an easy way to find your ball and gives you that pro vibe.

If you're in business, custom golf balls with your logo are sweet for marketing. Hand them out at company golf outings, industry shows, or as simple freebies. It's a subtle way to keep your brand in people's minds.
Lots of folks now design golf balls for tourneys, weddings, or to raise money for groups. It turns basic sports gear into memorable gifts. This kind of personalization isn't just helpful; it shows off your personality.
Part 2: Top 5 Methods for Customizing Golf Balls
You can customize golf balls in a few reliable ways, and each has its own perks for how long they last, how they look, and the overall feel.
Method 1: Pad Printing
Pad printing is the most common technique used by golf ball manufacturers to apply logos and text. It works by transferring ink from an etched plate onto a soft silicone pad, which then presses the design onto the curved surface of the ball. It's great for colorful logos, but watch out-the design can wear off as you play.
Pros:
- Sharp, durable prints
- Excellent for detailed logos
- Works well on curved surfaces
Cons:
- Requires professional equipment and setup
- Not suitable for one-off or home DIY projects
Method 2: Heat Transfer Printing
Heat transfer printing uses heat and pressure to apply a printed design onto the golf ball's surface. The design is first printed onto a special transfer film, then pressed onto the ball using a heat press.
Pros:
- Supports full-color printing
- Great for short runs or custom gifts
Cons:
- May require special heat-press equipment
- Prints can wear off faster on frequent use
Method 3: UV Printing
UV printing uses ultraviolet light to instantly cure specially formulated ink directly onto the golf ball's surface. The result is a vibrant, high-definition print that's both durable and waterproof.
Pros:
- Sharp, full-color prints with high precision
- Scratch- and water-resistant
Cons:
- Requires a UV printer
- May not be cost-effective for large-scale production
Method 4: Vinyl Stickers
Vinyl stickers are one of the easiest and most flexible ways to personalize golf balls. Simply print your design on durable vinyl, cut it to size, and apply it directly to the ball's surface.
Pros:
- Easy and low-cost to apply
- Great for one-time events or giveaways
Cons:
- Less durable — may peel with frequent play or washing
- Limited to simple shapes and smaller designs
Method 5: Laser Engraving
For detail and staying power, nothing beats laser engraving. It engrave the design into the ball's surface. It doesn't mess with how the ball flies or feels. Designs marked by laser won't fade or peel.
Pros:
- Permanent and wear-resistant results
- Ultra-precise detailing for logos or text
- Works on most golf ball materials
Cons:
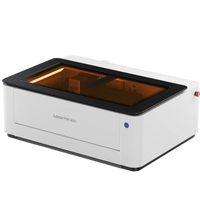
- Requires a golf ball laser engraving machine
Comparison Table
| Method | Durability | Detail Level | Cost | Speed | Ideal Use |
|---|---|---|---|---|---|
| Pad Printing | ★★☆☆☆ | ★★★☆☆ | Low | Very Fast | Bulk logo printing |
| Heat Transfer Printing | ★★★★☆ | ★★★★☆ | Medium | Moderate | Display or gift balls |
| UV Printing | ★★★★☆ | ★★★★★ | High | Moderate | Premium or personalized balls |
| Vinyl Stickers | ★☆☆☆☆ | ★★★☆☆ | Very Low | Fast | Temporary or small batch |
| Laser Engraving | ★★★★★ | ★★★★★ | Medium–High | Moderate | Gifts, business logos, professional personalization |
Want to give your golf balls a bit of flair? There are ways to do it, sure. But for a truly pro look that stands the test of time and keeps things precise, laser engraving is the way to customize golf ball.
Forget stickers or prints that flake off. Laser engraving burns the design right in, leaving you with a sharp, durable, and seriously classy result. Perfect for presents or company freebies!
Part 3: How to Customize Golf Balls With a Laser Engraver
Laser engraving is a great way to put custom designs on golf balls because it's very precise and lasts a long time. The process uses a beam of light to take off a layer of the ball, leaving a permanent mark that does not change how the ball looks or flies.
What You'll Need:
- Golf balls
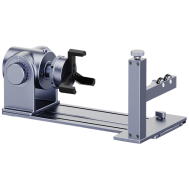
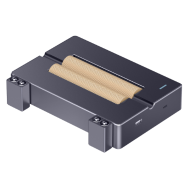
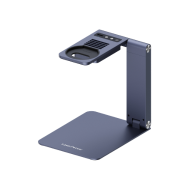
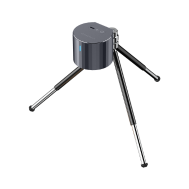
- A rotary extension or something to hold round stuff steady
- Design software (like LightBurn or LaserPecker Design Space)
- A computer or phone to tweak your design
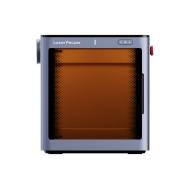
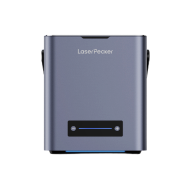
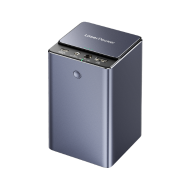
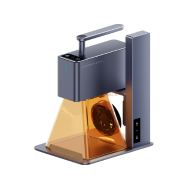
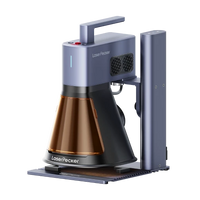
- A gold ball laser engraver (the LP4 works great)
Let's Get Started:
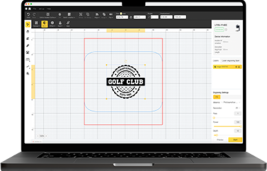
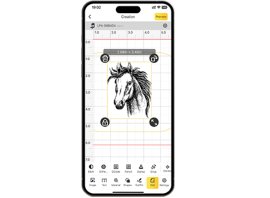
1.Prep Your Design: Upload your logo or text to your software.
2.Set Up: Stick the ball on the rotary attachment. Line up your design where it'll look best, avoiding dimples or logos.
3.Power and Speed: Start with low power and high speed. You want to etch the coating without burning it. Try it on a spare ball first to be sure.
4.Engrave: Fire up the LP4 and let it do its thing. Its two lasers (10W blue and 2W IR) are made to work on plastics and light metals. You'll get even engraving on the round surface.
5.Clean Up: Wipe off any gunk and check out your work. If you want it darker, do another pass at a slightly lower speed.
Why the LP4 Laser Engraver:
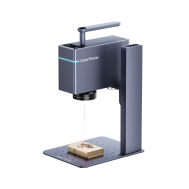
The LP4 is a dual-laser engraver made for accurate and quick work. It uses a 10W blue diode laser (450 nm) and a 2W infrared laser (1064 nm), so it can be used on many types of material, even coated golf balls. With its rotary extension, the LP4 can engrave curved or round things like golf balls with great alignment and detail.
It's also fast and consistent, great for making many items or doing custom logo jobs. Best of all, the laser is gentle on the golf ball, keeping its structure and performance intact while giving a clean, pro result each time.
Cool Things About It:
- Two lasers for different stuff.
- Fast engraving (up to 4000 mm/s) with sharp detail.
- Smart touchscreen for easy changes.
- Adjusts to different angles, great for golf balls.
Part 4: Factors To Consider When Customizing Golf Balls
Here's how to get the best results when customizing golf balls:
1. Material: Urethane covers usually engrave cleaner than Surlyn. Always test how your material reacts to heat and engraving depth.
2. Design Spot: Don't engrave over big dimples or close to logos. Keep the look and flight of the ball in mind.
3. Goal: Know why you're customizing—is it for ID, business branding, or gifts? This helps you pick the right method and design.
4. Lastingness: Laser engraving lasts longer for pro use than printing.
5. Quantity and Price: Laser engraving works better for small or custom jobs. Pad or UV printing is good for large orders.
6. Contrast and Color: Engraving shows up better on light or matte golf balls than on shiny or dark ones.
Part 5: FAQs for Making a Custom Golf Ball
1. How To Put A Custom Logo On A Golf Ball?
There are a few ways to put a logo on a golf ball: pad printing, UV printing, or laser engraving. If you want something that lasts, laser engraving is the way to go. It makes a mark that won't rub off. Just upload your logo to the engraving software, center it, and use medium power to get it just right. The logo will become part of the golf ball. So it will still look good even after many rounds on the course.
2. What's The Best Way To Add Text To Golf Balls?
For eye-catching colors in your message or name, UV printing is a good choice. But, if you want super-sharp and long-lasting results, laser engraving makes the cleanest marks. Stick to simple, strong fonts that are easy to read on curves. Before you engrave, test your size and spacing to be sure everything is clear.
3. How Long Does It Take To Customize Golf Balls?
How long it takes to customize depends on the method and how complex the design is. Laser engraving a ball usually takes one to three minutes each. Printing takes longer because of setup and drying times. The LP4 engraver speeds things up. After you save the settings, repeating the same design on many balls is super quick, which makes it a good option even if you're only doing a few.
Conclusion
Personalized golf balls blend skilled work with creativity. Whether it's for branding, easy ID, or presents, customized balls catch eyes everywhere. Laser engraving? It's the sweet spot for getting things done fast and with great, lasting detail.
With an LP4 laser engraver, anyone-from DIYers to pro shops-can make sharp, classy designs that show off personality and top-notch quality. Next time you're up to bat, be sure your golf ball isn't just there to do its job but is uniquely yours. After all, a personal touch does more than make your equipment better-it tells your story each time you swing.


