


Acrylic is a durable and versatile material commonly used for signs, display panels, crafts, DIY projects, protective covers, and decorative applications. Learning how to cut acrylic properly is important for achieving smooth edges, accurate dimensions, and professional-looking results.
The best way to cut acrylic depends on the thickness of the sheet, the type of cut you need, and the tools available. Some methods work better for thin acrylic sheets, while others are designed for cutting thick acrylic with higher precision.
In this guide, you'll learn how to cut acrylic sheets using four popular methods: laser cutters, rotary tools, saws, and scoring knives. Each method offers different advantages for precision, speed, edge quality, and ease of use.

In this article:
- Method 1: Cut Acrylic with a Laser Cutter
- Method 2: Cut Acrylic with a Rotary Tool
- Method 3: Cut Acrylic with a Saw
- Method 4: Cut Acrylic with a Scoring Knife
Method 1: Cut Acrylic with a Laser Cutter
Laser cutting is one of the best ways to cut acrylic when you need clean edges, intricate details, and highly accurate results. A laser cutter uses a focused beam of heat to melt and vaporize acrylic along the cut path, producing smooth and polished edges with minimal finishing.
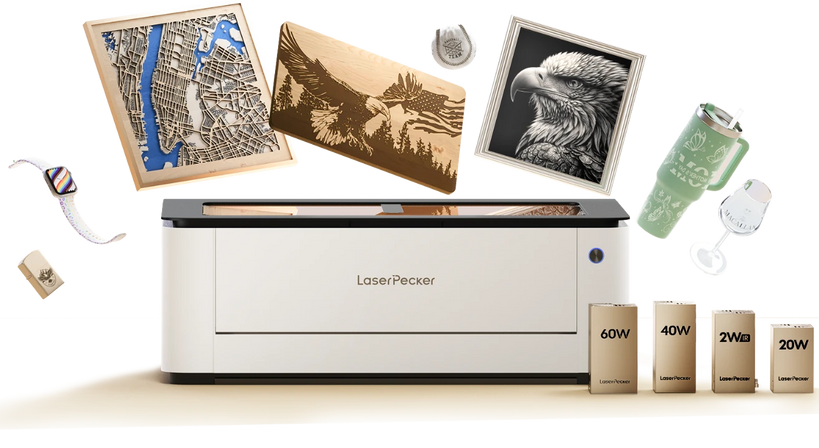
Recommended Desktop Laser Cutter for Acrylic Cutting: LaserPecker LX2
The LaserPecker LX2 is a high-precision desktop laser cutter designed for clean and detailed acrylic cutting projects such as signs, jewelry, display pieces, crafts, packaging, and custom decorations.
-
High-Power Laser Modules for Stronger Acrylic Cutting
The LX2 supports powerful 20W, 40W, and 60W diode laser modules, allowing users to cut acrylic more efficiently with improved edge quality and deeper cutting capability. -
Precise Cutting for Detailed Acrylic Designs
The LX2 delivers clean and accurate acrylic cuts suitable for signs, jewelry, display pieces, decorative panels, and intricate craft projects. -
Large Working Area for Bigger Acrylic Projects
The spacious workspace allows users to process larger acrylic sheets or multiple acrylic parts in one cutting session for improved productivity. -
Camera-Assisted Positioning and Digital Workflow
The built-in camera system and software-controlled workflow help improve material alignment, cutting accuracy, and repeatable production results.
This method is widely used for acrylic signs, display panels, decorative projects, custom shapes, and precision-cut acrylic pieces.
Best for:
- Intricate, detailed designs
- Projects needing smooth, polished edges straight from the machine
- Cutting and engraving in the same process
Precision Level of Cutting Acrylic with a Laser Cutter
Very High — Can create fine details and sharp corners with exact repeatability.
Edge Finish Quality of Cutting Acrylic with a Laser Cutter
High — Produces a smooth, flame-polished edge without sanding; finish quality depends on material type and laser settings.
Best Thickness Range
Typically best for thin to medium sheets: 1.5 mm – 12 mm (1/16″ – 1/2″)
Can cut thicker acrylic with higher-power lasers, but slower and may require multiple passes.
Pros and Cons of Cutting Acrylic with a Laser Machine
Pros
- Exceptional accuracy and repeatability
- Clean, polished edges
- Handles intricate shapes and fine details
- Can cut and engrave in one setup
Cons
- Limited cutting depth on lower-power machines
- Produces fumes — requires proper ventilation
- Not ideal for very large sheets without an oversized bed
Method 2: Cut Acrylic with a Rotary Tool
A rotary tool is a flexible and beginner-friendly option for cutting acrylic sheets at home. Tools like a Dremel can cut, shape, sand, and trim acrylic using different cutting wheels and attachments.
This method works best for small projects, curved cuts, custom shapes, and detail work where larger tools may be difficult to control.
Best Uses for Rotary Tool Acrylic Cutting
- Small acrylic sheets and custom shapes
- Curved cuts and decorative designs
- Trimming or modifying existing acrylic pieces
- DIY acrylic cutting projects at home
Precision Level
Medium to High — Rotary tools offer good control for detail work, although straight cuts require a steady hand and guide.
Edge Finish Quality
Medium — Acrylic edges may appear rough or slightly melted if the cutting speed is too high. Sanding or flame polishing is often needed afterward.
Best Acrylic Thickness Range
Best for thin to medium acrylic sheets:
- Approximately 1.5 mm to 6 mm (1/16" to 1/4")
Cutting thick acrylic with a rotary tool is possible but usually requires multiple passes and additional finishing.
Pros and Cons of Cutting Acrylic with a Rotary Tool
Advantages:
- Versatile tool for cutting, sanding, and shaping
- Excellent for curved and decorative cuts
- Affordable option for DIY acrylic projects
- Compact and easy to use at home
Disadvantages:
- Heat buildup can melt acrylic edges
- Requires practice for smooth straight cuts
- Edges often need sanding or polishing
- Slower than saws or laser cutters for large sheets
Method 3: Cut Acrylic with a Saw
Using a saw is one of the most practical and effective ways to cut acrylic sheets, especially for large panels and thick acrylic materials. Different saw types such as table saws, circular saws, jigsaws, and band saws can all be used depending on the shape and size of the cut.
This method is popular for both DIY and professional projects because it handles larger acrylic sheets quickly and works well for straight cuts and rough shaping.
Best Uses for Saw Cutting Acrylic
- Straight cuts on large acrylic sheets
- Cutting thick acrylic materials
- Workshop and construction projects
- Rough shaping before detailed finishing
Precision Level
Medium to High — Accurate cuts are possible with proper guides, clamps, and fine-tooth blades designed for plastic materials.
Edge Finish Quality
Medium — Saw-cut acrylic edges may show blade marks or slight chipping and usually require sanding or polishing afterward.
Best Acrylic Thickness Range
Suitable for thin to thick acrylic sheets:
- Approximately 2 mm to 25 mm (1/16" to 1")
Very thin acrylic sheets may crack if not properly supported during cutting.
Pros and Cons of Cutting Acrylic with a Saw
Advantages:
- Excellent for cutting thick acrylic sheets
- Fast cutting speed for large projects
- Works with commonly available workshop tools
- Suitable for both DIY and professional use
Disadvantages:
- Edges usually require sanding or polishing
- Can create dust, noise, and debris
- Incorrect blade speed may chip or melt acrylic
- Less suitable for intricate detailed cuts
Method 4: Cut Acrylic with a Scoring Knife
A scoring knife is one of the simplest and most affordable tools used to cut acrylic sheets at home. Instead of fully cutting through the material, the knife creates a deep groove that allows the acrylic to snap cleanly along the scored line.
This method works best for thin acrylic sheets and straight cuts, making it a popular option for beginners, DIY projects, and quick home repairs.
Best Uses for Cutting Acrylic with a Scoring Knife
- Thin acrylic sheets and plastic panels
- Straight cuts without power tools
- Quick DIY acrylic projects
- Simple home workshop tasks
Precision Level
Medium — A scoring knife can produce accurate straight cuts when used with a ruler or straight edge, but it is not suitable for curves or detailed patterns.
Edge Finish Quality
Medium to Low — Snapped acrylic edges may appear rough and often require sanding or polishing for a smoother finish.
Best Acrylic Thickness Range
Best for thin acrylic sheets:
- Up to approximately 3 mm to 5 mm (1/8" to 3/16")
Scoring knives are not recommended for thick acrylic because deeper scoring becomes difficult and uneven snapping may occur.
How to Cut Acrylic with a Scoring Knife
Step 1: Mark the Cut Line
Use a ruler and marker to create a straight guide line on the acrylic sheet.
Step 2: Score the Acrylic
Run the scoring knife firmly along the guide line several times to create a deep groove.
Step 3: Position the Acrylic Edge
Place the scored line along the edge of a table or workbench.
Step 4: Snap the Acrylic
Apply even downward pressure to snap the acrylic cleanly along the scored line.
Step 5: Smooth the Edges
Sand or polish the cut edge if a smoother finish is needed.
Pros and Cons of Cutting Acrylic with a Scoring Knife
Advantages:
- Low-cost and beginner-friendly
- No electricity or power tools required
- Quiet and produces minimal dust
- Portable and easy to store
Disadvantages:
- Only suitable for thin acrylic sheets
- Limited to straight cuts
- Edges may require additional finishing
- Not effective for intricate designs or thick acrylic
Conclusion:
There are several effective ways to cut acrylic sheets, and the best method depends on your project size, acrylic thickness, and desired finish quality.
Laser cutters provide the cleanest and most precise results for detailed projects, while rotary tools offer flexibility for shaping and trimming acrylic at home. Saws are ideal for cutting thick acrylic sheets quickly, and scoring knives remain one of the easiest and most affordable options for thin acrylic.
Whether you're creating signs, displays, DIY crafts, or custom acrylic parts, choosing the right acrylic cutting method will help you achieve smoother edges, cleaner cuts, and more professional-looking results.