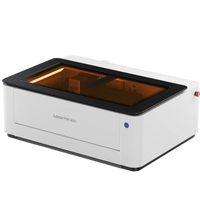
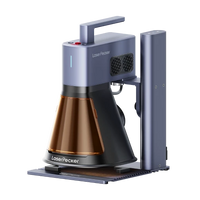
Engraved flasks have long been a mark of craftsmanship, festivity, and personal style. Engraving transforms any plain flask-metal or leather-into a special keepsake, a branded item, or a personalized gift. Today's compact devices let you create precise engravings at home.
This guide covers flask types, engraving methods, and simple steps for how to engrave flasks yourself.

In this article:
- Part 1: What are the Types of Flasks
- Part 2: Five Methods for Engraved Flasks
- Method 1: Laser Engraving
- Method 2: Sandblasting with Stencil
- Method 3: Electrochemical Etching
- Method 4: Mechanical Engraving
- Method 5: Leather Heat Embossing
- Part 3: How to Engrave a Flask with LaserPecker LP4
- Part 4: Tips for Engraving Liquor Flasks
- Part 5: FAQs for Engraving a Flask
Part 1: What are the Types of Flasks?
Before you grab your tools, get to know your flask. What it's made of matters a lot for how you can engrave it.

- Flasks made of stainless steel are a hit since they hold up well. They look sharp, perfect for adding detailed engravings—think words, cool designs, or logos. Plus, they don't rust, so your engraving stays looking good.
- Copper and brass flasks? They've got that old-school charm. These metals are softer than steel, making them easier to engrave with machines or chemicals. Just a heads up, they can get dull if they're not coated.
- Titanium flasks are super light and won't corrode, awesome for fancy or outdoor types. Engraving these needs the right tools, like fiber lasers.
- For leather-covered flasks, it's metal inside with leather outside, either real or fake. They're great for heat embossing or laser engraving, which gives a classy, textured vibe. Glass flasks aren't super common, but great for gifting whiskey or wine. Lasers or sandblasting can etch some pretty cool, frosted designs into them.
Part 2: Five Methods for Engraved Flasks
There are different ways to engrave flasks, and the best one depends on the tools you have, how much you want to spend, and the look you're going for. Each method has its own feel and benefits.
Method 1: Laser Engraving
Laser engraving is a precise way to customize flasks from all kinds of materials that have been mentioned in the last part. The focused laser beam marks the surface, leaving sharp and lasting designs.
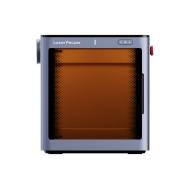
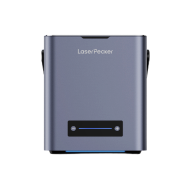
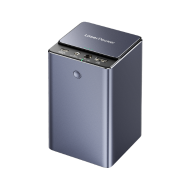
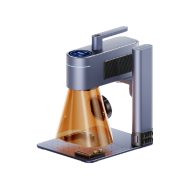
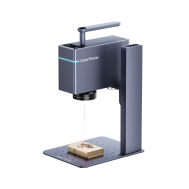
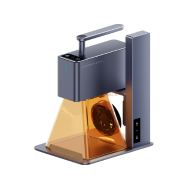
Flask engraving machines such as the LaserPecker LP4 use dual-laser tech. With an IR laser for metals and a diode laser for things like leather, it can handle lots of materials.
Laser engraving gives clean edges, details, and consistent marks, great for logos and text. Because the method is contactless, the flask won't get scratched. Once you buy a laser engraver, each project is cheap-no extra stuff needed. It's a fast option for personal use and small projects, delivering great results fast.
Method 2: Sandblasting with Stencil
Sandblasting involves shooting abrasive bits at a surface using high-pressure air through a stencil. This process etches the exposed spots, giving a frosted or matte finish. It's a classic way to decorate glass and metal flasks, creating a smooth, soft texture.
This approach gives items a handmade touch with a consistent, understated contrast. It shines on curved or shiny surfaces, great for big images or patterns. Note that each design needs its own stencil, so prep can take a bit. Also, cleaning and masking add to the work. So, it's not the best for making tons of stuff quickly, but it's awesome for crafters who want a handcrafted feel.
Method 3: Electrochemical Etching
Electrochemical etching, also known as chemical marking, uses an electric current and a salt electrolyte to dissolve a metal's surface in the shape of a design from a stencil. It's often used for nameplates and tools, but it can also engrave flasks.
The marks are smooth and exact. They can be dark or light, depending on the electrolyte and voltage used. This works well on stainless steel, titanium, and other metals that conduct electricity. While not pricey per item, it needs caution when handling chemicals and masks. It's great for logos or serial numbers, but doesn't allow as much artistic freedom as laser engraving.
Method 4: Mechanical Engraving
Mechanical engraving uses a spinning bit or a diamond tool to cut into the material. This gives you a groove you can feel and that classic engraved look. On metal flasks, it can create deep and clear marks, great for bold letters or monograms.
But you need to clamp the flask tightly, and it can be tricky on curves, which can lead to uneven results. Also, the tool wears down, and vibration can mess up fine details. It's tough and looks good, but it's slower than laser engraving and not ideal if you're making a lot of them. It works best if you want a traditional, handmade look where the depth of the engraving is important.
Method 5: Leather Heat Embossing
Heat embossing gives leather-covered flasks a nice, textured feel. It works by pressing a hot metal stamp or laser onto the surface. This darkens the leather a bit and adds some depth, making it look fancy and handmade.
Modern laser tools, like the LP4, can do this without needing special stamps. The laser's heat lightly burns the leather, creating detailed designs, logos, or initials that really stand out. The result is classy, long-lasting, and perfect for personalized presents or wedding gifts. Heat embossing mixes skill with speed, making it a great option for soft materials that machines can't handle well.
| Method | Suitable Material & Area | Precision | Efficiency | Cost & Cycle Time | Batch Reproduction |
|---|---|---|---|---|---|
| Laser Engraving | Metal, leather, coated surfaces | ★★★★★ | ★★★★★ | Low long-term cost | Excellent |
| Sandblasting | Metal, glass | ★★★ | ★★ | Medium | Limited |
| Electrochemical Etching | Metal (stainless, titanium) | ★★★ | ★★★ | Low per unit | Good |
| Mechanical Engraving | Metal (flat) | ★★★★ | ★★ | High setup | Fair |
| Leather Heat Embossing | Leather wrap or soft materials | ★★★★ | ★★★★★ | Low | Very Good |
Laser engraving is a top choice for flask marking because it's precise, clean, and works on many materials like metal and leather. It doesn't need much upkeep, and it saves you money in the long run. For these reasons, it's great for both personal and business needs.
Part 3: How to Engrave a Flask with Laserpecker LP4
It's easy and fun to engrave a flask using the LaserPecker LP4. The LP4 works with both metal and leather since it has fiber and diode laser modules.
Step 1: Get Your Design Ready
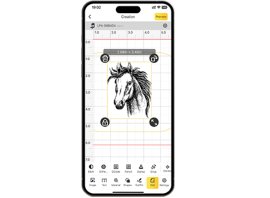
Make your logo, initials, or design using software like LaserPecker Design Space, Illustrator, or Canva. Save it as a file type that works (like SVG or PNG).
Step 2: Get Your Flask Ready
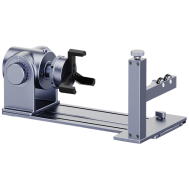
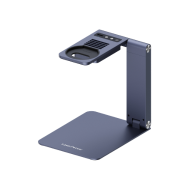
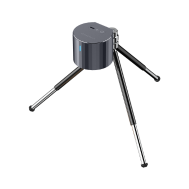
Put the flask on a flat, steady spot. If the flask is curved, you can use a rotary tool (which you can get with the LP4) to keep the laser focused.
Step 3: Change the Settings
Pick the right laser module-IR for metal, diode for leather. Change the power and speed based on what the flask is made of. For stainless steel, use medium power and a slower speed for a dark mark without hurting the surface.
Step 4: Test It First
Try engraving on something similar or on a spot that people won't see to be sure your settings and depth are good.
Step 5: Start Engraving
When you're ready, hit start in the LaserPecker app. The LP4 laser will etch your design very carefully. Watch as the design appears on the flask-clear, detailed, and lasting.
Step 6: Clean It Up
After engraving, wipe the flask with a soft cloth to clean off any stuff left over. Now you have a personal flask that makes a great gift or something to collect.
The LP4's dual-laser system (IR + diode) makes it a rare all-in-one engraver, letting creators work seamlessly on both metal and leather surfaces without switching machines.
Part 4: Tips for Engraving Liquor Flasks
- First, wipe the flask with alcohol to get rid of any grease or smudges.
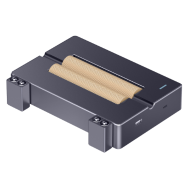
- If your flask is round, use supports or rotary tools to keep the laser focused.
- Begin with low laser power, increasing it slowly to prevent unwanted marks.
- Try using masking tape to check your design before you engrave the flask.
- If your flask has leather, consider engraving both the metal and leather parts for a fancy touch.
Part 5: FAQs for Engraving a Flask
1. Fiber Vs. Co₂: Which Laser Is Better?
If you're looking to engrave flasks, a fiber laser is your best pick - perfect for metals like stainless steel, titanium, and brass. For leather and wood, a CO₂ laser works great - and so does a 450 nm blue diode laser. But if you want to engrave a wide range of materials - from metal to wood, plastic, leather, and even glass - then the LP5 is the ideal choice. It combines a 20 W fiber laser and a 20 W diode laser, giving you the power and versatility to handle almost any engraving project with one compact machine.
2. Do I Need Marking Spray to Engrave Stainless Steel?
Nope, not if you're rocking an IR laser. This spray is used with CO₂ lasers to help them hit shiny metal. IR lasers like LP4 can mark stainless steel directly with no spray needed, saving you time and money.
3. What Is the Best Way to Engrave Stainless Steel?
Fiber laser engraving is really the best pick. It leads to clean, permanent marks by changing the metal surface, not cutting into it. You get a dark, smooth look that can handle wear and tear, water, and rust. Laser engraving also means nothing touches the flask, so no scratches or bends. It kills for tiny writing, company logos, or QR codes on your flasks.
4. Can You Engrave on a Whiskey Bottle?
Totally! You can etch directly onto glass whiskey bottles using a 450 nm blue diode laser. Just apply a layer of marking paper or black marker on the glass first - this helps the laser absorb better and create clear, frosted marks.
The laser engraver produces fine, permanent textures without damaging the bottle. Always make sure the bottle is empty, clean, and stable before engraving. Personalizing whiskey bottles is a great way to make wedding gifts, holiday keepsakes, or company presents - turning an ordinary bottle into a memorable, one-of-a-kind piece.
Conclusion
Engraving a flask is more than just adding a name or design — it's a way to create something meaningful and personal. Whether you choose traditional methods like sandblasting and etching or go modern with laser engraving, each technique offers its own unique finish and charm.
Among them, laser engraving stands out for its precision, speed, and ability to handle detailed artwork on various materials. With tools like the LaserPecker LP4, anyone can easily transform an ordinary flask into a one-of-a-kind keepsake or thoughtful gift.
No matter the method, take your time to plan the design, test materials, and enjoy the creative process — your custom-engraved flask will surely become a piece to treasure or proudly gift.


