Engraving keys is a simple yet effective way to add a personal touch, improve organization, or enhance security. Whether you're marking a house key with a name, numbering spare keys, or creating custom designs for decorative purposes, key engraving can be both practical and creative.
In this guide, we'll explore the top 4 key engraving methods—each with its own benefits, tools, and use cases. From laser engraving to manual techniques, you'll find the best approach to match your needs, skill level, and budget.

In this article:
- Method 1: Engrave Keys with a Laser Engraving Machine
- Method 2: Engrave Keys with a Rotary Tool
- Method 3: Engrave Keys via Stamping
- Method 4: Engrave Keys with a Key Machine
Method 1: Engrave Keys with a Laser Engraving Machine
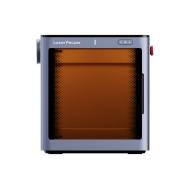
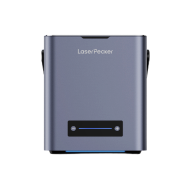
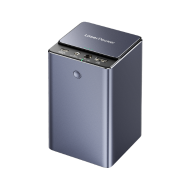
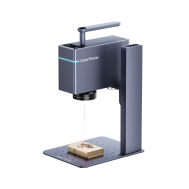
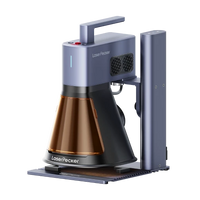
Laser engraving is one of the most precise and efficient methods to engrave metal keys. It uses a focused beam of light to etch designs, text, or patterns onto the surface of a key without physical contact. This technique is widely used by professionals and hobbyists alike for its clean finish and durability.
What You'll Need for Laser Engraving a Key:
- A key laser engraving machine
- Design software (e.g., LightBurn, LaserPecker Software & App)
- Metal key blank (brass, steel, or coated)
Steps to Engrave a Key with a Laser Machine
Step 1: Prepare the Design
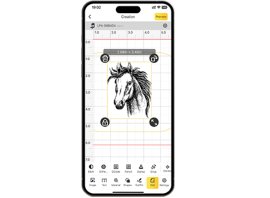
Create or import the engraving design in your software (e.g., initials, serial number, or logo).
Step 2: Set Up the Machine
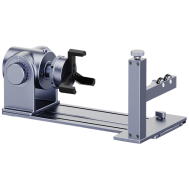
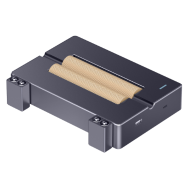
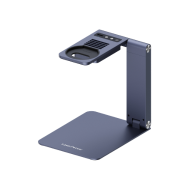
Secure the key onto the engraving platform. Use a rotary attachment if engraving on curved keys.
Step 3: Adjust Settings
Set laser parameters like speed, power, and focus based on the key material.
Step 4: Preview the Engraving
Use the framing feature to preview the engraving position on the key.
Step 5: Start Engraving
Run the engraving process. The laser will etch the design onto the key's surface.
Step 6: Inspect and Clean
Once complete, inspect the key and wipe off any residue using a soft cloth or alcohol pad.
Pros and Cons of Laser Engrave a Key
👍Pros:
Highly precise and professional results
Great for detailed logos, text, or small graphics
Fast and repeatable for batches
👎Cons:
Initial investment can be high
Method 2: Engrave Keys with a Rotary Tool
Engraving keys with a rotary tool is a manual but effective way to personalize or label keys using mechanical friction. A rotary tool spins a small engraving bit at high speed, allowing you to carve letters, numbers, or small designs directly into metal surfaces like brass or steel keys. This method is ideal for DIY enthusiasts who want flexibility without needing expensive equipment.
Required Tools:
- Rotary tool or electric engraving pen
- Clamp, vise, or non-slip mat
- Metal keys (preferably brass or soft metals)
Steps to Engrave a Key with a Rotary Tool
Step 1: Secure the Key
Place the key in a vise or clamp to keep it from moving while engraving.
Step 2: Mark the Design
Use a marker or stencil to outline the text or design you want to engrave on the key.
Step 3: Choose the Right Bit
Install a fine-point engraving bit or a diamond-tip bit on your rotary tool.
Step 4: Engrave Slowly
Power on the tool and begin engraving, gently following the guide lines. Keep the motion steady and pressure light to avoid mistakes.
Step 5: Clean the Key
After engraving, wipe off dust and marker ink with a soft cloth or rubbing alcohol.
Pros and Cons of Engraving a Key with a Rotary Tool
👍Pros:
Inexpensive and easy to get started
Great for personal, handmade touch
👎Cons:
Requires a steady hand and practice
Can be time-consuming for detailed work
Method 3: Engrave Keys via Stamping
Metal stamping is a traditional and hands-on method of engraving keys using force and steel stamps. It's perfect for creating simple text—like initials or numbers—by hammering character-shaped stamps directly onto the key surface. While it's not as refined as laser engraving, it's quick, inexpensive, and doesn't require electricity.
Required Tools:
- Metal stamping kit (includes alphabet/number stamps)
- Hammer (preferably metal or brass)
- Clamp or tape (to keep the key steady)
Steps to Engrave a Key via Stamping
Step 1: Secure the Key
Place the key on a steel block or hard surface and secure it with tape or a clamp to prevent movement.
Step 2: Align the Stamps
Use masking tape as a guide or mark the surface lightly to position your letters.
Step 3: Stamp the Characters
Hold the stamp vertically on the key surface, then strike it firmly once with the hammer. Repeat for each letter or number.
Step 4: Polish
Lightly polish the surface if needed to clean up around the stamped areas.
Pros and Cons of Hand Engrave a Key
👍Pros:
Low cost and no electricity required
Durable and long-lasting markings
👎Cons:
Limited to blocky text—no detailed designs
Can be hard to align precisely
Method 4: Engrave Keys with a Key Machine
Key machines are traditionally used for duplicating keys, but some advanced models can engrave text or ID codes onto key blanks using mechanical or electronic methods. These are commonly used in locksmith shops for professional-grade engraving—especially for security labels, serial numbers, or company logos.
Required Tools:
- Engraving-capable key cutting machine (manual or electronic)
- Key blank or an existing key (depends on machine type)
- Clamp or holder
Steps to Engrave a Key with a Key Machine
Step 1: Set Up the Machine
Power on the machine and choose the engraving function or switch to the engraving head (if it's a dual-function machine).
Step 2: Secure the Key
Insert the key into the designated holder or clamp and tighten it firmly to prevent movement.
Step 3: Choose Text or Design
For manual machines: Insert the appropriate engraving template or type guide.
For digital machines: Input the text or design via touchscreen or connected software.
Step 4: Engrave the Key
Start the machine and let it engrave your design. This could be automatic (CNC-like machines) or manual (you guide the cutter along the template).
Step 5: Finish and Inspect
Remove the key, clean it, and inspect for clarity and accuracy.
Pros and Cons of Engraving a Pen Using a Key Machine
👍Pros:
High precision with clean lines
Fast and consistent engraving
👎Cons:
Expensive machines—not ideal for hobby use
Conclusion
Key engraving is a surprisingly accessible skill that combines function with personalization. Whether you opt for the high precision of a laser engraver, the flexibility of a rotary tool, the charm of hand stamping, or the speed of a key machine, each method offers unique advantages. Choose the approach that best matches your needs and budget—and start adding a personal touch to your keys today.


