


Pen engraving is a popular way to turn an ordinary pen into a meaningful gift, professional promotional item, or personalized keepsake. Whether you want to engrave a name on a pen, add a company logo, or create a custom design, choosing the right engraving method is essential for clean and lasting results.
There are several ways to engrave a pen, ranging from precision tools like a laser engraver for pens or CNC machine to hands-on methods such as rotary engraving or traditional hand engraving.
In this guide, you'll learn how to engrave pens using four effective methods. We'll cover the tools required, step-by-step processes, and the best use cases for each technique so you can choose the right solution for your project.

In this article:
- Method 1: Engrave a Pen with a Laser Engraving Machine
- Method 2: Engrave a Pen with a Rotary Tool
- Method 3: Engrave a Pen via Hand Engraving
- Method 4: Engrave a Pen with a Small CNC Machine
- FAQs: Common Questions About Pen Engraving
Method 1: Engrave a Pen with a Laser Engraving Machine
Using a laser engraver for pens is one of the most precise and efficient ways to create personalized pens. A laser engraving machine uses a focused beam of light to permanently mark the surface of the pen, producing clean text, logos, or intricate designs.
This method is widely used for creating laser engraved pens for gifts, corporate branding, promotional items, or custom stationery. Because the engraving process is digitally controlled, it ensures consistent results even when engraving multiple pens.
What You'll Need
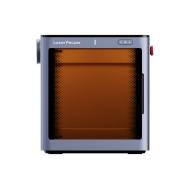
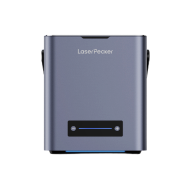
- Pen engraving machine like the LaserPecker LP2 Plus and LP4
- Pens with engravable surfaces (metal, wood, acrylic, or coated plastic)
- Design software such as LightBurn or LaserPecker software
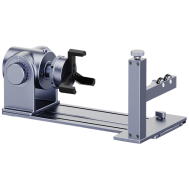
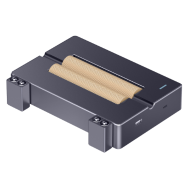
- Optional: Rotary Attachment or Roller for round pencils
Steps for Laser Engraving a Pen
Step 1: Prepare the Design
Create or import the text, name, or logo into your engraving software. Adjust the design size so it fits the engravable area of the pen barrel.
Step 2: Secure the Pen
Place the pen into a rotary attachment to allow smooth rotation during engraving. This setup is commonly used for cylindrical items like pens and is similar to setups used when engraving pencils or other writing tools.
Step 3: Adjust Laser Settings
Set the correct power, speed, and focus according to the pen material. Running a small test engraving is recommended for best results. Many engravers rely on tested laser engraving material settings to achieve consistent results across different pen materials.
Step 4: Preview the Engraving Area
Use the preview or frame function to confirm the engraving position before starting the job.
Step 5: Start the Engraving Process
Begin engraving and monitor the process to ensure the pen stays aligned and the engraving remains consistent.
Step 6: Clean the Pen
Once engraving is complete, wipe away any residue or soot using a soft cloth to reveal the finished design.
Pros and Cons of Laser Engraving Pens
Pros
- Extremely precise and professional results
- Ideal for engraving names, logos, and detailed designs
- Works on metal, wood, acrylic, and coated pens
- Perfect for producing multiple engraved pens quickly
Cons
- Requires a laser engraving machine
- Learning basic engraving software may take time
Method 2: Engrave a Pen with a Rotary Tool
Using a rotary tool or engraving pen is a practical and affordable way to personalize pens at home. This method uses a small rotating bit to carve designs directly into the pen surface, making it ideal for DIY projects or one-off custom gifts.
Although it is less precise than pen laser engraving, a rotary engraving tool works well for adding initials, simple graphics, or engraving a name on a pen made from metal, wood, or plastic. Many hobbyists use similar wood engraving tools when working with wooden pens or other carved writing instruments.
Required Tools
- Rotary tool or electric pen engraving tool
- Fine engraving bits (diamond or carbide)
- Clamp, vise, or non-slip mat to hold the pen
- Pen with engravable surface (metal, wood, or durable plastic)
Steps to Engrave a Pen with a Rotary Tool
Step 1: Mark the Design
Use a fine marker or stencil to sketch the text, initials, or design you want to engrave onto the pen barrel.
Step 2: Secure the Pen
Place the pen in a soft-jaw vise, clamp, or foam holder to prevent movement while engraving.
Step 3: Select the Engraving Bit
Attach a diamond or carbide engraving bit suitable for the pen material.
Step 4: Start Engraving
Turn on the rotary tool and carefully follow the guide lines using light pressure. Let the tool do the cutting rather than forcing it.
Step 5: Clean the Surface
After engraving, wipe the pen with a soft cloth to remove metal shavings or dust.
Pros and Cons of Engraving a Pen with a Rotary Tool
Pros
- Affordable and easy to start with
- Good for engraving names or initials on pens
- Suitable for DIY personalization projects
Cons
- Lower precision than laser or CNC engraving
- Requires steady hands for clean results
- Not ideal for engraving multiple pens
Method 3: Engrave a Pen via Hand Engraving
Hand engraving is a traditional method used to engrave pens by manually carving the design into the pen surface. This technique uses specialized engraving tools called gravers and is commonly used for luxury pens, heirloom gifts, or artistic customization.
Although it requires practice and skill, hand engraving allows artisans to create elegant lettering, decorative patterns, and detailed designs that give each pen a unique handcrafted appearance.
Required Tools
- Hand graver or manual pen engraving tool
- Engraving vise or padded clamp
- Magnifying glass or jeweler's loupe
- Pen with engravable material such as metal or wood
Steps to Hand Engrave a Pen
Step 1: Plan the Design
Sketch the name, initials, or decorative pattern on the pen using a fine marker or pencil.
Step 2: Secure the Pen
Place the pen in an engraving vise or padded clamp to prevent movement during engraving.
Step 3: Prepare the Graver
Select the appropriate graver shape and ensure it is properly sharpened for clean and controlled cuts.
Step 4: Begin Engraving
Hold the graver at a steady angle and carefully follow the design lines, carving small sections at a time.
Step 5: Clean and Polish
Remove metal shavings or debris with a soft brush, then polish the engraved area if desired.
Pros and Cons of Hand Engraving a Pen
Pros
- Produces unique artisan-quality engravings
- Ideal for luxury or collectible pens
- No machines or electricity required
Cons
- Requires practice and engraving skill
- Time-consuming compared to machine engraving
- Mistakes can be difficult to fix
Method 4: Engrave a Pen with a Small CNC Machine
A pen engraving machine based on CNC technology offers precise and repeatable engraving for custom pens. CNC engraving uses a computer-controlled cutting tool to carve designs directly into the pen surface, making it ideal for batch production or professional engraving projects.
This method works well for engraving names, logos, or decorative designs on metal, wood, and acrylic pens. Because the process is automated, CNC machines provide consistent results across multiple pens.
Required Tools
- Small CNC pen engraving machine
- Fine engraving bit or V-bit
- Design and CAM software
- Custom jig, clamp, or rotary fixture to hold the pen
Steps to Engrave a Pen with a CNC Machine
Step 1: Create the Design
Use design software to create the text, logo, or pattern you want engraved. Generate the toolpath using CAM software compatible with your CNC machine.
Step 2: Secure the Pen
Place the pen in a jig, clamp, or rotary fixture to keep it stable and aligned during engraving.
Step 3: Select the Engraving Bit
Install a fine engraving bit and configure the spindle speed, feed rate, and engraving depth based on the pen material.
Step 4: Run a Test Pass
Test the engraving on a spare pen or scrap material to confirm alignment and cutting depth.
Step 5: Start the Engraving Job
Run the CNC program and monitor the process to ensure smooth engraving and accurate results.
Step 6: Clean and Inspect
Remove the pen from the machine and clean off any debris or dust. Inspect the engraving for consistency and clarity.
Pros and Cons of Engraving Pens with a CNC Machine
Pros
- High precision and repeatable results
- Excellent for engraving multiple pens
- Creates deeper engravings than laser methods
Cons
- Requires CNC setup and software knowledge
- More preparation time compared to laser engraving
- Produces dust and machine noise
FAQs: Common Questions About Pen Engraving
1. Can any type of pen be engraved?
Most pens can be engraved as long as the surface material is suitable. Metal, wood, acrylic, and high-quality plastic pens are commonly used for pen engraving. The engraving method and machine settings should be adjusted based on the material.
2. How do you engrave a name on a pen?
To engrave a name on a pen, create a small text design in engraving software and apply it using a laser engraver, CNC machine, or rotary engraving tool. Laser engraving is usually the easiest method for clean and precise lettering.
3. What machine is used to engrave pens?
The most common tools include a laser engraver for pens, CNC engraving machine, or rotary engraving tool. Laser engravers are especially popular because they provide high precision and consistent results.
4. What materials work best for pen engraving?
Metal pens, wooden pens, and anodized aluminum pens are among the best materials for engraving because they produce clear and durable engraved markings.
5. Is pen engraving permanent?
Yes. Engraving creates permanent marks by etching or cutting into the pen surface rather than printing on top of it.
6. Can you engrave multiple pens at the same time?
Yes. Many laser engraving machines can engrave multiple pens simultaneously using rotary attachments or custom fixtures for batch processing.
7. Can you engrave pens at home?
Yes. Small desktop machines such as a laser engraving pen machine or rotary engraving tool make it possible to engrave pens at home for DIY projects.
8. What designs can be engraved on pens?
You can engrave names, logos, dates, quotes, or decorative graphics. Laser engraving allows highly detailed designs on small pen surfaces.
9. How deep is pen engraving?
The depth of engraving depends on the method used. CNC engraving typically creates deeper cuts, while laser engraving produces precise surface markings.
10. Are engraved pens good gifts?
Yes. Laser engraved pens are popular gifts for graduations, corporate events, anniversaries, and promotional branding.
Conclusion
Pen engraving is a great way to transform an ordinary writing tool into a personalized gift, professional promotional item, or meaningful keepsake. Whether you want to engrave a name, logo, or decorative design, the best method depends on the tools you have available and the level of precision required.
Here's a quick summary of the most effective ways to engrave a pen:
- Laser engraving machines offer the most precise and professional results, making them ideal for custom and batch-produced laser engraved pens.
- Rotary tools are affordable and perfect for DIY pen engraving projects.
- Hand engraving creates elegant, artisan-style designs for luxury pens.
- CNC engraving machines provide consistent and repeatable results for small production runs.
By learning how to engrave a pen, you can create personalized pens for gifts, branding, or creative projects. Choose the engraving method that fits your tools and experience level, and start turning ordinary pens into memorable custom designs.


