


Rubber engraving is a versatile craft that blends creativity with functionality, making it perfect for creating everything from custom stamps and decorative patterns to personalized signage and unique gifts. Whether you're working on a small DIY project or producing items for your business, mastering the art of rubber engraving opens the door to endless design possibilities.
The beauty of this craft is that there's no one-size-fits-all approach. Different techniques offer different advantages, depending on your tools, budget, and the finish you're aiming for.
In this guide, we'll explore several effective ways to engrave rubber, from high-precision machine work to hands-on, artisanal methods—giving you the knowledge you need to choose the approach that works best for you.

In this article:
- Method 1: Engrave Rubber with a Laser Engraving Machine
- Method 2: Engrave Rubber with a Hand Carving Tool
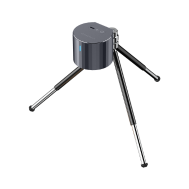
- Method 3: Engrave Rubber with a CNC Machine
- Method 4: Engrave Rubber with a Cricut Maker
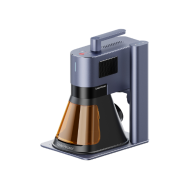
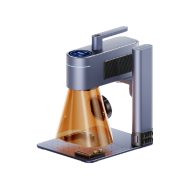
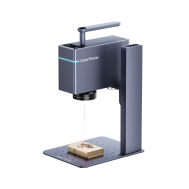
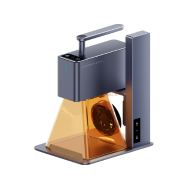
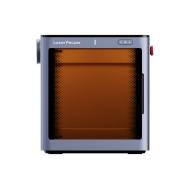
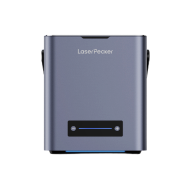
Method 1: Engrave Rubber with a Laser Engraving Machine
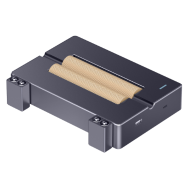
Laser engraving is one of the fastest and most precise ways to engrave rubber. It works by focusing a high-powered laser beam onto the surface, vaporizing the material along the design path. This method is popular for making custom rubber stamps, intricate patterns, and professional signage due to its speed and accuracy.
Tools & Materials Needed
- Laser engraving machine
- Laser-compatible rubber sheets (low odor, designed for engraving)
- Design software (e.g., LDS, LightBurn, RDWorks, CorelDRAW)
- Masking tape (optional, to reduce residue)
Steps to Engrave Rubber with a Laser Engraver
Step 1: Prepare Your Design
Create or import your pattern into the laser software. Adjust the image to high contrast for clear engraving.
Step 2: Set Up the Material
Place the rubber sheet flat on the laser bed. Use masking tape to secure it and minimize smoke marks.
Step 3: Adjust Laser Settings
For engraving rubber with the LP5, we recommend the following laser settings: Power at 50%, Depth at 70%, and 1 pass.
Step 4: Engrave the Design
Start the laser and monitor the process.
Step 5: Clean & Finish
Remove any residue with mild soap and water. Peel off masking tape and inspect engraving depth.
Pros & Cons of Engraving Rubber with a Laser Engraver
Pros
- Extremely precise and repeatable results.
- Can handle complex and detailed designs.
- Fast production speed for bulk orders.
Cons
- Requires access to a laser machine (higher initial cost).
Method 2: Engrave Rubber with a Hand Carving Tool
Hand carving is the most traditional and low-cost way to engrave rubber. Instead of using machines, you manually cut into the rubber with specialized tools. This method is popular for DIY stamp making, artistic patterns, and custom designs because it allows full creative control, although it requires more time and skill.
Tools & Materials Needed
- Rubber carving block
- Carving tools (e.g., Speedball linoleum cutters, X-Acto knife)
- Pencil or waterproof marker (for sketching the design)
- Tracing paper
- Cutting mat
Steps to Engrave Rubber by Hand Carving Tool
Step 1: Prepare Your Design
Draw your design directly on the rubber using a pencil or marker. Alternatively, use tracing paper to transfer a design.
Step 2: Secure the Rubber Block
Place it on a cutting mat to avoid slipping. You can tape the edges for extra stability.
Step 3: Carve the Outline
Use a fine carving tip to trace the outline first. Go slowly to maintain accuracy.
Step 4: Remove Excess Material
Switch to a wider carving blade to remove larger sections. Carve away background areas, leaving raised parts as your design.
Step 5: Inspect & Clean
Brush off rubber shavings. Test your engraving with ink (if making a stamp) to check details.
Pros & Cons of Engraving Rubber with a Hand Carving Tool
Pros
- Very low cost—no need for expensive machines
- Complete creative control over depth and style
Cons
- Time-consuming, especially for large or complex designs
- Requires steady hands and practice to achieve precision
- Inconsistent results if skill level is low
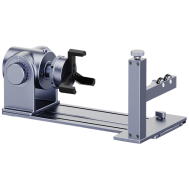
Method 3: Engrave Rubber with a CNC Machine
Using a CNC (Computer Numerical Control) machine to engrave rubber combines automation with high precision. The CNC machine follows a digital design to carve the rubber accurately, making it ideal for consistent, repeated patterns or mass production. While less common than CNC engraving on wood or metal, it's a good option for industrial rubber marking or creating custom rubber stamps in bulk.
Tools & Materials Needed
- CNC milling or engraving machine
- Rubber sheet or block
- Appropriate cutting bit
- Design software (CAD/CAM software like Fusion 360, VCarve, or Easel)
- Cutting mat or clamps (to secure rubber)
Steps to Engrave Rubber with a CNC Machine
Step 1: Create or Import Your Design
Use CAD software to create a vector-based design or import an existing file (DXF, SVG).
Step 2: Secure the Rubber Material
Place the rubber sheet on the CNC bed and secure it using clamps or double-sided tape to prevent shifting.
Step 3: Set Up the CNC Machine
Install the correct cutting bit for fine details. Adjust spindle speed—rubber requires lower speeds to avoid melting or tearing.
Step 4: Run a Test Pass
Perform a shallow test cut on scrap rubber to ensure depth and accuracy.
Step 5: Start the Engraving Process
Let the CNC run according to the programmed toolpath. Monitor the process to ensure no material warping or displacement.
Step 6: Finishing
Remove the rubber from the CNC bed. Clean up any loose shavings or burrs.
Method 4: Engrave Rubber with a Cricut Maker
The Cricut Maker is a versatile craft cutting machine designed for DIY projects, vinyl, paper, fabric, and light engraving. While not originally built for deep rubber engraving, with the right blade and settings, it can be used to cut or lightly engrave thin rubber sheets—especially for making custom stamps, stencils, or decorative rubber pieces. This method is ideal for hobbyists or small-scale projects rather than industrial production.
Tools & Materials Needed
- Cricut Maker
- Engraving tip or deep-cut blade
- Thin rubber sheet (0.8–2 mm recommended for best results)
- StrongGrip cutting mat (purple mat)
- Design software (Cricut Design Space)
- Masking tape (optional, for extra hold)
Steps to Engrave Rubber with a Cricut Maker
Step 1: Design Your Artwork
Open Cricut Design Space and create or import your design.
Step 2: Prepare the Rubber Sheet
Place the rubber sheet onto the StrongGrip mat. Use masking tape along the edges to secure it firmly so it doesn't shift.
Step 3: Install the Right Tool
For surface etching: use the Cricut Engraving Tip. For cutting shapes: use the Deep-Point Blade.
Step 4: Adjust Machine Settings
Choose a lower cutting pressure for engraving and medium pressure for cutting. Run a small test pass to ensure the tool doesn't tear the material.
Step 5: Engrave or Cut
Start the Cricut process. Monitor progress to ensure the rubber stays flat and secure.
Step 6: Finishing Touches
Remove the rubber from the mat carefully to avoid stretching. Clean off any residue with a soft cloth.
Conclusion:
Engraving rubber can be as high-tech or as hands-on as you want it to be. If you need fast, professional results, a laser engraving machine or CNC machine offers precision and efficiency. For smaller or more personal projects, a hand carving tool or Cricut Maker can deliver great results without major investment.
With the right approach, engraving rubber is not only doable—it's fun and rewarding. Now that you know the main methods, it's time to pick one and start creating your own custom rubber designs.


