Using a laser cutter to make real letters from digital fonts is super satisfying and practical. You get crisp edges, can easily make copies, and use all sorts of materials, like shiny plastic, wood, or even metal. Keep reading for ideas, material advice, and answers to common questions.

In this article:
Part 1: Introduction to Laser Cutting Letters
Laser cutting is a techy way to make letters for signs, decor, branding, or gifts. It's way more precise than old-school cutting, giving you crisp edges, smooth curves, and similar results on different stuff.
What are Laser-Cut Letters
Laser-cut letters are text shapes made by using a laser to cut through stuff like wood, acrylic, metal, or cardboard. You can get them flat, stacked, or mixed with engraving for cool looks.

Cons and Pros of Laser-Cut Letters
Pros: It looks clean and pro. You can use detailed fonts. It works on lots of stuff, and it's easy to repeat if you're making a bunch of things.
Cons: You need a laser cutter. Some materials need a little extra work after cutting, and getting the settings right might take some practice.
Part 2: Choosing the Right Materials for Laser-Cut Letters
The material you pick matters big time - it changes the whole vibe of your project. Lasers interact with each material in their own way, so knowing what's what helps nail the look you're going for.
Acrylic
If you want a modern, clean look, acrylic is your friend. You'll often find these letters in business logos, decorations, and signs for events. Lasers cut it cleanly, giving smooth, shiny edges without needing any sanding. You can even play with layers of different colors or thicknesses to give depth. Plus, acrylic is pretty tough, so your letters will stay looking great for years, either inside or in a sheltered spot outside.
Wood
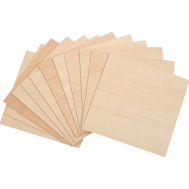
Wood letters are great if you are aiming for a natural, warm look. They're awesome for home decor, DIY projects, or wedding decorations. You can etch them for extra detail, and paint or stain them as you like. Different woods offer different feels: birch and maple are smooth, while used wood brings a more rugged feel.
Metal
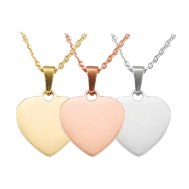
Metal letters? Those are built to last. They're strong, durable, and fit right in with industrial designs or outdoor signs. After cutting, you can polish, brush, or coat them with powder for a better look. Metals such as brass or aluminum can also have logos, names, or designs etched into them, which makes those materials good for practical and decorative jobs.
Leather
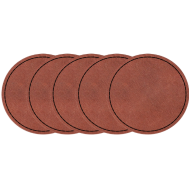
Leather letters add a soft, adaptable touch. They're awesome for clothes, patches, bags, or as brand details. Laser etching can create detailed designs or logos without hurting the leather. Since leather is flexible, these letters are easy to put on curved items or layer with other materials for a stylish feel.
Cardboard
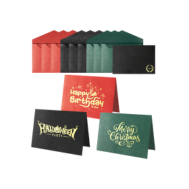
Cardboard letters are cheap and light. They are a go-to if you're doing prototypes, short-term signs, kids' projects, or big letters you just need for a short period. Feel free to paint, decorate, or layer them to add depth, and they're easy to cut, so you can try out shapes and setups before using pricier stuff.
Part 3: Step-by-step Guide to Laser Cutting Letters
To produce professional, accurate letters, simply adhere to these steps. We will guide you through preparation, design setup, machine operation, and final touches. Even for those new to laser cutting, these tips can assist you in avoiding errors and achieving quality outcomes consistently.

Source: LaserPecker CraftZone
Tools and Preparation
- Laser cutter fiber or diode, depending on your material
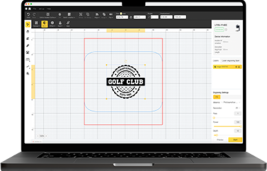
- Computer with design software (like LaserPecker Design Space, Illustrator, CorelDRAW, or LightBurn)
- Acrylic sheets, wood panels, leather pieces, metal sheets, or cardboard
- Safety glasses, gloves, and a ventilation system
Your Letters Design (vector files, fonts, layouts)
1. Create your design as a vector file (SVG, DXF, or AI).
2. Choose fonts that are thick since thin lines can break.
3. Arrange your designs to minimize material waste.
Laser Cutting Process
Setting up the machine
The person in the YouTube video gently puts the material flat on the cutter bed and uses clamps or magnets to keep it still, which stops it from moving while the laser is working.
Adjusting power, speed, and focus
To start, adjust the focus using the focus tool. Next, change the power and speed settings in the program. The best settings depend on the material, so you may have to experiment a little.
It's a good idea to test on some scrap material first. This lets you fine-tune the settings and get a clean look before working on your real project.
Cutting and engraving steps
- With the settings dialled, start the cut.
- The laser will follow your design to cut each letter.
- If you're engraving details inside the letters, do that before cutting the outline.
Finishing touches (polishing acrylic edges, painting wood, etc.)
- Acrylic: Clean the shiny edges and use a flame to polish them more, if desired.
- Wood: Lightly sand off any burn marks, then paint or varnish.
- Metal: Brush or polish the edges.
- Cardboard: Usually, no finish is needed, but you can paint it to make it more durable.
To care for leather after engraving, wipe away any leftover material. Then, use a leather conditioner or wax to keep the leather soft and prevent it from drying out.
Part 4: Creative Applications of Laser-Cut Letters
Home Decor: Use large, laser-cut letters to spell out names or inspirational words. Layering different materials like acrylic over wood gives a cool, high-end feel. They're easy to hang.
Event Signs: Custom-lettered signs are great for weddings, parties, and trade shows. This includes welcome boards, table numbers, and directional signs that fit your theme.
Retail Displays: Lettering for stores or product names looks good when cut from acrylic or metal. They look professional compared to printed signs.
Office Branding: Use lobby signs or engraved nameplates to show how professional you are. Laser-cut letters can be painted to match your brand's colors.
Art: Artists use laser-cut letters in art or mixed-media projects. Repeating letters or stacked layers can create interesting effects.
Educational Tools: Alphabet sets or nameplates for doors are practical classroom uses. Letters made of cardboard or thin plywood are cheap teaching tools.
Gifts: Personalized letter magnets or engraved plaques make good gifts. Lasers make sure each gift has sharp details.
Packaging: Use laser-cut letters or logos for fancy packaging. Cut lettering on wood can be added to gift boxes for a personal touch.
Outdoor Signs: Letters cut from weather-proof stuff can be used for shop signs or house numbers.
Prototypes: Designers can quickly test out letter styles by cutting samples in cheap materials before choosing the final look.
FAQs: Hot Questions about Laser Cutting Letters
I'm a beginner. What material should I pick first?
Try acrylic or MDF. They both give clean cuts and aren't too fussy when you're still learning. Acrylic gives you polished edges right away and works great for signs. MDF or birch plywood are cheap, sand and paint easily, and shows you how wood acts when heated. Hold off on PVC, since it makes bad fumes, until you know about ventilation and machine settings.
What are the basic settings I need to know (power, speed, focus)?
Power is how much energy the laser uses on the material. Speed is how long the laser stays in one spot. More power and less speed cut deeper. Less power and more speed engraves. Focus is how sharp the laser is. Getting the focus right means cleaner edges. Test your settings on some scrap material first. Then change them a little at a time until the edges are smooth, without burning or melting too much.
How can I create letters that stand up on their own without falling over?
Make the base wider or make a base that it can slot into. If what you're using is heavy, try adding a small bracket or attaching the letters to a panel to spread the weight. If it's light, like cardboard, try glueing it to a thicker base.
Is there a way to cut large letters without a huge laser?
Cut the letters into pieces and put them together. Split a letter into parts that fit together, add glue or screw them together where you are using them. Also, big signs are much easier to ship this way.
Do I need to know special software to get my files ready?
Knowing how to use vector software is a plus. Programs such as LaserPecker Design Space (which has a material library and simple design tools), Adobe Illustrator, Inkscape (free), or LightBurn let you change text into outlines, clean up lines, and pick what you want to cut. Most issues happen because lines are going the wrong way or shapes aren't closed, so check your vectors before cutting.
Conclusion
Laser-cut letters are a fantastic way to bring your designs to life. You can pick from materials like acrylic, wood, or metal to get clean edges and a consistent look.
Beyond just aesthetics, they're versatile. Ideas include home decor, custom gifts, business signs, and branding. With proper prep and finishing, laser-cut letters can look beautiful and last a while. So, they're a solid option for any project size.


