


Picture frames not only keep your photos safe but also bring memories to life and give character to your home. Building your own frame lets you pick the look, the stuff it's made of, and the final touches. This simple project can turn into something really special.
No matter if you're into classic woodworking or want to try cool laser cutting, this guide will show you how to make a frame that really pops.

In this article:
- Part 1: Why Making Your Own Picture Frame is So Popular?
- Part 2: Top 2 Methods to Make a Custom Frame
- Method 1: Make a Picture Frame with Woodworking Tools
- Method 2: Make a Picture Frame with a Laser Cutter
- Part 3: Creative Ideas for Custom Frames
- Part 4: Tips for Making the Best Picture Frame
- FAQs: Questions about Making Your Own Picture Frame
Part 1: Why Making Your Own Picture Frame is So Popular?
Custom frames are great because they mix creativity, usefulness, and personal meaning. They let you get the perfect match for your home, use cool materials, and add personal touches that you can't get with regular frames. Plus, making your own frames can save you money and be a fun project, especially if you like making art that you can actually use.
Part 2: Top 2 Methods to Make a Custom Frame
When it comes to creating frames, you'll mostly see two methods: the classic woodworking approach and the modern laser cutter method. Woodworking brings out a handcrafted, slightly old-fashioned feel, while laser cutting focuses on exactness, quick production, and design freedom.
Method 1: Make a Picture Frame with Woodworking Tools
Woodworking is a time-honored method for crafting frames, giving you the ability to shape and finish wood manually. It's easy, versatile, and gives your project a personal, handcrafted feel.
Pros and Cons
Pros: Wood frames give off a cool, old-school vibe since they're built by hand. You get to pick the size, slap on whatever paint color you want, and finish it your way. If you're into DIY and digging natural materials, building these frames can be a blast.
Cons: Dealing with wood means you gotta have the right tools, carve out some time, and have some skills. It might take longer than just buying something these days, and how it looks depends on how good you are at it.
Tools and Materials
- Wood boards (like oak, pine, or old wood)
- A saw (a miter saw works best)
- Sandpaper
- Wood glue and clamps
- Nails or screws
- Wood stain or paint (if you want)
- A measuring tape and a pencil
- A sheet of glass or plastic for the front
Step-by-Step Guide
Step 1: First, measure your photo. You'll want the frame to be a bit smaller, like a half-inch on each side, so the photo sits nicely.
Step 2: Cut the wood at 45-degree angles using a miter saw. This makes the corners look sharp.
Step 3: Sand the edges smooth.
Step 4: Glue the frame together. Then clamp it tight while the glue dries. For a super-strong frame, add small nails or screws.
Step 5: Time to add color! Stain, paint, or seal it. It's all up to you.
Step 6: Pop in the glass or acrylic, then your photo, and a backing to hold it all together.
Step 7: Finally, add something to hang it up with – brackets or wire work great.
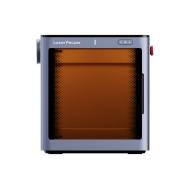
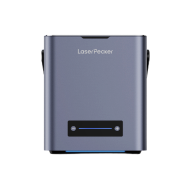
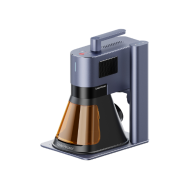
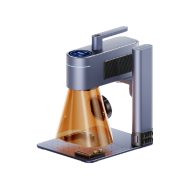
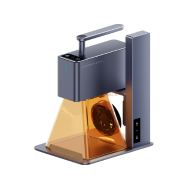
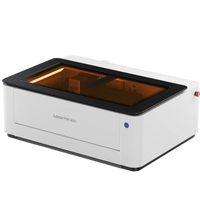
Method 2: Make a Picture Frame with a Laser Cutter (Recommended: LP5)
Laser cutters let you make wood frames with clean cuts and nice engravings. Unlike regular woodworking, they let you design frames with cool patterns, shapes, or words all at once. This quick method turns wood into keepsakes.

Pros and Cons
Pros: Laser cutters are a good choice for projects that need precise cuts and a polished, pro look. You can use them to add designs - think names or dates - right onto whatever you're making. They're fast and reliable, which makes them good for gifts or making a few of something.
Cons: Keep in mind you'll need to get your hands on a laser cutter and get used to the design software. Also, laser cutters cost extra compared to your standard tools.
Tools and Materials
- Laser cutter (LP5 is a good choice)
- Wood sheets (like basswood)
- Design software (LightBurn or LaserPecker Design Space)
- Your picture and a wood backing
Step-by-Step Guide
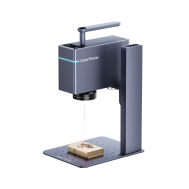
Step 1: Make your design using vector software. Add patterns, borders, or text to personalize it.
Step 2: Use thin, flat wood sheets such as basswood, which cut smoothly.
Step 3: Change the laser's power and speed to suit the wood's thickness.
Step 4: Use the LP5 to precisely cut out the frame pieces. Try layered shapes or heart cutouts, like in our Valentine's Day photo frame.
Step 5: For decoration, add designs, initials, or messages to the wood.
Step 6: Glue or attach the pieces, put in the glass or acrylic front, add your photo, and secure the backing.
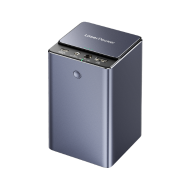
Why the LP5 Stands Out
The LP5 is great for crafting wood picture frames. It has two lasers: a 20W diode laser that cleanly cuts basswood up to 20mm thick, and a 20W fiber laser for really detailed engraving. You can form the frame and then decorate it with designs, words, or borders to give it a pro, personal touch.
The LP5 engraves quickly, up to 10,000mm/s, even with complex designs, so it's useful whether you're making one frame or many. It also does deep engraving and embossing, so you can create 3D textures like vines or geometric patterns.
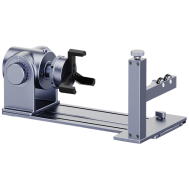
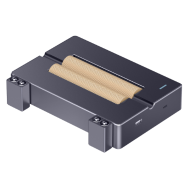
Extras like the slide extension (160 × 300mm) allow you to make bigger frames. The rotary extension lets you work on curved items that look nice with frames. It works well with LightBurn or LaserPecker Design Space, so you can see how your designs will look and change them before engraving.
The LP5 is safe to use inside, thanks to its Class 1 Safety Enclosure. It gives you cutting precision, detailed engraving, and speed. It's awesome for making unique, good wood picture frames for decorations, gifts, or those important moments.
Part 3: Creative Ideas for Custom Frames
Custom frames don't need to be boring. Try different materials and designs to make them your own.
Type 1: Glass Photo Frame
Glass frames look cool, but why not make them even cooler? Laser engraving lets you burn images straight into the glass, making them look like awesome, frosted, grayscale pics. The result? Photos that seem to shine from inside the glass, kept safe forever.
This is great for portraits, landscapes, or any memory you care about. It gives them an artistic and timeless feel. To get the best results, use photos with clear contrast and make sure they're in grayscale. Dark backgrounds seriously help the details pop. It's a new, up-to-date way to turn plain glass into personalized art.
Type 2: Wood & Acrylic Music Frame
These frames blend the warmth of wood with sleek acrylic, a pretty cool match! Lots of people add a QR code or music notes to the acrylic, so the frame shows a picture and links to a song. It's like seeing and hearing a memory at once.
Type 3: Driftwood or Rustic Frame
Driftwood frames look natural and a bit aged, great for beachy, country, or farmhouse-style rooms. Since no two pieces of wood are the same, each frame is unique. Those little marks add so much character.
Type 4: Recycled Material or Vinyl Record Frame
Turning old stuff like records, cardboard, or plastic into frames rocks because you're helping the earth while creating something awesome. Think of cutting up a record to make a frame that shows off a photo and reminds you of great music. These make killer, earth-friendly gifts or just cool decorations.
Part 4: Tips for Making the Best Picture Frame
Always be sure to measure your photo twice. This way, you can be sure your frame fits right, with no gaps or cut-off parts.
Pick frame materials that go with your place and match the photo's feel. Wood makes things cozy, acrylic is sleek, and metal is for an industrial style.
If you're using wood, sand all the edges well. A smooth frame looks way better than a rough one.
When using a laser cutter, try out the settings on some spare stuff first. You don't want to mess up your final piece. Change the power or speed for different material thicknesses.
Keep decorations balanced. Add just enough to make the frame look good without taking away from the photo. Often, simple is best.
Put on a finish to protect your frames, like varnish for wood or a film for acrylic. This helps prevent scratches, water damage, and wear over time.
FAQs: Questions about Making Your Own Picture Frame
1. What materials are best for making DIY frames?
Wood gives you that timeless vibe. The wood's natural look is awesome, but you can also stain or paint it to match anything. For a modern twist, acrylic is where it's at. It's super sleek, and you can layer it or add designs. Metal, like aluminum or brass, makes your frames tough with a bit of an industrial edge. And if you're all about recycling, why not try cardboard or even old records? Got a laser cutter? Then all of these materials are good to go.
2. Do I need advanced skills to make a frame?
Nah, you don't need to be a pro. If you're cutting wood, you'll need to know the basics of using a saw, sandpaper, and glue. If you're just starting, stick to simple squares or rectangles before trying anything fancy. A laser cutter will make your life way easier. Just design your frame on your computer, and the machine cuts and etches it for you. There are loads of easy design software out there, so anyone can make cool frames.
3. Can I sell DIY frames?
Totally! Handmade frames are popular at craft fairs, online on places like Etsy, and in local shops. Frames with names, dates, and even special designs are super sought after. People love buying personal gifts for weddings, birthdays, and decorations. This could be a cool way to start a small biz.
4. What size frames can I make?
The size of your frame depends on your tools and materials. Big wooden frames are totally achievable. If you have a laser cutter, the size will stick to the machine surface. Some machines can expand the workspac,e which is good for small and medium frames. You can always divide bigger frames into sections and assemble them afterwards
Conclusion
Making your own picture frame is a fun idea! You can grab some wood and make one by hand for a cool, homemade feel. Or, if you're looking for quick and exact cuts with unique designs, try a laser cutter like the LP5. Whether you're into a plain wood style, a sleek acrylic look, or something that shows off your personality, creating your own frame turns everyday materials into something special that displays your best photos.


