


A wooden chessboard is more than just a place to play a game-it shows skill, design, and what you like. Making your own chessboard lets you decide on the materials, size, and how it looks, whether you like old-fashioned woodworking or today's computer-based methods.
In this guide, we'll explore two practical methods for making a wooden chessboard: traditional woodworking and laser cutting. You'll learn the strengths of each approach and follow a clear process for creating a chessboard using laser cutting, helping you choose the method that best fits your skills and goals.

In this article:
- Part 1: Two Popular Ways to Make a Chessboard out of Wood
- Method 1: Make a Wood Chessboard via Traditional Woodworking
- Method 2: Make a Wood Chessboard via Laser Cutting
- Part 2: Woodworking vs. Laser Cutting: Which Method is Best?
- Part 3: How to Make a Chessboard out of Wood via Laser Cutting
- Part 4: Design Tips for a Better Wooden Chessboard
- Part 5: FAQs about Making a Chessboard out of Wood
Part 1: Two Popular Ways to Make a Chessboard out of Wood
When crafting a wooden chessboard, you have two main choices. You can go the classic way with woodworking skills and hand tools. Or, you can use laser cutting and engraving for a faster, exact result. Each way has its own appeal and things to think about.
Method 1: Make a Wood Chessboard via Traditional Woodworking
Have you considered making a wooden chessboard? It's a timeless woodworking thing to do. The idea's simple: chop wood into strips or squares, glue them in a checkerboard look, sand it until smooth, and stain it.
If you're good with wood, you'll have fun showing off your skills with this. Maple and walnut are great choices. In the end, the board will be a family thing that stays within.
But be warned: it's trickier than you might believe. Your measurements and cuts need to be correct, or the squares will be off. Gluing can also get hard if you lack the right clamps. And sanding takes time. If you're new, it might be hard, mostly if you're short on tools.
Method 2: Make a Wood Chessboard via Laser Cutting & Engraving
Laser methods use a laser cutter or engraver to make the chessboard design. Instead of cutting and putting together many small pieces by hand, you can design the board on a computer and have the laser cut or engrave the grid with great accuracy.
With laser cutting, you can cut individual squares to assemble later, or cut a single board and engrave the grid lines and square layout directly onto the surface.
Laser engraving also makes it easy to darken selected squares, add board coordinates, or incorporate decorative borders and logos for a more refined look. Beyond the board itself, laser cutting can also be used to precisely cut chess pieces, allowing you to create a fully matching set with consistent shapes and clean edges from the same material.
If you want to make more than one board, this way is quicker, more consistent, and easier to do again. This is good for makers, small shops, or hobbyists who care about getting things done well and making things their own.
Comparison Table: Traditional vs Laser-Based Methods
To help you decide which approach suits your needs, the table below compares traditional woodworking and laser-based methods side by side.
| Traditional Woodworking | Laser Cutting & Engraving | |
|---|---|---|
| Precision | Depends on skill and tools | Very high and consistent |
| Time Required | Long (cutting, gluing, sanding) | Shorter, especially for repeats |
| Difficulty | Medium to high | Beginner-friendly |
| Customization | Limited, mostly manual | Excellent (patterns, text, logos) |
| Repeatability | Hard to duplicate exactly | Easy to reproduce |
| Tools Needed | Saws, clamps, sanders | Laser cutter, design software |
In conclusion: For strength that lasts, you can't beat traditional woodworking. But if you need things made fast, with exact cuts, or want to add text, logos, or fancy designs, laser cutting is the way to go.
Part 2: Woodworking vs. Laser Cutting: Which Method is Best for Making a Chessboard?
Thinking of crafting a chessboard? Sweet! How you tackle it depends on what you want. Match the method to your vibe, skills, and how special you want it to be.
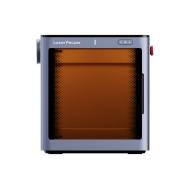
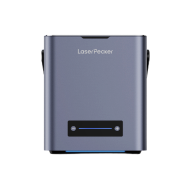
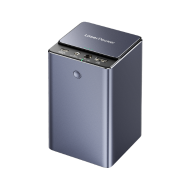
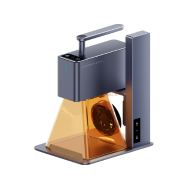
Here's why adding laser cutting-especially with a machine like the LaserPecker LX2 makes a real difference:
If you enjoy getting your hands dirty and picking up new skills, regular woodworking could be your thing. You'll learn cool wood joints and finishing tricks.
There's something super satisfying about building a chessboard from the ground up. Many players dig that sturdy, classic feel you get with a wood chessboard made this way. Plus, your friends will think you are a cool DIY-er.
If you're into a modern style or value being super precise, then laser cutting is your best bet. It's great for crafters, hobbyists, or small businesses that want to make spot-on chessboards. Laser cutting gives you way more freedom with designs. Want perfect squares? Easy. Aiming for a stylish, up-to-date look? A laser cutter can nail it. You can toss in custom details, too.
Laser tech makes it a cinch to slap on letters, logos, or names to seriously personalize it. I mean, imagine giving a friend a chessboard with their name on it; how cool is that?
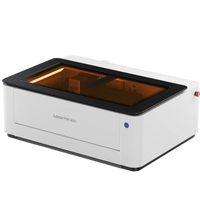
If you want an easy process with very little risk of mistakes, check out a laser cutter like the LaserPecker LX2. Made to cut and engrave wood with accuracy, it's also easy to use-even for beginners. One of its key advantages is its maximum working area of 500 × 305 mm (19.7” × 12”), which is large enough to engrave an entire chessboard in a single pass.
Since standard chessboards typically range from 6 to 20 inches (approximately 40 to 50 cm), the LX2 comfortably handles most common board sizes without the need for repositioning. This makes it a great starting point for chessboard projects and other woodcrafting applications, especially if you plan to produce consistent results or even sell your finished boards for extra income.
Part 3: How to Make a Chessboard out of Wood via Laser Cutting
Laser-cutting a chessboard is pretty straightforward: prep first, finish last. Even though the laser does the detailed cutting, what materials you pick and how you set things up really matters for how it turns out.
Tools You Need
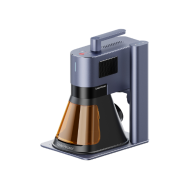
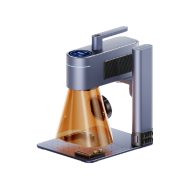
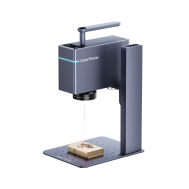
If you're thinking about crafting a wooden chessboard with a laser cutter, you'll want a machine that's up to the task. I recommend the LaserPecker LX2 cutter.The LX2 does cutting and engraving rapidly. This is awesome for getting those chessboard squares and lines just right, and it won't eat up all your free time. Got different wood thicknesses or engraving projects? No sweat! You can swap out the laser modules in a snap. Camera alignment makes setting up your design super simple, even if you're just starting out. The work area is a good fit for normal chessboard sizes. Plus, it has built-in safety features.
Materials You Need
Choosing the right materials ensures both durability and visual contrast. Common options include:
- Plywood or solid wood boards for the base
- Two contrasting wood tones, or one wood combined with engraving for dark squares
- Wood glue if assembling multiple layers or pieces
- Wood finish such as oil, wax, or clear varnish
People often go for thin plywood in laser projects since it slices sharp and stays put. Still, real wood works too, as long as it's dried right and prepped well.
Steps to Make a Chessboard with Laser Cutting
Step 1. Plan Your Board
Begin by designing an 8x8 grid. Aim for squares that are about 40–50 mm wide – a pretty standard size. You can either cut out each square individually or engrave the whole pattern on one piece of wood.
Step 2. Prep the Wood
The wood needs to be clean, flat, and without any dust. If you're engraving, put masking tape on the wood to keep burn marks away.
Step 3. Set Up the Laser
Set up your file to separate the cutting and engraving. Usually, you'll engrave the darker squares deeper, or fill them with stain later on. The lighter squares stay as is.
Step 4. Do a Test Run
Try your settings on a spare piece of wood first. This way, you can adjust the depth, contrast, and how clean the edges look.
Step 5. Cut or Engrave
Start the full job, but keep an eye on it. You want to make sure the lines are clean and the engraving is consistent.
Step 6. Clean It Up
Once it's done, lightly sand the surface to get rid of any residue and make the edges smooth. Be careful not to sand away the engraved parts.
Optional Step: Adding Details with Laser Engraving
Laser engraving allows you to enhance the chessboard beyond the basic grid. You can add coordinates (A-H and 1-8) along the edges, decorative borders, or even custom text on the back. These small details make the board feel more refined and personalized.
Part 4: Design Tips for a Better Wooden Chessboard
Want to make a wooden chessboard that's not just nice to look at but also great to play on? A good design is key. Whether you're into classic looks or want something totally unique, here's how to make your board stand out, last for years, and be a joy to use – especially when you're using lasers for cutting and fancy details.
Tip 1. Get the Size Right
Chessboards usually have those 8x8 grids with squares that are all the same size. For most boards you keep at home, squares that are about 1.75 to 2.25 inches across are a great fit. The size keeps stuff looking nice and fits the chess pieces well.
Tip 2. Pick Woods or Colors That Stand Out
To make a chessboard that's easy to read, contrast is super important. If you're gluing wood together, think about using light woods, such as maple or birch, mixed with darker woods, such as walnut or mahogany. If laser engraving is more your thing, you can darken certain squares and make them pop – no paint needed.
Tip 3. Laser Engraving for Sharp Lines
Instead of just gluing squares, use a laser to lightly mark the grid lines. This makes each square clear over time and looks top-notch. It also hides little mess-ups.
Tip 4. Mark Coordinates (Up to You, But Handy)
Putting letters (A-H) and numbers (1-8) around the edges can help people learn, teach, or write down moves. Laser engraving makes these marks small and exact without getting in the way.
Part 5: FAQs about Making a Chessboard out of Wood
Q1. How Many Squares Are on a Chessboard
A regular chessboard has 64 squares in an 8x8 layout. The light and dark pattern is key to playing, since many moves depend on the square color. When you make your board, keep the square size the same for looks and how it works.
Q2. Can I Make a Wooden Chessboard Using Laser Cutting Only?
Yes, you can make a whole wooden chessboard using just laser cutting and etching. Just etch the grid and dark squares right onto the wood. This skips the need to glue pieces together. It's great for newbies or if you're making a lot of boards with the same style.
Q3. What Type of Wood Works Best for Laser-Cut Chessboards?
For plywood, go with the stuff that's the same all the way through - it cuts clean and stays flat. For solid wood, maple, birch, or walnut are great if they're dried well. Soft woods are easy to etch, but harder woods look better, even if you have to work with them a bit.
Q4. Can You Laser Cut Chess Pieces?
Yes, laser cutting is an excellent method for creating chess pieces with consistent shapes and clean edges. A laser cutter allows you to cut detailed silhouettes from wood, acrylic, or other suitable materials with high precision.
This ensures that every piece in the set matches in size and style, which is difficult to achieve with manual cutting. Laser cutting also makes it possible to experiment with custom designs, modern shapes, or themed chess sets. When paired with laser engraving, you can even add symbols or subtle details to enhance the overall look of the pieces.
Conclusion
A wooden chessboard is a cool project that mixes skill with design. Woodworking provides a traditional feel, but laser cutting brings accuracy and lets you easily repeat designs. A Laser cutter, like the LX2 model, simplifies the process and enables personal touches for great results. Either way, a handmade wooden chessboard is a classic item.


