


Wooden stools are both practical and decorative, adding warmth and character to any space. When you make one yourself, you have full control over the design, size, and finish, allowing you to create a piece that fits your home perfectly.
This guide will walk you through how to make a wooden stool using two practical methods: traditional hand woodworking and modern laser cutting. Whether you prefer classic craftsmanship or precision tools, you'll find an approach that suits your needs and skill level.

In this article:
- Part 1: Two Practical Ways to Make a Wooden Stool
- Method 1: Make a Wooden Stool via Traditional Woodworking
- Method 2: Make a Wooden Stool via Laser Cutting
- Part 2: Woodworking vs. Laser Cutting: Which Method is Best?
- Part 3: How to Make a Wooden Stool with LX2 Laser Cutter
- Part 4: FAQs about Making a Wooden Stool
Part 1: Two Practical Ways to Make a Wooden Stool
There are two main ways to craft wooden stools: the classic woodworking route or using modern laser cutters. Each has some good points, and knowing them can help you pick the one that's best for your skills and what you want to make.
Method 1: Make a Wooden Stool via Traditional Woodworking
Old-fashioned woodworking uses simple tools like saws and hammers. You get total creative control and can make strong stools that last for years. By joining pieces with methods like mortise and tenon, or using dowels or screws, you can put together a solid stool without fancy machines.
Still, this way takes time, practice, and careful measuring so the stool is safe and steady. Sanding and coating are also key to a smooth, nice look.
Method 2: Make a Wooden Stool via Laser Cutting
Laser cutting is a great way to get exact and consistent cuts on wood parts for a stool. A laser cutter lets you make copies that are all the same, so you don't have to spend time repeating the same cuts by hand. It can also engrave logos, patterns, or text directly onto the stool, making each piece more personal or brand-ready.
Another big advantage is that laser cutting is very beginner-friendly. Even if you have little to no woodworking experience, you can simply upload a prepared design file and let the machine cut all the stool parts for you with precision.
Instead of measuring, sawing, and correcting mistakes, your main task becomes assembling the finished pieces. While laser cutting can't replace every traditional woodworking technique, it excels at fine details, reduces errors, and greatly speeds up small-batch or custom stool projects.
Comparison Table: Traditional vs Laser Cutting Stool Making
| Method | Precision | Speed | Skill Required | Best For | Customization |
|---|---|---|---|---|---|
| Traditional Woodworking | Medium-High | Medium | High | Sturdy stools, furniture-quality | Moderate, mostly hand-carved or painted |
| Laser Cutting | Very High | Fast | Low–Medium | Decorative or batch production | Excellent, can add engraving, text, logos |
| Combination | High | Medium-Fast | Medium | Sturdy stools with custom details | High, engraving or patterns added easily |
In conclusion: For strength that lasts, you can't beat traditional woodworking. But if you need things made fast, with exact cuts, or want to add text, logos, or fancy designs, laser cutting is the way to go.
Part 2: Woodworking vs. Laser Cutting: Which Method is Best?
If you're new to woodworking or mainly building for personal use, traditional stool-making methods are still a great foundation. They help you understand joinery, balance, and structural strength. However, when you want to elevate your project beyond a basic functional stool, laser cutting becomes a powerful upgrade rather than a replacement.
Here's why adding laser cutting-especially with a machine like the LaserPecker LX2 makes a real difference:
Reason 1: Beginner-Friendly with Minimal Woodworking Experience
You don't need years of woodworking skills to get accurate parts. With laser cutting, you simply prepare or import a design file, and the LaserPecker LX2 precisely cuts each stool component for you. Instead of struggling with measuring, sawing, and re-cutting, your main task becomes assembly.
Reason 2: High Precision Without Trial and Error
Traditional methods often require repeated adjustments to get legs, seats, and supports aligned. Laser cutting ensures every part is identical, which greatly reduces mistakes and wasted material-especially helpful for first-time builders.
Reason 3: Easy Personalization Through Laser Engraving
Beyond cutting, the LaserPecker LX2 allows you to engrave names, logos, patterns, or decorative details directly onto the stool. This adds character and uniqueness without weakening the structure or complicating the build process.
Reason 4: Efficient for Small Batches or Custom Designs
Whether you're making one stool or a small set, laser cutting speeds up production while keeping results consistent. It's ideal for custom home projects, gifts, or small-scale workshops that value both efficiency and creativity.
In short, traditional woodworking teaches valuable skills, but combining it with laser cutting-using a capable desktop laser cutter like the LaserPecker LX2 lets you achieve cleaner results, personalized details, and a smoother building experience without sacrificing strength or durability.
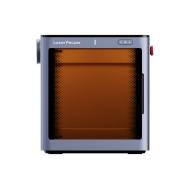
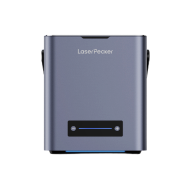
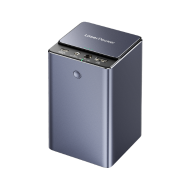
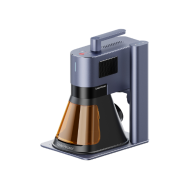
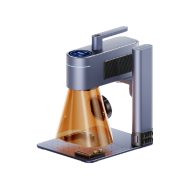
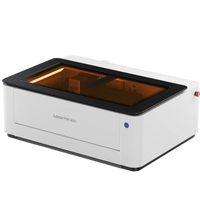
Part 3: How to Make a Wooden Stool with LX2 Laser Cutter
Laser cutting makes building a wooden stool faster and more precise than traditional methods. With the LaserPecker LX2, you can cut every stool part with clean edges and reliable accuracy, even if you have no prior woodworking experience.
Its stable laser output and smart software control make wood cutting and engraving straightforward-simply load the design file, let the machine handle the precision work, and focus on assembling a sturdy, personalized stool with engraved text or patterns.

Materials and Tools You Need
- Wood panels (birch, basswood, or maple are good choices)
- LX2 laser cutter
- Wood glue and clamps
- Sandpaper (120–220 grit)
- Wood finish or varnish
The LX2 makes it easy for anyone to make clean cuts and detailed engravings. The software is easy to learn, and it has strong laser modules. Good for different woods and thicknesses, it's great for making your own stools.
Steps to Make a Wooden Stool with LX2
Step 1. Prepare the Design
Draw or import your stool design into the LX2 software. This design should include clear-cut lines for the legs, supports, and seat, as well as any optional engraving, such as a logo or text.
If you're not sure how to design a laser-cut stool from scratch, you can explore ready-made files on LaserPecker CraftZone for inspiration, or purchase professionally designed stool laser cutting files from platforms like Etsy. These pre-made designs can save time and help ensure proper fit and structural balance before cutting.
Step 2: Secure the Wood Panels
Place your wood sheets into the laser cutter, ensuring they are flat and properly aligned. Use clamps or weights if necessary to prevent movement during cutting.
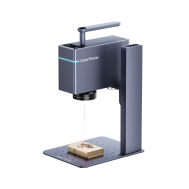
Step 3: Laser Cutting the Parts
Run the LX2 to cut all stool components. The laser will create clean edges, and you can engrave text, patterns, or logos simultaneously. Double-check settings for speed, power, and number of passes depending on the wood thickness.
Step 4: Sand and Prep Components
Lightly sand each cut piece to remove minor burn marks or splinters. Pay attention to edges and corners for a smooth finish.
Step 5: Assemble the Stool
Use wood glue, dowels, or screws to join the legs, supports, and seat. Clamp and let dry thoroughly for maximum stability.
Step 6: Final Sanding and Finishing
After assembly, sand the entire stool once more to smooth any rough areas. Apply a clear varnish or wood finish to protect and highlight the wood grain.
Step 7: Optional Engraving Touch-Ups
If you want to enhance engraved designs, lightly sand and re-run a shallow pass with the LX2 to deepen or clean lines.
Part 4: FAQs about Making a Wooden Stool
Q1. Is a Laser-Cut Wooden Stool Strong Enough?
Yes, they can be quite strong if you pick good hardwood or softwood with good support. How you join and put things together matters more than the laser cut itself. If you use precise cuts and old-school building methods, you'll get a stool that lasts. Good glue and clamps mean it can handle daily use, like sitting and moving it. Adding designs doesn't hurt the wood if you keep them off important spots.
Q2. Can Lx2 Cut Thick Wood Panels?
The LX2 works with different wood thicknesses and can cut wood up to 22 mm thick in a single pass, while thinner pieces can be cut at faster speeds for precise results. For the best outcome, cut in layers or go with thinner panels. Softwoods are simpler to cut. Hardwoods need the right settings. Always try a test cut first to find what works best for the wood you're using.
Q3. Is Laser Engraving Permanent on Wood?
Laser engraving sticks around because it takes off a bit of the wood, unlike just coloring it. If you finish and seal it right, what you engraved-text or a logo-will stay there for years. Sunlight and wetness can change how it looks as time passes, so a clear coat is a good idea. Engraving on flat spots lasts longer than on edges.
Q4. How Long Does It Take to Make One Stool?
How long it takes depends on how you do it and how much experience you have. Regular woodworking could be hours or a whole day when you count cutting, sanding, and putting it together. With the LX2, cutting and engraving might take 30–60 minutes, plus time to build and finish. The more you do it and know your tools, the faster it gets.
Conclusion
Making a wooden stool is a rewarding project that blends creativity and craftsmanship. Traditional woodworking ensures a durable, timeless piece, while laser cutting offers precision, efficiency, and the ability to personalize with engravings.
Using tools like the LaserPecker LX2 laser cutter simplifies intricate designs and makes customization accessible, even for beginners. By following these steps and tips, you can create a sturdy, attractive, and uniquely personalized wooden stool that lasts for years.


