


Making a wooden flag is a rewarding project that blends craftsmanship with creativity. Traditionally, wooden flags were made entirely by hand—cutting, carving, and painting each stripe and star with basic woodworking tools. While this method delivers a strong handcrafted feel, it also requires time, skill, and patience.
Today, easier and more efficient methods make it possible for beginners to create detailed wooden flags with consistent results and far less effort.
In this guide, we'll compare the traditional approach with a more modern, easy method, helping you choose the best way to make a wooden flag based on your tools, skill level, and project goals.

In this article:
- Part 1: Two Popular Ways to Make a Wooden Flag
- Method 1: Make a Wooden Flag by Hand Crafting
- Method 2: Make a Wooden Flag via Laser Engraving
- Part 2: Hand Crafting vs. Laser Engraving: Which Method is Best?
- Part 3: How to Make a Wooden Flag with Laser Engraving?
- Part 4: Useful Tips for Laser Engraved Wooden Flags
- Part 5: FAQs about Making a Wooden Flag
Part 1: Why Wooden Rings are Gaining Popularity?
Method 1: Make a Wooden Flag by Hand Crafting
Making wooden flags the old-fashioned way means doing a lot of work by hand with wood. First, you pick out planks and chop them into even pieces. Then, you glue those pieces together to make the flag's base. After the glue is dry, you need to sand the whole thing until it's flat and slick.
The stars are usually carved or routed out by hand, which takes a steady hand and careful measuring. Some people use chisels, while others use routers and templates. Once the carving is done, the whole flag gets painted by hand – usually with many layers of stain or paint to make the stripes and stars stand out.
While this way gives you a handmade feel, there are some downsides:
- It takes a lot of time and work.
- It's hard to make all the stars look the same.
- If you mess up, it's tough to fix.
- It's hard to make the exact same flag twice.
If you like working with your hands, this can be great. But you need to be patient, know your way around woodworking, and be okay with some small flaws.
Method 2: Make a Wooden Flag via Laser Engraving
Laser engraving makes creating wooden flags more accurate and faster. Instead of hand-carving the stars and stripes, a laser engraver removes wood to create the design according to a digital file.
Stripes:
The flag's stripes are made by deeply engraving horizontal lines into the wood. By adjusting how deep the laser cuts, some areas are lower than others, creating a noticeable 3D effect without cutting through.
Stars:
For the stars, the laser traces their shape and then removes the wood inside the lines. This ensures each star has the same size, spacing, and shape. You can choose to only engrave the outline of the stars or remove more wood to make them sunken.
Since the whole design is digital, laser engraving ensures:
- Stars and stripes line up perfectly.
- The engraving depth is consistent.
- Edges are clean and uniform.
- Repeating the same design is simple.
Laser engraving changes wooden flag-making from a handmade job to a controlled and repeatable method.
Comparison Table: Traditional Methods vs Laser Engraving
| Traditional Methods | Laser Engraving | |
|---|---|---|
| Time Required | Very high | Significantly reduced |
| Precision | Depends on skill | Extremely high |
| Difficulty | High | Low to medium |
| Repeatability | Poor | Excellent |
| Design Consistency | Hard to maintain | Digitally identical |
| Learning Curve | Steep | Beginner-friendly |
| Batch Production | Impractical | Highly efficient |
Part 2: Hand Crafting vs. Laser Engraving: Which Method is Best for Making Wooden Flag?
If you're making a single, one-of-a-kind wooden flag and enjoy hands-on woodworking, traditional methods can be a rewarding choice. However, for most people—especially beginners or small business owners—laser engraving is the more practical and efficient option.
Laser engraving delivers higher accuracy, cleaner results, and far fewer mistakes, allowing you to focus on creativity rather than manual labor. Compared with traditional woodworking, its advantages become even more noticeable in real-world projects:
- Cleaner and quieter workflow: Laser engraving avoids the heavy noise, dust, and complex tools of traditional woodworking. It's well suited for home workshops or small studios where space and cleanliness matter.
- Better for layered and 3D designs: Creating depth with layered stripes, raised stars, or engraved textures is far easier with laser cutting and engraving than with hand tools.
- Consistent texture and depth control: Laser settings allow precise control over engraving depth, producing uniform textures, clean burned edges, and repeatable distressed effects.
- Easy personalization: Names, dates, slogans, and logos can be engraved accurately without weakening the wood or disrupting the overall design.
- Ideal for batch production: For selling or gifting multiple flags, laser engraving ensures consistent quality, faster output, and significantly lower labor costs.
In short, while traditional woodworking emphasizes craftsmanship, laser engraving offers precision, efficiency, and repeatability, making it the better choice for most modern wooden flag projects.
Besides just cutting, you can use a laser to engrave your rings, which opens up a lot of cool design possibilities. Adding names, logos, or cool patterns can make your wooden rings look nicer and add a personal touch. When you cut and engrave with a laser, your wooden rings are going to look polished and professional.
Part 3: How to Make a Wooden Flag with Laser Engraving?
Laser engraving is easier overall, but doing it right still means prepping well and getting the job done.
Tools and Materials You'll Need
- Solid wood boards or glued panels
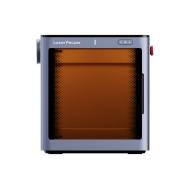
- A laser engraving machine (like the LaserPecker LX2)
- Design software that works with your laser
- Masking tape (if you want)
- Sandpaper
- Paint, stain, or finishing oil
The LX2 laser engraver works well because it's easy to use, great for beginners, and made for wood projects. It's simple to control and gives dependable results, which makes it a good choice for decorative woodworking.
Steps to Make a Wooden Flag with LX2
Step 1: Prep your wood. Sand the surface until it's smooth and flat, which makes sure the engraving is even. Get rid of any dust.
Step 2: Design your flag. Use a design program to lay out the flag. Set the stripes as filled areas to be engraved. Make the stars either outlines or filled shapes, depending on how they look best to you.
Step 3: Secure the wood on your machine. Make sure the wood is flat and won't move while the laser is working. Shifts can mess up the design.
Step 4: Test your settings. Do a small test run to check the engraving depth and how clear the design is. Change the speed and power until the stripes and stars look good without any burning.
Step 5: Engrave the design. Start the main engraving. The laser handles the stripes first, removing wood in lines. Then, it cuts the stars.
Step 6: Clean it up and add a finish. After engraving, gently clean off any leftover stuff. If needed, sand it a bit. Then, add paint or stain to make the engraved parts pop, and finish with a sealant to help it last.
Part 4: Useful Tips for Laser Engraved Wooden Flags
Even with a precise laser, following a few key tips can improve the quality and longevity of your wooden flag. These simple practices help prevent mistakes and enhance the final appearance.
Tip 1: Choose the Right Wood Type
Softer woods, like pine, are easier to engrave, but they might burn a bit. Harder woods, such as maple or birch, give you sharper edges and better contrast. Pick the wood that fits the look and how long you want it to last.
Tip 2: Use Masking Tape to Reduce Burn Marks
Putting on masking tape before engraving helps reduce burn marks. Once you're done, just peel it off to get a cleaner surface.
Tip 3: Test Laser Settings First
Each kind of wood acts differently. Testing helps you avoid burning it too much and keeps the depth even across the whole flag.
Tip 4: Watch Your Engraving Depth
If it's not deep enough, the design won't stand out. If it's too deep, the wood gets weak. A good balance makes the design look its best.
Tip 5: Painting Your Wooden Flag After Engraving
Painting is up to you. Flags without paint have a natural look, but adding color can make the contrast and overall look better. Make sure the engraved spots are totally dry before you paint.
Part 5: FAQs about Making a Wooden Flag
Q1: What Size Should a Wooden Flag Be?
Typical wood flags usually run from 19 × 36 inches to 24 × 45 inches. These sizes look like standard flags and fit nicely on walls. For smaller areas like offices or for gifts, go with a smaller size.
If it's for a garage, patio, or outdoor wall, bigger is better. If you are using a laser engraver, make sure that the size fits in the machine. Boards that are 0.5 to 0.75 inches work best to prevent bending but still have a good look. The size really boils down to where you're putting it and what matters more: easy to carry or big and bold?
Q2: Do I Need Design Software for Laser-Engraved Wooden Flags?
If you want sharp stars, stripes that are spaced just right, and even engraving, then yes, get design software. It gives you way more control over things like line width, how deep you engrave, and placement.
Software like LaserPecker Design Space or LightBurn let you upload designs, change things around, and see a preview before you start engraving. Most people can pick up the basics fast because they have drag-and-drop features. Getting those stars and stripes perfect without software would be hard.
Q3: Which Type of Wood Is Best for Laser-Engraved Flags?
For laser-engraved wood flags, go with softwoods like pine, basswood, or cedar. They engrave nicely, handle changes in depth well, and have good contrast when you're done.
Pine is cheap and easy to find, so it's great if you're just starting out.
Basswood has a smoother surface for better results.
You can try hardwoods like oak or maple, but they need careful setup and might not engrave evenly because of the wood grain. Whatever you pick, make sure it's kiln-dried to help stop bending.
Q4: How Long Does It Take to Make a Wooden Flag with a Laser Engraver?
A laser engraver cuts down on time a lot compared to doing it by hand. Getting the design ready takes about 15-30 minutes, depending on how many changes you make.
Engraving itself is about 30 to 90 minutes, depending on the size, how deep you're engraving, and how strong your laser is. If you're adding paint, that will tack on a few more hours. But generally, you can make a laser-engraved wood flag in a day. Doing it all by hand could take days.
Q5: How Do I Protect a Wooden Flag from Moisture?
Sealing is the key to protecting a wood flag from water, especially if it's outside or in a wet place. Use a clear polyurethane, a sealer for outdoor wood, or a varnish made for boats.
That creates a barrier against water and changes in temperature. Put on a few thin coats instead of one thick one-it soaks in better. If you painted the flag, seal it to keep the colors from fading or peeling. If you re-seal it every year or two, that will help it last longer.
Conclusion
Building a wooden flag is a fun, creative thing to do. You can go the old-fashioned way to give it a handmade feel, or use laser engraving for super accuracy, so everything looks the same and it's done faster.
If you get everything ready and use the right stuff, anyone can make a great-looking wooden flag that'll last. Whether it's just for you or if you want to make a bunch, laser engraving lets you have cleaner designs, do things the same way each time, and make the whole process easier.


