Hats do more than keep the sun out of your eyes. They show off who you are, what you're into, or what you're selling. Lots of people are making their own custom hats, creating designs that show off their personality or brand.
So, if you're stylish, run a small shop, or just want a cool hat, learning how to customize is super useful. I’ll walk you through some ways to customize hats – whether you're starting with nothing or fixing up something you have. I’ll even look at some tips and gadgets to help you have ideas and make things easy.

In this article:
- Part 1: Introduction to Customizing Hats
- Part 2: Customize Hats Before Purchasing (Online Design and Printing)
- Part 3: Customize Hats After Purchasing (DIY Hat Making)
- Method 1: HTV or DTF
- Method 2: Cricut
- Method 3: Hand-sewing
- Method 4: Laser Engraving
- Part 4: How to Customize Hats by Laser Engraving
- Part 5: Tips for Customizing Hats
- Part 6: FAQs about Customizing Hats
Part 1: Introduction to Customizing Hats
Customizing means taking a plain hat and using designs, colors, logos, words, or patterns to make it special. You can get that special look in a bunch of ways, from simple stitched logos to cool laser designs.
Why Customize Hats
Most folks get custom hats to stand out a bit. Sure, you can find plain hats anywhere, but they're kinda bland, right? When you create your own hat, you're taking something ordinary and turning it into a billboard for your passions, beliefs, or just what's on your mind. Here's the lowdown on what custom hats can do:

- Get those creative juices flowing
- Show off your personal or team logos
- Mark special times like birthdays, weddings, or game days
- Back small businesses by crafting one-of-a-kind merch
Beyond just looking sharp, custom hats can carry weight. A self-designed hat for a loved one becomes a keepsake. And shops can use logo hats as an easy way to stick in people's minds and leave a good impression.
Benefits of Customizing Hats
There's a lot to love about custom-made hats, whether it's a personal treat or a business move. Here are some top perks:
- Make it You: Custom hats let you splash your own style on your wear. Pick colors, images, sayings, anything that tickles your fancy.
- Stand Out: Rocking a custom hat means you're one in a million. It's a no-sweat way to grab some eyes.
- Killer Gifts: Hats you dream up are awesome gifts for friends and fam. The personal spin makes it extra special and memorable.
Part 2: Customize Hats Before Purchasing (Online Design and Printing)
Want a hat that's totally you? Designing it online is an easy way to nail that perfect look. Tons of sites let you whip up custom hats and order them without needing any skills. Usually, they have loads of hat styles, colors, and printing choices.
Method 1: Printify
Printify is an online spot that makes designing and printing custom hats a piece of cake. They've got styles, colors, and embroidery options to play with. Also, they handle making the hats and shipping them. That makes Printify a solid pick for both personal projects and small biz stuff. Their design tool is super simple, so you'll see your hat before it shows up at your door.

Method 2: Printful
Printful is another spot to go when designing custom hats online. They've got all sorts of hat styles, like snapbacks, dad hats, and beanies. Also, they do good embroidery and printing. Their website can handle big orders, which makes them okay for branded merch or team gear.
Part 3: Customize Hats After Purchasing (DIY Hat Making)
If you like making things or want to totally change your hat, doing it yourself is the way to go. Buy a plain hat and change it with some tools and tricks. Here are some popular ways to do it:
Method 1: HTV or DTF
Heat Transfer Vinyl (HTV) and Direct-to-Film (DTF) let you put designs on hats with heat. With HTV, you cut out vinyl designs and press them on with a heat press. DTF lets you print detailed, colorful designs. Both work on cotton, polyester, and mixes. HTV is great for simple logos and words, but DTF is better for complicated designs.
Method 2: Cricut
A Cricut machine is a tool for changing hats. It can cut vinyl, cloth, and paper to make designs that you can heat transfer onto hats. Cricut machines are common for people who want to make gifts or sell hats. Use a Cricut with HTV or iron-on transfers to get great results.
Method 3: Hand-sewing
Hand-sewing gives your hats a personal touch. You can sew on patches, beads, or other things to make cool designs. It takes longer and you need to be good at it, but the results are unique and detailed. It’s great for people who like making things.
Method 4: Laser Engraving
Want to make your hats one of a kind? Laser engraving could be the way to go. Forget those vinyl stickers that peel or stitched designs that fall apart. Laser engraving burns your design right in, so you get a permanent, professional finish. You can do it on leather, wood, or some of the newer fabrics out there.
Why it's great:
- Durability: Your design will last. No fading or peeling here.
- Precision: Even tiny details will show up clean and crisp.
- Premium Look: Engraved hats just look… better. Like you got them from a high-end store.
Part 4: How to Customize Hats by Laser Engraving
Follow the step-by-step guide below to learn how to customize hats by laser engraving.
1. Pick the Right Hat
Laser engraving is great for leather, faux leather, fabric, wood, or some synthetic stuff. If you're using cotton or polyester, you might need to try something else.
2. Choose Your Design
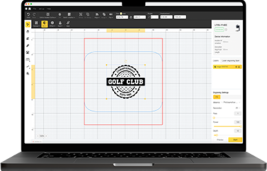
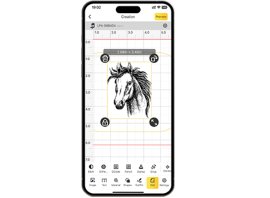
Use graphic design software (like LaserPecker Design Space, or LightBurn) to make or upload your design.
3. Set Up the Laser Engraver
Change the power, speed, and resolution. Test it on a spare piece of material first, so you don't mess up the hat.
4. Put the Hat in Place
Make sure the hat is flat and won't move around.
5. Engrave
Start the laser with your settings. Once it's done, take a look and make changes if you need to.
6. Final Steps
Clean off any extra stuff and check out your design. Now you've got a custom hat made with a laser.

Best Laser Engraving for Custom Hats
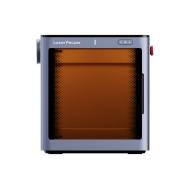
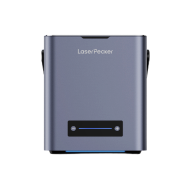
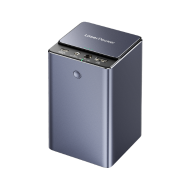
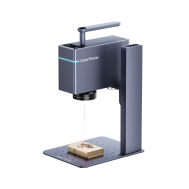
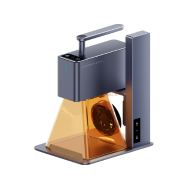
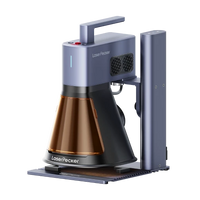
The LaserPecker LP4 is a cool, portable tool that lets you engrave stuff. It's got two lasers inside, so you can make your own custom hats and other projects.

It uses a 10W blue light laser (450nm) for materials like wood, leather, and plastic. Plus, there's a 2W infrared laser (1064nm) for metals like stainless steel and aluminum. The two lasers let you mark over 300 kinds of materials.
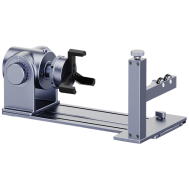
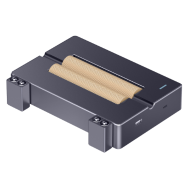
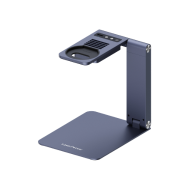
The LP4 can engrave an area of about 6.3 x 4.7 inches. If you need more space, there's a slide you can buy that makes it bigger, up to 6.3 x 11.8 inches, for larger projects. It's speedy, engraving at up to 157 inches per second, and it can handle really sharp images up to 8K. So, you get nice details without waiting forever. It can work with wood, leather, plastic, and metals, which makes it good for making custom hats.
The LP4 is for anyone, from hobbyists to pros. It's easy to carry around, has two lasers, and is a great way to make awesome personalized hats.
Part 5: Tips for Customizing Hats
Want to give your hats some extra flair? Here's how to make them stand out.
1. Choose the Right Hat
It all starts with the right hat. Baseball caps and snapbacks are great for adding designs with embroidery or vinyl. Leather hats look awesome with laser engraving. Beanies? Patches or sewing on cool stuff works great. Make sure the material of your hat works with the custom method you're using.
2. Keep It Simple (at First)
New to customizing hats? Start with designs that are easy to create! Think initials, short words, or simple shapes. They look good, and you're less likely to mess up. Once you get the hang of it, you can try complicated designs with lots of colors or different materials.
3. Use High-Quality Materials
Good supplies matter! Well-made hats keep their shape. A thread that's high-quality won't fall apart, and good vinyl lasts through washes. Cheap materials might peel or fade.
4. Placement Matters
Where you put your design matters. Centered logos look professional, but putting designs on the side can look cool. Avoid putting stuff where the hat bends a lot, like the edges of the brim. That way, your design will last.
5. Mind the Colors
Pick colors that look good with the hat. A white design on a black hat really pops. If you want something more subtle, try using similar colors. Think about who will wear the hat and when when choosing your colors.
6. Prioritize Safety
When using heat presses, glues, or lasers, always read the instructions and be careful. Use gloves when working with hot vinyl and wear safety glasses when engraving. Make sure you have good airflow in your workspace.
Part 6: FAQs about Customizing Hats
1. Can I add some flair to any hat?
For sure! How you do it relies on the hat and what it is made of. Cotton, polyester, or blends are great for embroidery or printing. Got a leather hat? Try laser engraving. Using a structured hat like a snapback? Be careful where you put designs! Match the method to the hat for great results.
2. How long will this take to customize hat?
It depends on your design and method. Easy vinyl or embroidery takes about 10–30 minutes. Harder designs, like laser engraving or sewing, may take hours. Plan your design first to save time!
3. Where should beginners start?
Laser-engraved designs last ages. They don't peel or fade like stickers. Done well on good ABS or PBT keycaps, they can last for years, even if you type a lot. To keep them safe, don't use harsh cleaners. Water or mild soap usually does the job.
4. Can I combine different methods on one hat?
Of course! Mix it up to make something cool. Think embroidery for words, vinyl for images, and laser engraving for leather. Mixing methods lets you get the most from each one and make awesome designs.
Conclusion
Customizing hats is a fun and versatile way to express personal style, promote a brand, or create thoughtful gifts. Whether you choose an online design platform before purchasing or dive into hands-on DIY methods after buying, the possibilities are endless. From simple vinyl transfers and sewing to advanced techniques like laser engraving, each method offers unique results to match your creativity and budget.
By exploring the tools, methods, and tips shared in this guide, you now have the knowledge to bring your hat designs to life with confidence. Whether you’re making a one-of-a-kind piece for yourself or producing hats for business or events, the right customization approach will help your designs stand out and make a lasting impression.


