


Custom stencils are a simple and effective way to create repeatable designs for painting, airbrushing, fabric printing, signs, crafts, and DIY projects. Whether you're decorating a wall, making custom T-shirts, or creating products for your business, learning how to make a stencil gives you complete control over your designs.
If you've ever wondered how to make stencils at home, the process is easier than you might think. With the right materials and tools, you can create durable stencils for everything from simple lettering to detailed artwork.
In this guide, you'll learn how to make stencils from start to finish, including the best stencil materials, cutting tools, and production methods. We'll also compare manual cutting, digital cutting machines, and laser cutters to help you choose the best option for your needs.

In this article:
- Part 1: Choose the Right Material for Your Custom Stencil
- Part 2: 3 Best Ways to Make a Custom Stencil
- Method 1:Using Manual Tools
- Method 2:Using Dedicated Cutting Machines
- Method 3: Using Laser Cutters
- Part 3: Why Choose a Laser Cutter for Making Custom Stencils
- Part 4: How to Make Custom Stencils with LX2
- Part 5: FAQs about Making Custom Stencils
Part 1: Choose the Right Material for Your Custom Stencil
The first step in learning how to make a stencil is choosing the right material. The material affects how durable the stencil is, how easy it is to cut, and how clean your painted design will look.
Material 1: Cardstock or Paperboard
Cardstock is one of the easiest and most affordable stencil materials for beginners. It's simple to cut with a craft knife or laser and works well for one-time projects, signs, and practice designs.
However, paper-based stencils are not waterproof and can wear out quickly after repeated use or exposure to paint.
Material 2: Acrylic Sheets
Acrylic is a durable stencil material that produces sharp, clean edges. Because it is rigid and easy to clean, it's a popular choice for airbrushing, wall art, signage, and reusable stencils.
Acrylic works especially well when cut with a laser cutter, making it ideal for detailed designs that need long-term durability.
Material 3: Wood or MDF
Wood and MDF are excellent options for larger stencil projects, rustic signs, branding templates, and decorative applications. These materials are sturdy and long-lasting but usually require a laser cutter or power tools to cut accurately.
They're best suited for makers who need a rigid stencil that can be reused many times.
Material 4: Metal Sheets
Metal stencils like laser cut aluminum stencils offer the highest level of durability and are commonly used in industrial, commercial, and high-volume applications. They resist wear and can withstand repeated use without losing accuracy.
Because metal requires specialized cutting equipment, it is typically used by professionals rather than beginners.
Material 5: Mylar
Mylar is widely considered the best all-around stencil material. It's flexible, durable, water-resistant, and easy to clean, making it suitable for both beginners and experienced makers.
If you're researching how to make a stencil for painting, Mylar is often the recommended choice because it produces clean paint lines and can be reused many times. It works well for wall art, spray painting, fabric printing, logos, and craft projects.
Part 2: 3 Best Ways to Make a Custom Stencil
There are several ways to create custom stencils, ranging from simple hand-cut methods to advanced laser cutting. The best option depends on your budget, the level of detail you need, and how often you plan to use your stencils.
If you're searching for how to make stencils at home, these three methods cover everything from beginner-friendly DIY projects to professional stencil production.
Method 1: Using Manual Tools
Manual cutting is the most affordable way to make a stencil. All you need is a printed design, a craft knife, a cutting mat, and your chosen stencil material.
Common manual stencil-making tools include:
- Craft knife or hobby knife
- Self-healing cutting mat
- Ruler or straight edge
- Painter's tape
- Temporary spray adhesive

Method 2: Using Dedicated Cutting Machines
Electronic cutting machines automate much of the stencil-making process. They can cut designs directly from digital files, making them a popular option for hobbyists, crafters, and small businesses.
Tool 1: Cricut
Cricut machines are beginner-friendly and work well with materials such as cardstock, vinyl, and thin Mylar. The software is easy to learn, making Cricut a popular choice for occasional stencil projects and home crafting.
However, Cricut machines are generally best suited for thinner materials and may struggle with highly detailed or thicker stencil designs.
Tool 2: Silhouette
Silhouette machines offer more advanced design controls and cutting adjustments than many entry-level cutters. They're particularly useful for complex graphics, detailed lettering, and customized stencil layouts.
Like Cricut machines, Silhouette cutters are best suited for thinner materials and may require multiple cutting passes when working with thicker stencil sheets.
Method 3: Using Laser Cutters
Laser cutters are widely considered the most precise and versatile solution for making custom stencils. They use a focused laser beam to cut designs with exceptional accuracy and clean edges.
If you're wondering how can I make my own stencilswith professional-quality results , laser cutting is often the best option. It works with a wide range of materials, including Mylar, acrylic, wood, cardstock, leather, and certain metals.
Unlike manual tools or blade-based cutters, laser cutters can easily produce intricate patterns, small text, and highly detailed artwork while maintaining consistent quality across multiple copies.

Part 3: Why Choose a Laser Cutter for Making Custom Stencils
Whether you're creating stencils for painting, airbrushing, fabric printing, signage, or business use, laser cutting provides several advantages over traditional methods.
1. Ultra-Precise Cuts for Detailed Designs
Laser cutters can create extremely fine details, including small text, intricate artwork, sharp corners, and delicate bridge connections. This level of precision is difficult to achieve with craft knives or blade-based cutting machines.
2. Compatible with a Wide Range of Materials
One of the biggest advantages of laser cutting is material versatility. Depending on the machine, you can create stencils from:
- Mylar
- Cardstock
- PET sheets
- Acrylic
- Wood and MDF
- Leather
- Certain thin metals
This flexibility allows you to choose the best material for your project without being limited by blade thickness or cutting force.
3. Faster Production and Less Manual Work
Hand-cutting complex designs can take hours. With a laser cutter, you simply upload your design, choose the correct material settings, and start the job.
This makes laser cutting ideal for anyone learning how to make stencils at home while also wanting the ability to scale up production later.
4. Consistent Results for Multiple Stencils
If you need multiple copies of the same design, consistency becomes important. Laser cutters reproduce designs with identical accuracy every time, making them ideal for:
- T-shirt printing
- Wall art projects
- Business branding
- Sign making
- Product packaging
- Commercial stencil production
Every stencil matches the original design without the variation that often occurs with manual cutting.
5. Clean Edges with Minimal Finishing
Because laser cutting is a non-contact process, materials remain stable during cutting. There is no blade drag, tearing, bending, or distortion.
The result is smoother edges, sharper paint lines, and less cleanup after cutting.
6. Beginner-Friendly Yet Powerful
Modern laser cutters are much easier to use than many people expect. Many systems include built-in material presets, automatic positioning features, and intuitive design software.
This means beginners can quickly learn how can I make my own stencils, while experienced makers can take advantage of advanced settings for highly detailed projects.
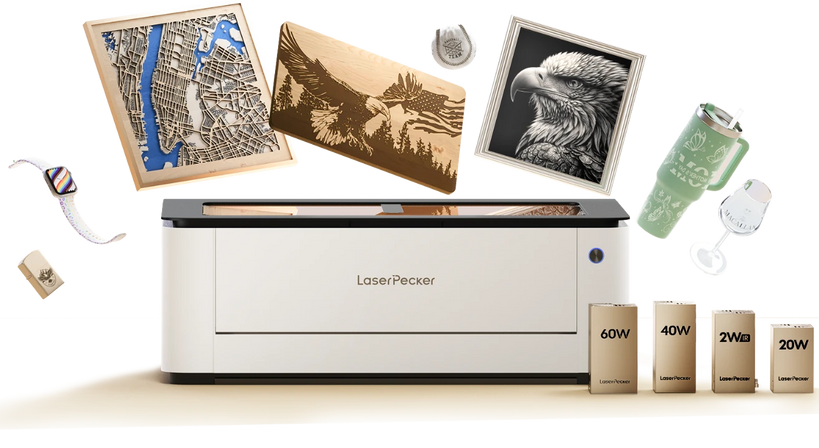
Recommended Laser Cutter for Custom Stencils: LaserPecker LX2
The LaserPecker LX2 is a desktop laser cutter designed for creating custom stencils, reusable templates, signs, craft patterns, packaging designs, and DIY décor projects.
-
Precise Cutting for Detailed Stencil Designs
The LX2 can accurately cut letters, logos, icons, borders, and intricate patterns, making it ideal for reusable stencils and custom DIY templates. -
Large 500 × 305 mm Working Area
The spacious workspace allows users to create larger stencils or cut multiple small stencil designs in one session for better production efficiency. -
12MP Camera with Point-to-Shape™ Positioning
The built-in camera and Point-to-Shape™ positioning system help users align stencil materials accurately and preview design placement before cutting. -
20W / 40W / 60W Laser Module Options
The LX2 supports different laser power options, allowing users to cut various stencil materials such as cardstock, Mylar, acrylic, thin wood, and craft sheets.
Part 4: How to Make Custom Stencils with LX2
If you're looking for how to make stencils quickly and accurately, a laser cutter can simplify the entire process. With the right design file and material, you can create reusable stencils with clean edges and professional-quality results in just a few steps.
Here's how to make a custom stencil using the LX2 laser cutter.
Step 1: Create or Import Your Design
Start by creating your stencil artwork in design software such as Adobe Illustrator, CorelDRAW, Inkscape, or LaserPecker Design Space. Save the file in a vector format like SVG, DXF, AI, or EPS to ensure smooth, accurate cut lines.
Import the design into the LX2 software and adjust the size, position, and layout as needed. If your design includes letters such as O, A, B, or R, remember to add bridges so the inner sections remain connected after cutting.
Step 2: Place and Secure Your Material
Select the stencil material that best suits your project. Mylar is often the preferred choice for reusable stencils, while cardstock works well for one-time applications.
Place the material flat on the work surface and secure it using magnets, tape, or other holding methods. Keeping the material stable helps ensure accurate cuts and consistent results.
Step 3: Configure the Cutting Settings
Choose the appropriate settings based on the material thickness and type. Most laser cutting software includes recommended presets that provide a good starting point.
Before cutting the final design, perform a small test cut to confirm the settings produce clean edges without excessive burning or incomplete cuts.
Step 4: Start the Cutting Process
Once everything is aligned correctly, start the cutting job. The laser will follow the vector paths and cut the stencil openings with high precision.
Compared with manual cutting, laser cutting can dramatically reduce production time while producing cleaner and more consistent results.
Step 5: Remove the Cut Sections
After the job is complete, carefully remove the stencil from the work surface. Pop out the cut sections and inspect the design for any remaining material that may need light cleanup.
Well-calibrated laser settings typically produce smooth edges that require little to no additional finishing.
Step 6: Test Your Stencil
Before using the stencil on your final project, test it on a scrap surface. Apply a light coat of paint and check for clean edges, proper spacing, and good overall design clarity.
By following these steps, you can create clean, reusable stencils for crafts, wall art, signage, fabric printing, airbrushing, and countless other creative projects.
Part 5: FAQs About Making Custom Stencils
Q1. What Is the Best Material for a Reusable Stencil?
Mylar is the most popular material for reusable stencils because it's flexible, durable, water-resistant, and easy to clean. For most painting and craft projects, Mylar between 5 mil and 10 mil thick offers the best balance of flexibility and durability.
If you need a more rigid stencil for frequent use, acrylic or thin metal sheets can provide additional strength and longevity.
Q2. Can I Make a Stencil Without a Machine?
Yes. If you're wondering how can I make my own stencils without specialized equipment, a craft knife and printed design are all you need.
Simply transfer the design onto cardstock, Mylar, or another stencil material and carefully cut out the sections by hand. This method works well for simple projects but can become time-consuming when working with intricate designs.
Q3. How Do You Prevent Paint Bleeding Under a Stencil?
Paint bleeding usually happens when the stencil isn't firmly attached to the surface or when too much paint is applied at once.
For cleaner results:
- Use temporary spray adhesive to secure the stencil.
- Apply several light coats instead of one heavy coat.
- Remove excess paint from brushes, rollers, or sponges before use.
- Keep spray paint at a consistent distance from the surface.
These techniques help create sharper lines and more professional-looking results.
Q4. What Is the Easiest Way to Make Stencils at Home?
For beginners learning how to make stencils at home, cardstock and a craft knife are often the easiest starting point. The materials are inexpensive, readily available, and require minimal setup.
As your projects become more detailed or frequent, a cutting machine or laser cutter can significantly improve speed and accuracy.
Conclusion
Learning how to make a stencil is easier than ever thanks to the wide range of materials and tools available today. Whether you're creating stencils for painting, fabric printing, signage, home décor, or DIY crafts, the right combination of material and cutting method can make a big difference in the final result.
By choosing the right material, following proper cutting techniques, and testing your design before use, you can create custom stencils that produce clean lines and consistent results every time. With a little practice, you'll be able to make stencils for virtually any creative project.