


Wooden signs are one of the most popular DIY projects for homeowners, crafters, woodworkers, and small business owners. From rustic welcome signs and personalized gifts to business signage and home décor, wooden signs offer a timeless look that works in almost any setting.
Thanks to modern tools and techniques, learning how to make wooden signs is easier than ever. Whether you prefer traditional hand-crafted methods or advanced laser cutting technology, there are options available for every skill level and budget.
In this guide, you'll learn how to make a sign with wood, discover the best wood types for different projects, compare four popular sign-making methods.

In this article:
- Part 1: 5 Best Types of Wood for Wooden Signs
- Part 2: 4 Popular Ways to Make Wooden Signs
- Method 1: Hand-Painted Wooden Signs
- Method 2: Stencil and Paint Wooden Signs
- Method 3: CNC or Router Carved Wooden Signs
- Method 4: Laser Cut and Laser Engraved Wooden Signs
- Part 3: Why Laser Engraving & Cutting Is the Best Way to Make Wooden Signs
- Part 4: FAQs about Making Wooden Signs
Part 1: 5 Best Types of Wood for Wooden Signs
Choosing the right wood is one of the most important steps when starting making wooden signs. Different wood species vary in appearance, durability, engraving quality, and weather resistance, so selecting the right material can significantly improve your final results.
Below are some of the best wood options for DIY sign making, laser engraving, and laser cutting projects.
1. Plywood (Birch or Basswood Plywood)
Plywood is one of the most popular materials for making wooden signs because it is affordable, stable, and easy to work with. Laser-grade birch and basswood plywood produce clean cuts and detailed engravings, making them ideal for decorative signs, wall art, and personalized gifts.
Best for: Indoor signs, painted projects, layered signs, and laser-cut designs.
2. Basswood
Basswood is a soft hardwood with a smooth surface that engraves exceptionally well. Its fine grain allows for crisp details and consistent results, making it a favorite among crafters and laser engraving enthusiasts.
Best for: Detailed engravings, decorative signs, ornaments, and craft projects.
3. Pine
Pine is widely available, budget-friendly, and known for its rustic appearance. Its natural knots and grain patterns can add character to farmhouse-style signs, although engraving results may vary due to grain inconsistencies.
Best for: Rustic signs, farmhouse décor, and budget-conscious projects.
4. Cedar
Cedar naturally resists moisture, insects, and outdoor weather conditions. It also creates strong engraving contrast, making it an excellent option for exterior signage.
Best for: Outdoor signs, garden signs, business signage, and long-term installations.
5. Maple
Maple is a dense hardwood that offers a smooth surface and excellent engraving quality. It produces sharp details and a premium finish, making it a popular choice for professional and high-end wooden signs.
Best for: Premium indoor signs, business branding, and detailed engraved artwork.
Part 2: 4 Popular Ways to Make Wooden Signs
There are several ways to make wooden signs, ranging from traditional hand-crafted techniques to modern digital fabrication methods. The right approach depends on your budget, skill level, desired appearance, and production goals.
Let's start with one of the oldest and most creative sign-making methods.
Method 1: Hand-Painted Wooden Signs
Hand-painted wooden signs are a classic DIY option that allows for complete creative freedom. Using paint brushes, markers, or paint pens, you can create one-of-a-kind designs that showcase your personal style and craftsmanship.
If you're just getting started with making wooden signs, hand painting is an affordable and rewarding way to learn the basics. However, as designs become more detailed or production volume increases, many creators transition to stencil, CNC, or laser-based methods for greater precision and consistency.
Method 2: Stencil and Paint Wooden Signs
Stencil painting is one of the easiest ways to create professional-looking wooden signs without advanced artistic skills. By using pre-made or custom stencils, you can achieve clean lettering, consistent designs, and repeatable results with minimal effort.
Method 3: CNC or Router-Carved Wooden Signs
CNC routers and wood carving machines create signs by cutting or carving directly into the wood surface. Unlike painted signs, this method adds depth and dimension, producing a premium, professional appearance that works well for both indoor and outdoor applications.
Because the design is controlled by software, CNC carving delivers consistent results and can reproduce intricate lettering, logos, and decorative patterns with high accuracy.
Method 4: Laser Cut and Laser Engraved Wooden Signs
Laser cutting and laser engraving are widely considered the most efficient and versatile methods for making wooden signs. While both processes use a laser machine, they serve different purposes and are often combined to create professional-quality signs with exceptional detail and precision.
Laser engraving removes a thin layer from the wood surface to create text, graphics, patterns, logos, and detailed artwork. It is ideal for producing crisp lettering, intricate designs, and photo-quality engravings.
Laser cutting goes a step further by cutting completely through the wood. This allows you to create custom shapes, decorative borders, dimensional lettering, layered designs, and complex sign components that would be difficult to produce using traditional tools.
| Method | Typical Result | Best For | Speed & Repeatability |
|---|---|---|---|
| Hand-Painted | Unique, textured, artisanal finishes with visible brushwork. | One-off decorative signs or artistic pieces. | Slower; low repeatability because each piece is hand-made. |
| Stencil & Paint | Crisp, repeatable lettering with clean edges when applied carefully. | Batch production where consistent typography is needed. | Medium speed; good repeatability with durable stencils. |
| CNC / Router | Raised or carved lettering with sculptural depth and mechanical precision. | Signs needing relief carving or heavy-duty installation. | Medium speed; good repeatability but longer setup time. |
| Laser Cut / Engrave | Ultra-fine detail, precise cuts, photo-quality engraving, and clean edges. | Detailed logos, small text, photorealistic images, and high-volume runs. | Fast for repeats; very high repeatability once settings are perfected. |
Part 3: Why Laser Engraving & Cutting Is the Best Way to Make Wooden Signs
There are many ways to make wooden signs, including hand painting, stenciling, and CNC carving. While each method has its advantages, laser engraving and laser cutting offer the best combination of precision, speed, consistency, and creative flexibility.
Whether you're creating custom home décor, business signage, personalized gifts, or products for sale, laser technology makes it easier to produce professional-quality results with less time and effort.
Reason 1. Exceptional Precision and Detail
Laser engraving can reproduce fine text, intricate logos, decorative patterns, and highly detailed artwork with remarkable accuracy. This level of precision is difficult to achieve consistently with traditional painting or carving methods.
Reason 2. Clean Cuts and Professional Finishes
Laser cutting produces smooth, accurate edges that often require little to no additional finishing. It allows makers to create custom shapes, layered signs, decorative borders, and intricate cutout designs that would be difficult to achieve with conventional tools.
Reason 3. Faster Production and Greater Efficiency
Unlike hand-painted signs, which require significant manual work, laser systems can complete complex designs quickly and consistently. Once the design file is prepared, the same project can be reproduced repeatedly with minimal setup.
Reason 4. Consistent Results Every Time
One of the biggest advantages of laser technology is repeatability. Once the correct settings are established, you can recreate the same sign design multiple times with virtually identical results. This level of consistency is difficult to achieve with hand-crafted methods.
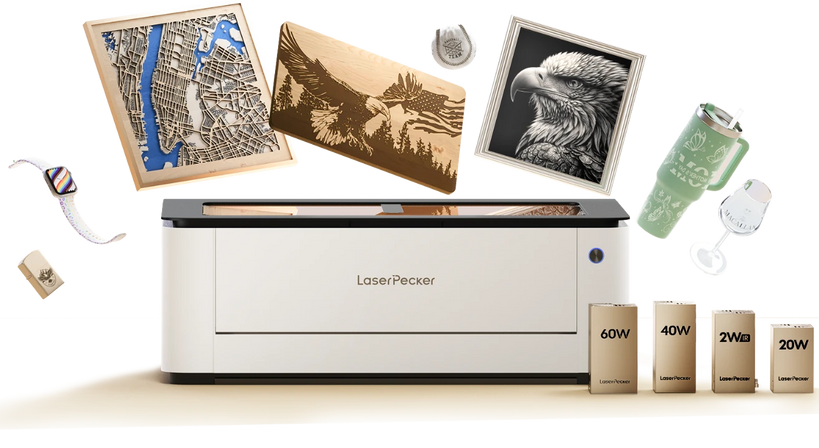
Recommended Laser Cutter for Making Wooden Signs: LaserPecker LX2
The LaserPecker LX2 is a powerful desktop laser cutter designed for creating wooden signs, home décor, business signage, personalized gifts, and woodworking projects.
-
Up to 60W High-Power Diode Laser
The LX2 supports 20W, 40W, and 60W laser modules, providing strong cutting performance for plywood, hardwood veneers, MDF, and other materials commonly used for wooden signs. -
Large 500 × 305 mm Working Area
The spacious workspace allows users to create larger signs or process multiple sign components in a single session for improved productivity. -
12MP Camera with Point-to-Shape™ Positioning
The built-in camera system helps accurately align materials and preview designs before cutting or engraving, reducing waste and improving workflow efficiency. -
Precise Cutting and Engraving for Sign Making
The LX2 can create detailed lettering, logos, decorative borders, and intricate artwork with clean cuts and sharp engraving results.
Part 4: FAQs About Making Wooden Signs
Q1. How Do You Transfer a Design onto Wood?
There are several ways to transfer designs onto wood, including stencils, carbon paper, vinyl decals, and laser engraving. Among these methods, laser engraving offers the highest level of precision because the design is transferred directly from a digital file, producing clean text, detailed graphics, and consistent results.
Q2. Can Beginners Make Wooden Signs at Home?
Yes. Many sign-making methods are beginner-friendly, including hand painting, stencil painting, and laser engraving. Modern laser cutters and engravers simplify the process by automating much of the cutting and engraving work, making it easier for beginners to create professional-looking signs.
Q3. Is Laser Cutting Safe for Making Wooden Signs?
Yes, laser cutting is safe when used according to the manufacturer's guidelines and with proper ventilation. Modern enclosed laser systems include multiple safety features and make it possible to cut and engrave wood efficiently while maintaining a safe working environment.
Q4. Is Laser Engraving and Cutting the Best Way to Make Wooden Signs?
For most hobbyists, creators, and small businesses, laser engraving and cutting offer the best balance of precision, speed, repeatability, and design flexibility. They allow you to create detailed artwork, clean lettering, custom shapes, and layered signs with significantly less manual effort than traditional methods.
Conclusion
Whether you're making a one-of-a-kind gift or building a sign-making business, laser technology makes it easier to produce high-quality projects that look polished and repeatable. With the right materials, proper settings, and a reliable laser cutter, you can transform simple wood into custom signs that are built to impress.
Now that you know how to make a sign with wood, it's time to put your ideas into action and start creating unique wooden signs for your home, customers, or next creative project.