Clear or transparent acrylic has become a staple material in everyday life thanks to its versatility and wide range of creative uses.
Most people know that colored acrylic is easy to engrave and cut—but what about clear acrylic? Can you laser engrave clear acrylic? And if so, what steps should you take to get the best results?
In this article, we'll answer those questions and guide you through how to successfully engrave clear acrylic with a diode laser. We'll also share some inspiring project ideas to help spark your next creative build!

In this article:
- Part 1: Can you laser engrave clear acrylic?
- Part 2: How to engrave clear acrylic with diode laser
- 🧪 Case Study: Laser engrave clear acrylic LED light with Spotify code
- 💡 More Inspiration: Two creative projects for clear acrylic laser engraving
Part 1: Can you laser engrave clear acrylic?

Not all lasers can effectively engrave clear acrylic. For example, 450 nm diode lasers and 1064 nm fiber lasers typically cannot engrave clear acrylic directly.
This is because clear acrylic is transparent to these wavelengths—the laser light simply passes through without being absorbed. For laser engraving to work, the material needs to absorb the laser's energy, generating heat to create a visible mark. Since clear acrylic doesn't absorb these wavelengths well, there's little to no visible effect. ( CO₂ laser with a wavelength of 10,600 nm is highly effective for engraving and cutting clear acrylic)
So, can the clear acrylic be laser engraved with 450nm diode lasers?
In some cases, yes. While clear acrylic doesn't absorb blue diode laser light easily, there are specific techniques that make engraving possible. Below, we'll walk you through the most effective methods to help you successfully engrave clear acrylic with a diode laser.

Part 2: How to laser engrave clear acrylic with diode laser?
Laser engraving clear acrylic can be challenging due to its transparency, which can cause the laser beam to pass through rather than effectively marking the surface.
To achieve crisp, high-quality engravings, you need to create contrast and absorb the laser's energy efficiently. Below are 4 effective methods to ensure the best results when engraving clear acrylic:
Option 1: Use black cardstock

Placing a sheet of cardstock beneath the acrylic helps improve the engraving process. Actually, any colored cardstock is okay, but the dark background absorbs excess laser energy and minimizes unwanted reflections. This technique is especially useful when working with diode lasers, which may struggle to engrave transparent materials directly.
To do that, you need to cut a piece of black cardstock slightly larger than your acrylic sheet. Then place it underneath the acrylic on the laser bed. Rember to secure both materials to prevent movement during engraving.
Option 2: Use marker pen

Coating the engraving surface with a black marker helps the laser beam focus and absorb effectively. This Option is quick and works well for fine details.
To do that, you need to use a black marker to color over the area to be engraved.(repeate it many times to ensure the acrylic is opaque) Then, let the ink dry completely before engraving.
After engraving, clean off the residual marker ink with running tap and a damp cloth.
Option 3: Use tempera paint

Applying a thin layer of tempera paint on the acrylic surface helps the laser beam interact more efficiently, resulting in sharper engravings. This Option is excellent for large or intricate designs.
To do that, you can use a brush or spray bottle to evenly apply a thin coat of black tempera paint. Then wait the paint to dry completely before starting the engraving process.After engraving, wipe off the paint residue using a damp cloth and be careful not to wipe hardly as the acrylic can easily get scratch.
Option 4: Use marking tape

A thin layer of marking tape (such as painter's tape) can enhance laser absorption and reduce the chance of reflections that may cause inconsistent engraving results.
To do that, you can Cover the engraving area with marking tape, ensuring full surface coverage. Thne, smooth out any air bubbles to ensure even engraving. When the engraving is done, wait the engraved acrylic become coll and then peel off the tape and clean any adhesive residue.
*Extra Tip: Choose a suitable machine
To get good performance with clear acrylic, you'll require a suitable clear acrylic engraving tool, which can streamline the engraving process and ensure precise and durable results.
With numerous laser engraving machines available, some people may wonder What laser is best for engraving clear acrylic or What is the best laser engraver for clear acrylic?
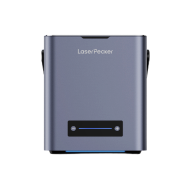
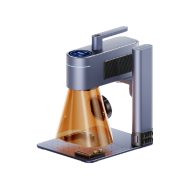
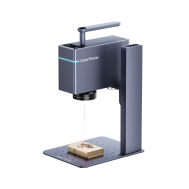
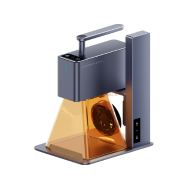
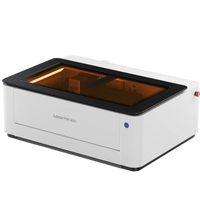
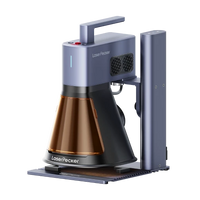
Actually, it depends on your engraving needs. For home or small-scale clear acrylic laser engraving project, diode laser engravers like LP4 or LP2 Plus are the best choice. Because these clear acrylic laser engraving machines are easy to use and budget-friendly compared with other clear acrylic engraving machines.

🧪 Case Study - Laser engrave clear acrylic LED light with Spotify code
In this case study, we create a clear acrylic LED plaque engraved with a Spotify code. Place it on an LED base, and scanning the code instantly plays the song—an easy, meaningful gift idea.
Items Required to Engrave Clear Acrylic:
- Engraving Material: Clear acrylic sheet
- Engraving Machine: Diode Laser Engraver
- Engraving Design: Text, Images, Patterns, etc
- Assist Tool: Cardstock, marker pen, tempera paint or marking tape
Step 1: Choose your material - Clear Acrylic Sheet
Choose a clear acrylic sheet that not be so thin, otherwise, it would bend when it absorb the heat from laser.

Step 2: Choose the clear acrylic engraving machine
Ensure that your laser engraving machine is compatible with clear acrylic sheet engraving. Evaluate various usage scenarios and select the most appropriate machine accordingly.
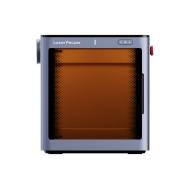
Here, we choose LaserPecker 5 (LP5), which is a dual-laser and multi-functional laser engraver.
Don't have LaserPecker 5? No problem at all! You can use LP4, LP2 Plus, or any other laser engraver that works well with acrylic engraving and continue with the following steps.
Step 3: Pepare your engraving design
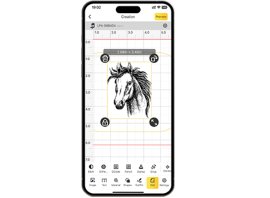
Use LaserPecker graphic design app/software to create and then save it in the svg, png or other format. Consider size, shape, and other details.

Source: Design for Clear Acrylic Laser Engraving
Step 4: Set up the laser engraving machine
Firstly, Connect the laser engraver to your computer or mobile devices and then open the LasePecker's design app/software or LightBurn to load your design.
Secondly, Place the items within the designated working area and turn on Preview Mode, making sure the laser is properly focused. When the two red dots overlap, it is well-focused!
Thirdly, check if the design fits properly on the acrylic sheet. If it doesn't, adjust its size and position to match the dimensions of your material.

Finally, access the software's laser settings to adjust parameters like power, speed, and resolution. You might be wondering, "How much laser power is needed to engrave acrylic sheet?" Rest assured, I've got you covered!
Here are some recommended parameters to laser engrave clear acrylic sheet:
LP5 (20 W 450 nm laser): Resolution: 2k; Power: 28%; Depth: 26%; Pass: 1
LP4 (10 W 450 nm laaser): Resolution: 2k; Power: 100%; Depth: 15%; Pass: 1
To find the recommended LaserPecker engraving and cutting parameters, refer to the settings table. It applies to all LaserPecker models, including LP1, LP2, LP3, LP4, LP5, and LX2.
Step 5: Engrave Your Clear Acrylic Now
Double-check everything to avoid mistakes. Then, hit the start button and watch the magic happen. The laser brings your design to life. Keep an eye on it, and you're all set!
When operating a laser engraving machine, it's advisable to wear goggles or use a laser protection cover to protect your eyes and body from potential harm, as the blue laser can pose risks.
Additionally, please be mindful that smoke or toxic gases may be emitted during the laser engraving process. Wearing a mask or employing an air purifier is essential for safety.
Once the engraving is complete, rinse the acrylic under running water or gently agitate it. Avoid rubbing the surface, as it can scratch easily
💡 More Inspiration - Two creative projects for clear acrylic laser engraving
If you're looking for unique and eye-catching ways to use clear acrylic in laser engraving, here are three creative projects to inspire you:
Project 1 : Clear Acrylic with Laser Engraved Photo

Source: LP5 Official Facebook Group
Transform your favorite photos into stunning, engraved keepsakes on clear acrylic. By using a backing technique—such as black cardstock or a temporary coating—you can create high-contrast, detailed engravings that stand out beautifully. These engraved photos make elegant gifts, home décor pieces, or even memorial plaques.
Project 2 : Laser Engraved Clear Acrylic Sign

Acrylic signs add a sleek, modern touch to any space. Whether it's for a business logo, a welcome sign, or a decorative quote, laser engraving on clear acrylic ensures a professional, long-lasting design. You can enhance the visibility by placing the sign against a dark background or using paint-filling techniques for added contrast.
Conclusion
Laser engraving clear acrylic with a diode laser is absolutely possible once you understand how the material behaves and how to prepare it properly. With techniques like applying surface coatings, you can achieve crisp, clean, and professional results even on fully transparent sheets. These methods remove the limitations many beginners assume exist when working with clear acrylic.
Now that you've learned the complete process, you're fully equipped to start experimenting and crafting your own clear acrylic projects.


